


Want an easy way to draw the human head and face? Then include Clip Studio Paint's 3D model in your art workflow!
Although they aren't a perfect drawing formula, using 3D models are beneficial for your drawing process.
I mean, it's the fastest way to help you grasp the 3D form of any character's head. A well-drawn head and face can be all it takes to capture the viewer's impression in your art, especially when you draw a portrait or manga.
Why? Because the head and face are important parts of conveying a character's emotion and message!
If you want people to stop by your art while they're scrolling through their feed, your art should be at least eye-catching, and one of the techniques that helps is making your character anatomically correct.
Let's see my use of head 3D models in Clip Studio Paint below. This helped me a ton in correcting the head anatomy, even though it's not the character type I always draw (the male character).
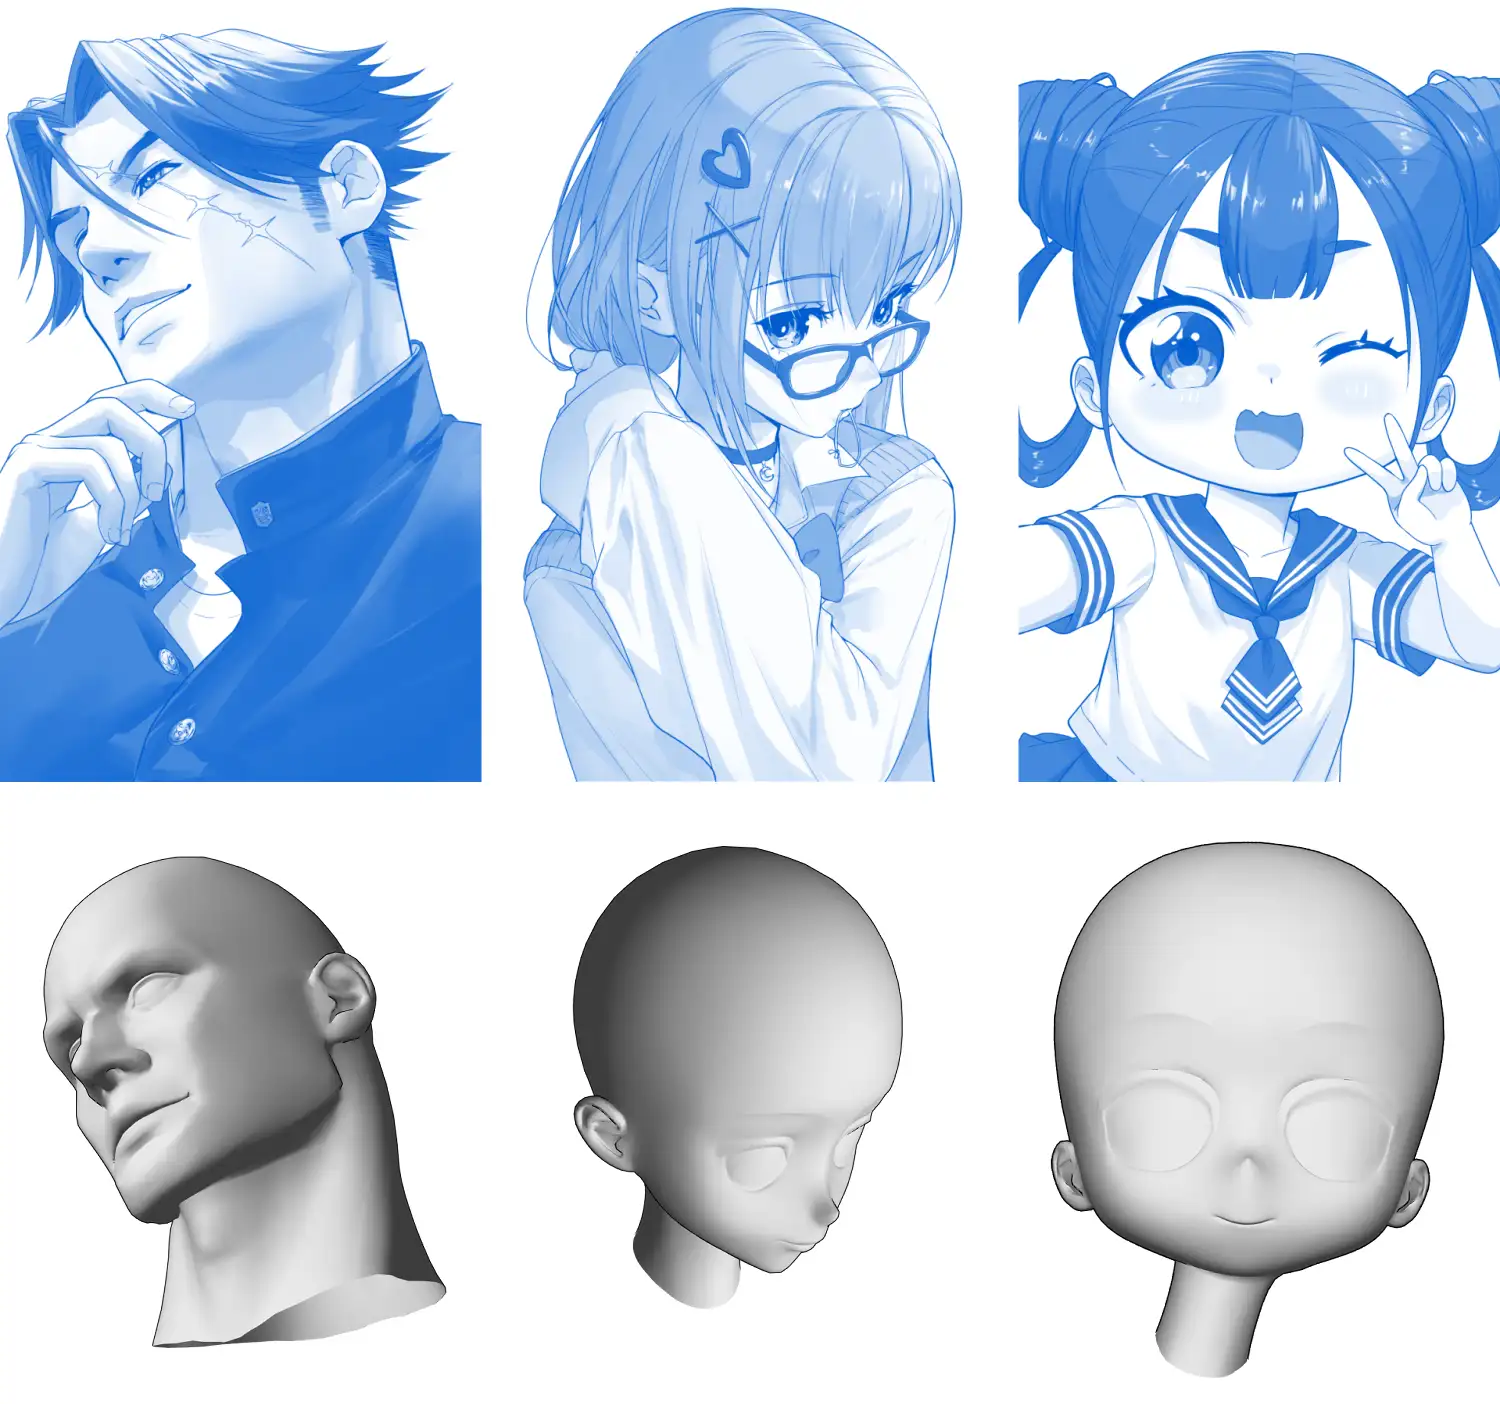
Don't get me wrong, I didn't mean the knowledge of human anatomy had to be neglected. However, once we've learned all the basics and started your art career, we need to stay productive in production, and 3D head models in Clip Studio Paint are one of the best tools to help us with anatomy drawing.
Ready? Great! Let's start with an overview of the 3D head models in Clip Studio Paint!

Clip Studio Paint and its 3D Model Capabilities
Clip Studio Paint is my main drawing software, which I've used for more than 6 years. I have to say that Clip Studio Paint helped me a lot in my art production process. They have so many tools to assist artists like custom brushes, perspective ruler tools, assets store, 3D models, and so on.
Recently, in the Clip Studio Paint 2.0 version update, the 3D head model was added to the software to help users with character illustration.
In the next section, I'll share my steps to use them in my drawing process.
#1 Access the 3D Head Model in Clip Studio Paint
The first thing to do is gain access to the 3D head models.
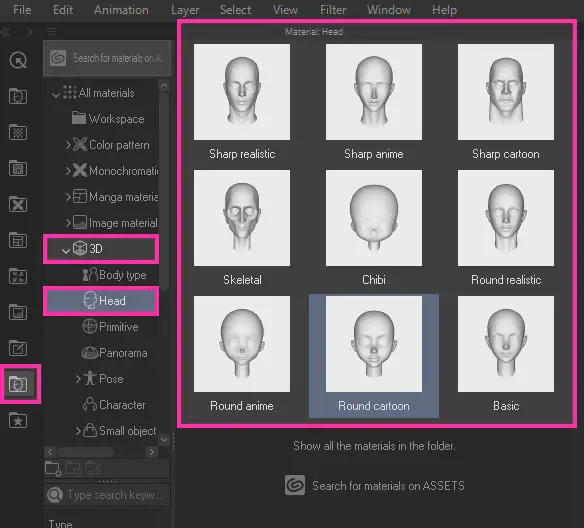
It's really easy! First, you need to upgrade your Clip Studio Paint to the 2.0 version. Then navigate to the Material palette and click on 3D > Head and that's all!
The 3D head model is like other 3D assets in Clip Studio Paint. If you're new to 3D model function in Clip Studio Paint, you may read the basics of using a 3D model here.
To utilize each head, we need to click and drag each head to our canvas and you're good to go!

#2 Select the Right 3D Head for Your Character Design
There are nine head styles for you to choose from! Let's take a look at each 3D head model in Clip Studio Paint. The second thing for me is choosing the right head model for my character design. Below is my advice for matching each head to each character design!
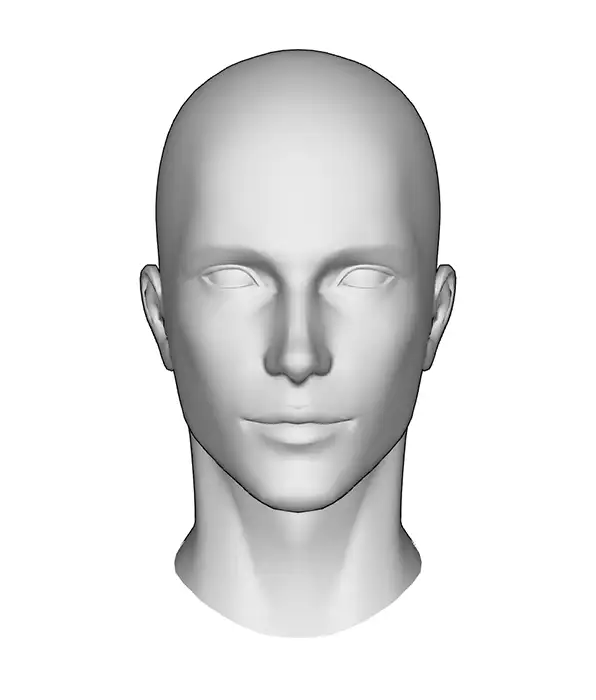
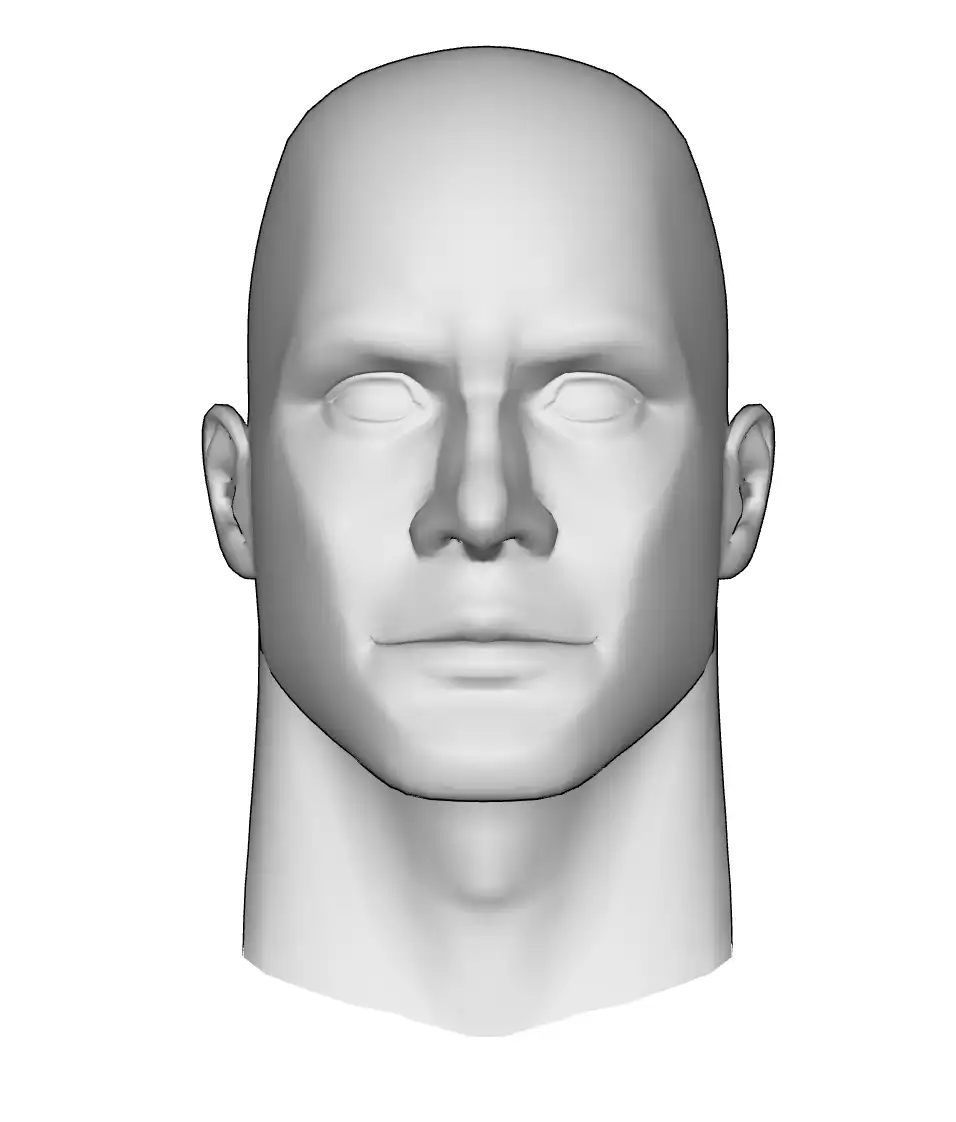
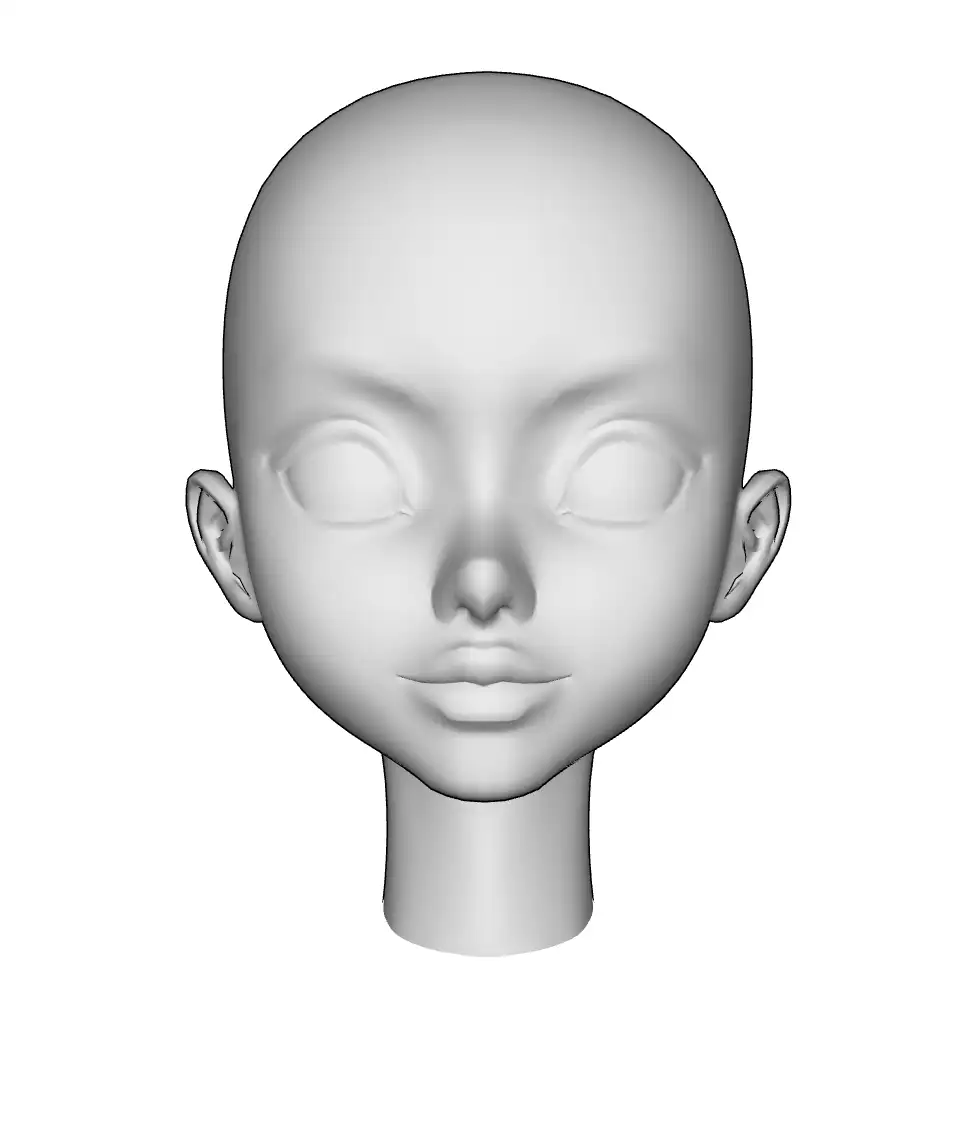
1. Sharp Realistic Head
The Sharp Realistic Head model in Clip Studio Paint is ideal for drawing realistic style male characters.
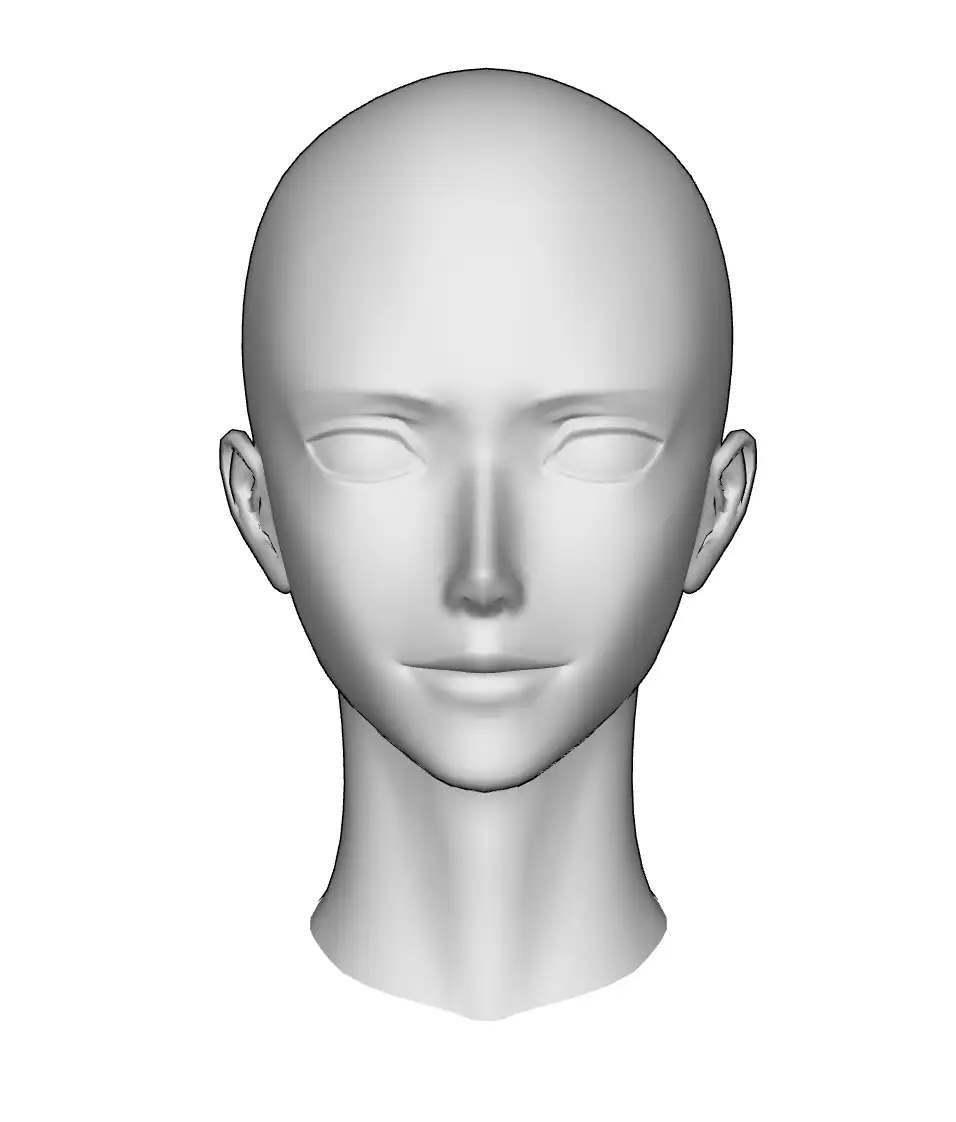
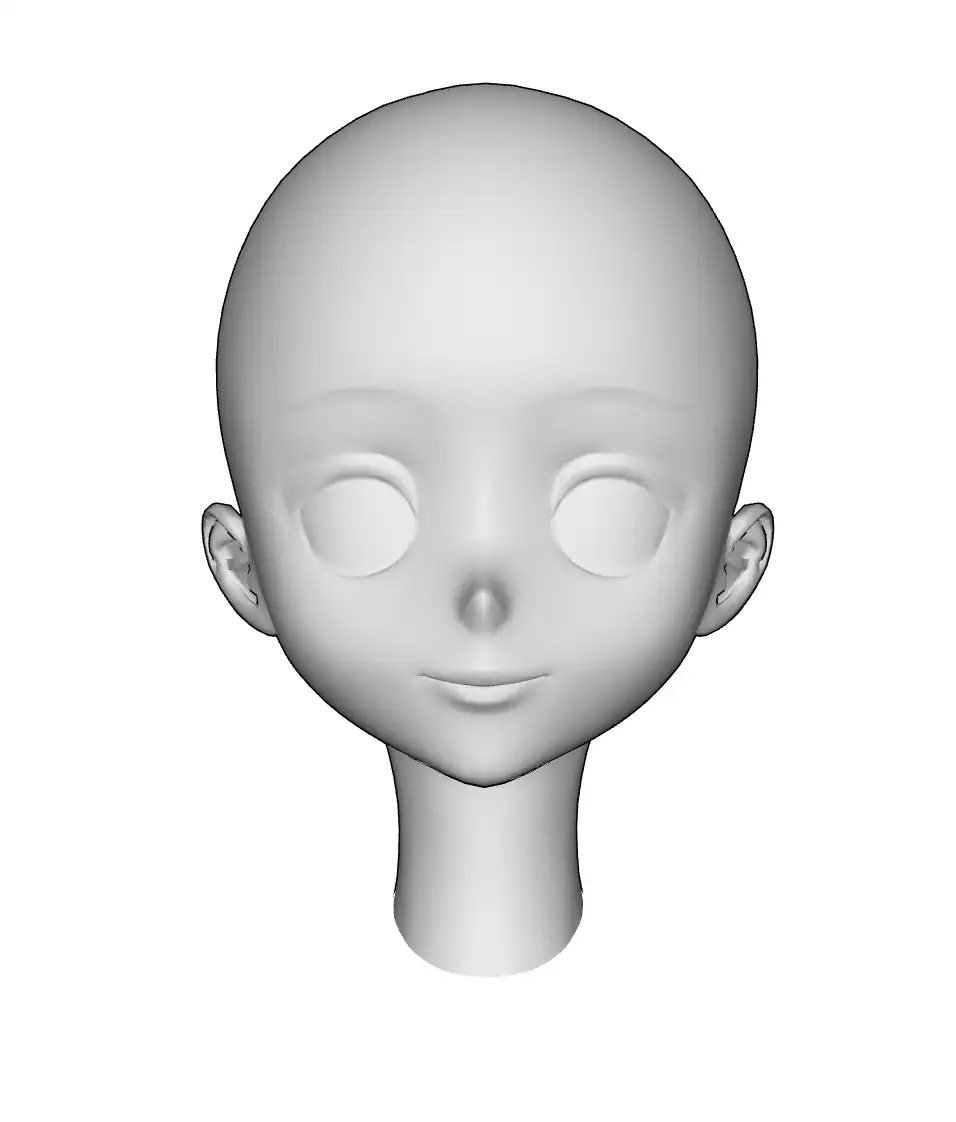
2. Sharp Anime Head
The Sharp Anime Head serves to create ikemen or beautiful male characters, and can also be used to portray mature female characters.
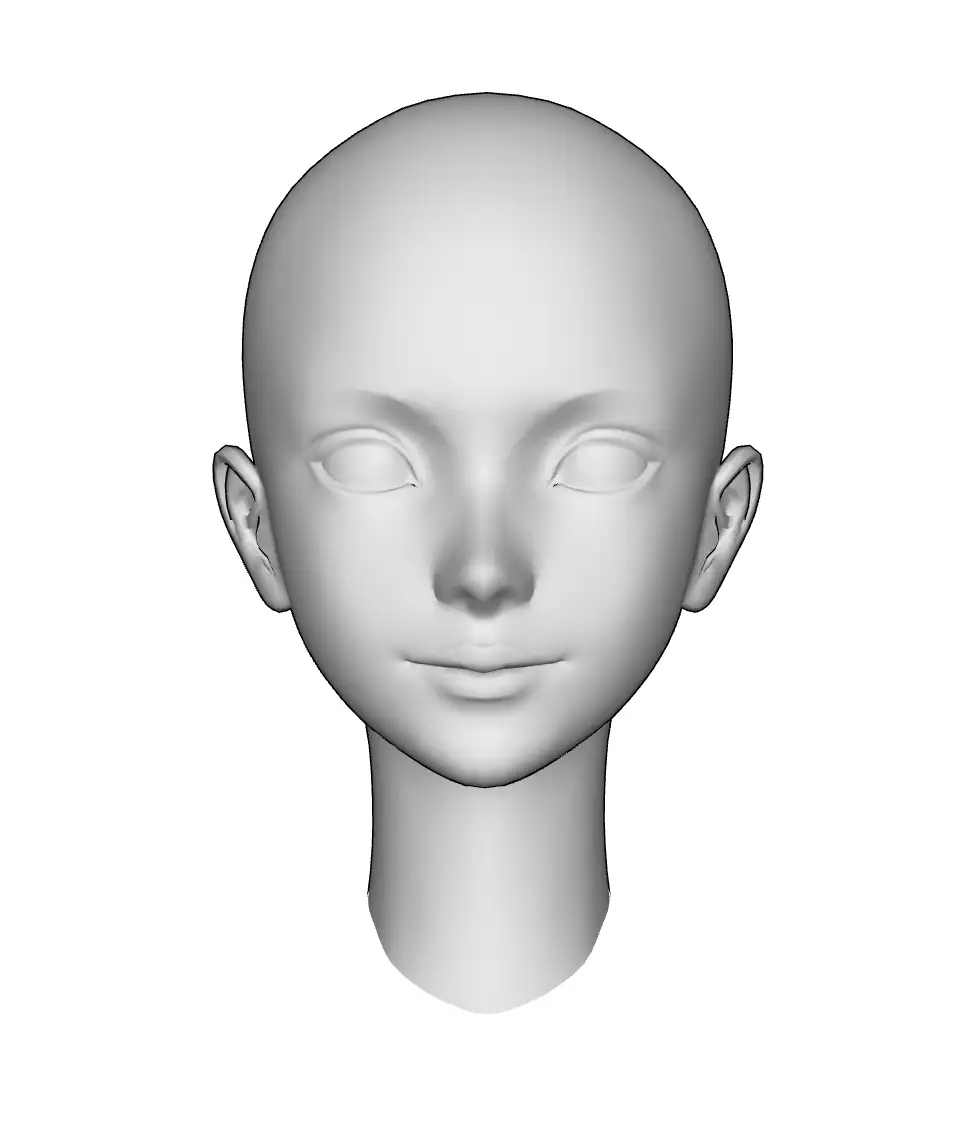
3. Sharp Cartoon Head
The Sharp Cartoon Head model is perfect for constructing muscular characters or characters in the style of American comics, lending them a distinctive and dynamic look.
4. Skeletal Head
The Skeletal Head model is a go-to for skinny character designs and old characters.

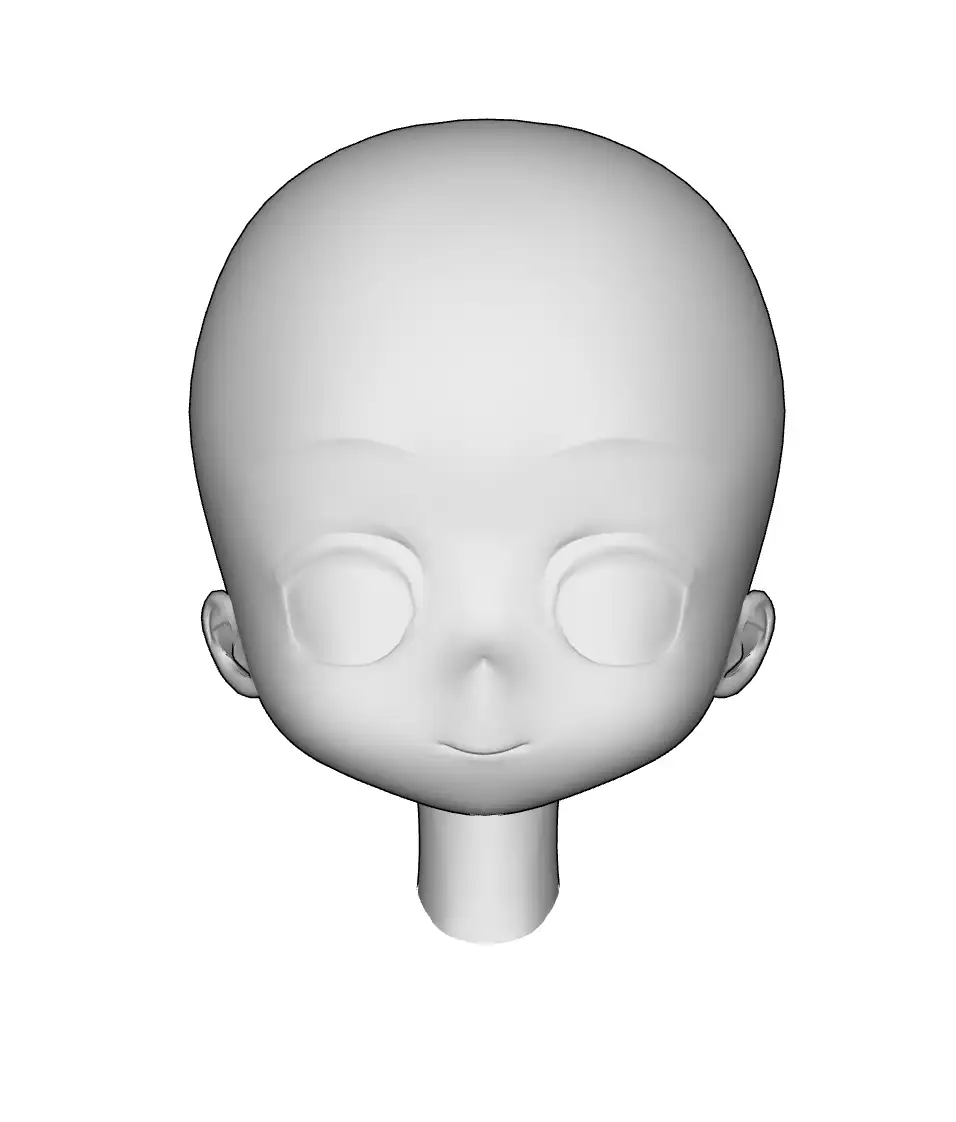
5. Chibi Head
For a playful approach, the Chibi Head model allows artists to create chibi or super deformed characters, and is equally adept at crafting child characters.
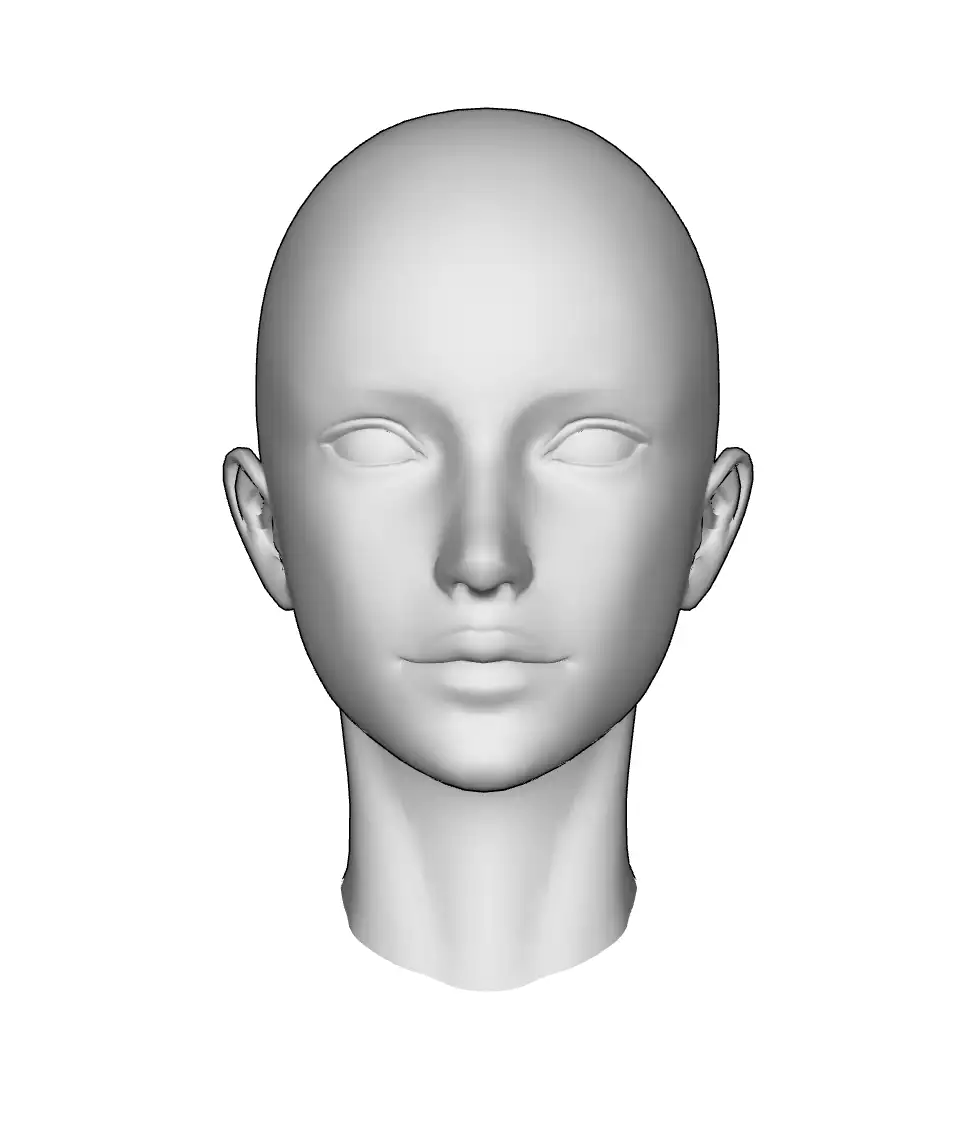
6. Round Realistic Head
The Round Realistic Head model is tailored for realistic female characters, enhancing the softer contours and feminine features.
7. Round Anime Head
The Round Anime Head model is ideal for creating cute anime girl characters and shota or little boy characters, bringing a touch of kawaii into the design process.
8. Round Cartoon Head
The Round Cartoon Head model complements western style male or female characters, enabling artists to tap into the classic aesthetics of western animation.
9. Basic Head
Lastly, the Basic Head model stands as a versatile base, serving as a kind of unisex head for adult characters, both male and female.
#3 Adjust the 3D Model Head
The reason I really love these 3D head models in Clip Studio Paint is that they're adjustable! The next thing I'll do with the 3D head model is adjust it to fit my character design.
In the Tool Property palette, you can adjust the facial features of the head. You can even set the height, angle, size, and depth of each facial feature. And you can also blend the face preset using the Face Mixer!
Let's see this function's capability and how you can implement it to your character!
Blend The Character's Face Design
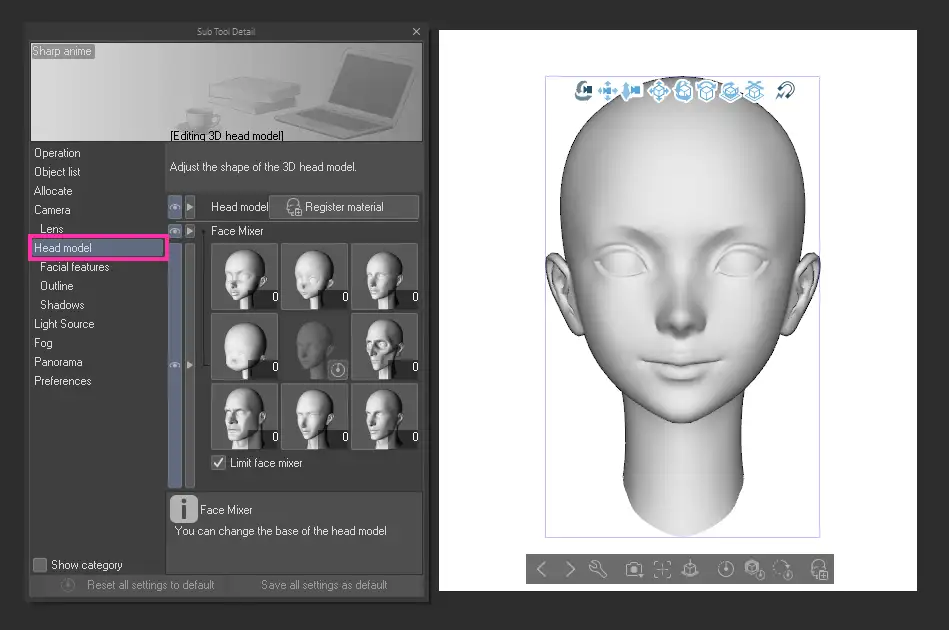
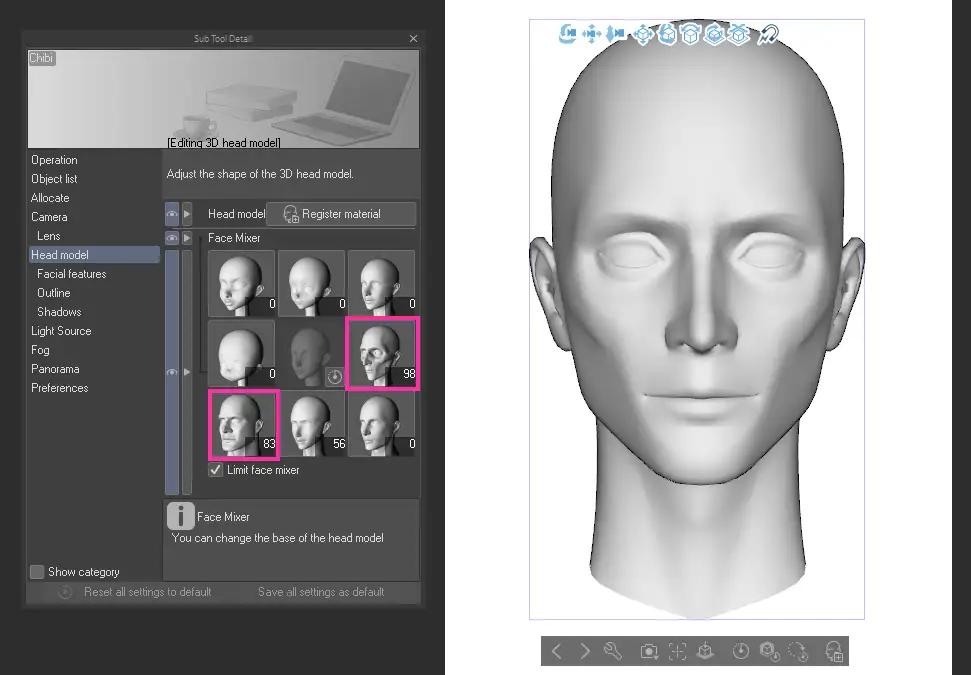
Let's access the Face Mixer by navigating to the Tool Property palette and click on the wrench icon on the right. The Subtool Detail panel will appear.
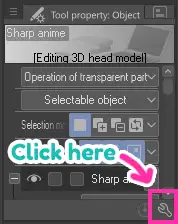
Then click on the Head model and you'll see the Face Mixer like this image.
With Face Mixer, you can create a wide range of face adjustment on the 3D head. For example, you can blend the chibi head with the skeletal head and round realistic head, and so on!
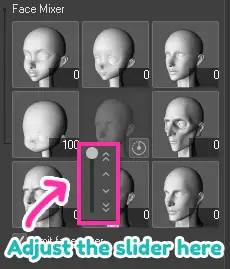
Just click on each head model and adjust the slider to mix the style!
When using the Face Mixer, you need the rough concept of the character in mind. Then mix other style together to get the final outcome of your preferences.
I'll give you some sample character design here.
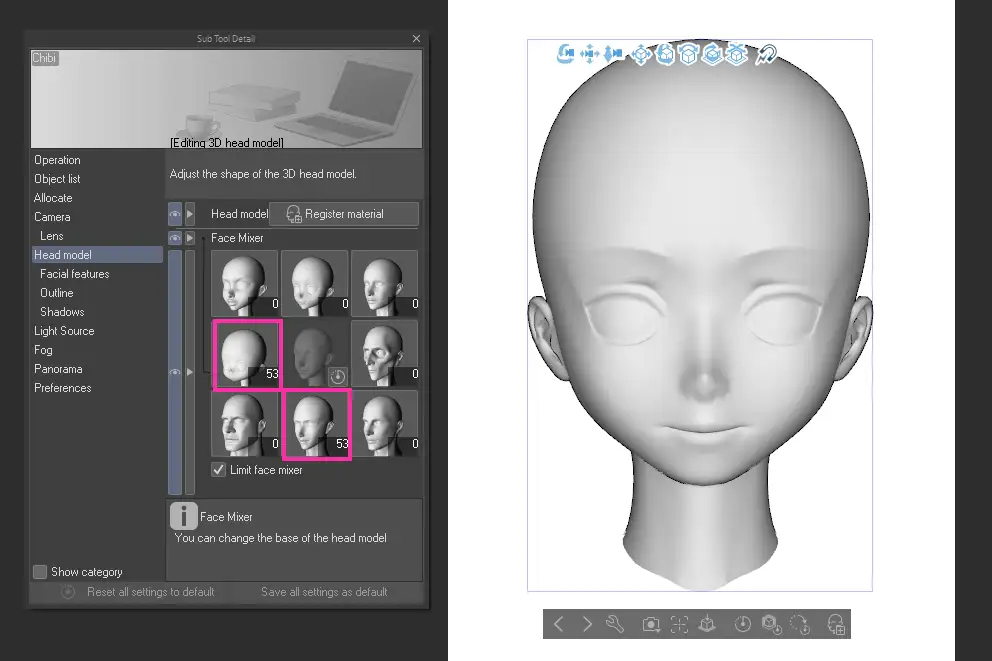
- Handsome shota or 10-15 year-old boy character
Chibi: 53
Sharp Anime: 53
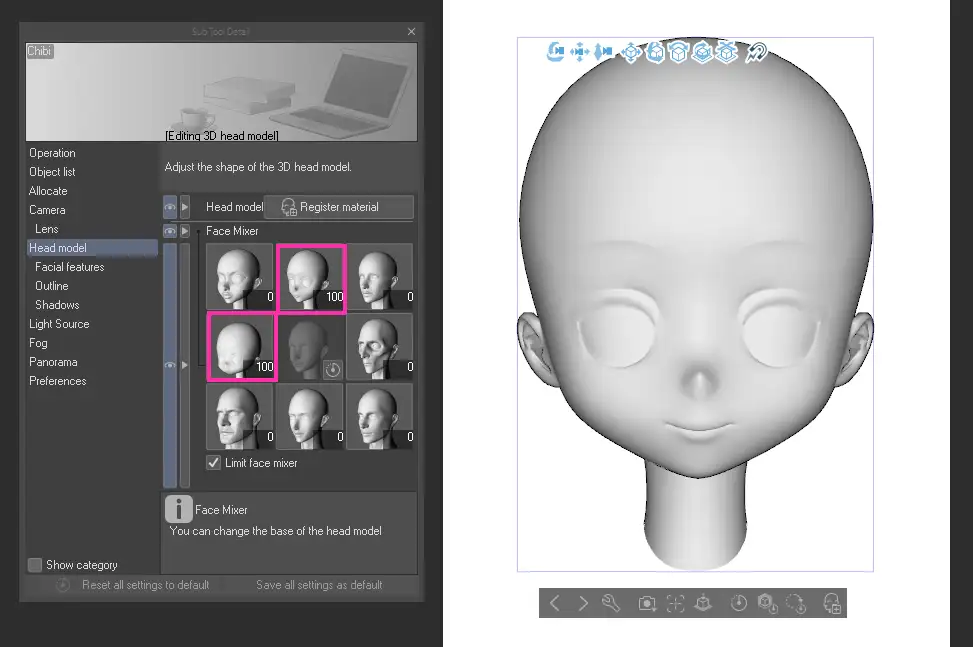
- 8 Year-old girl character
Chibi: 100
Round/Soft Anime: 100 - Skinny 30 year-old male character
Skeletal: 98
Sharp Cartoon: 83
Sharp Anime: 56
Adjust the Facial Feature to Fit Your Character Design
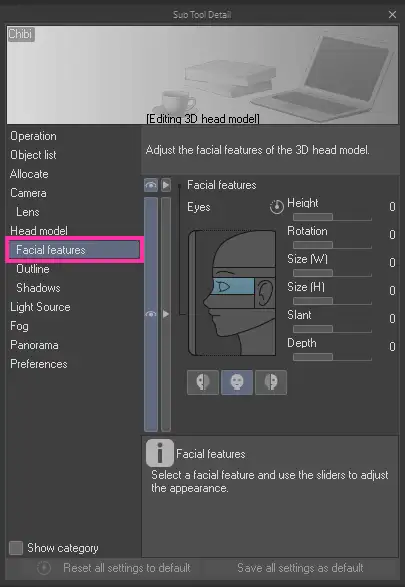
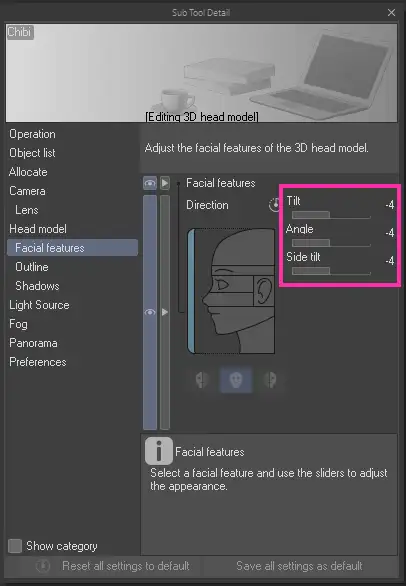
After blending the face using Face Mixer, I'll adjust the 3D head a little more by clicking on the Facial Features in the Subtool Detail panel.
In this panel, you can adjust all of the facial features, such as the head, brows, eyes, nose, ears, mouth, and neck.
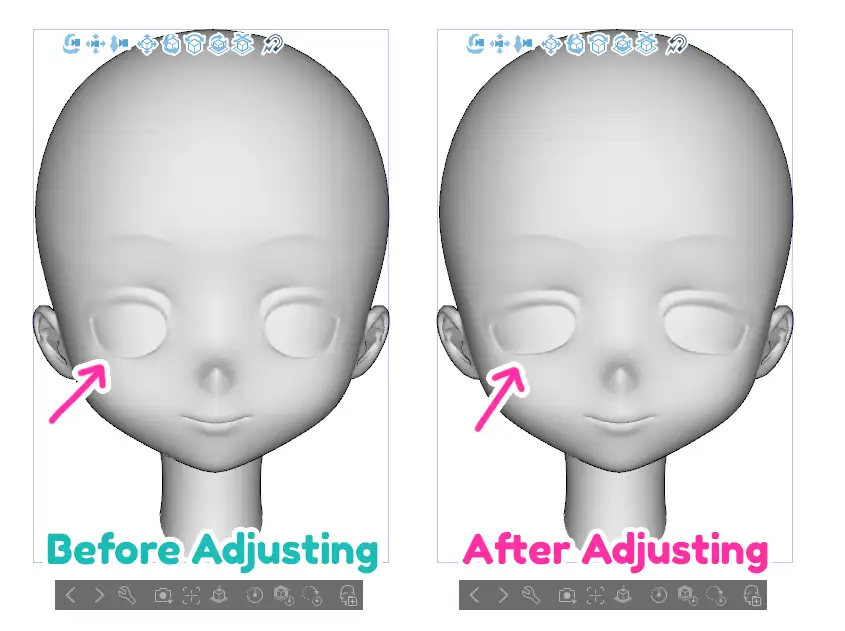
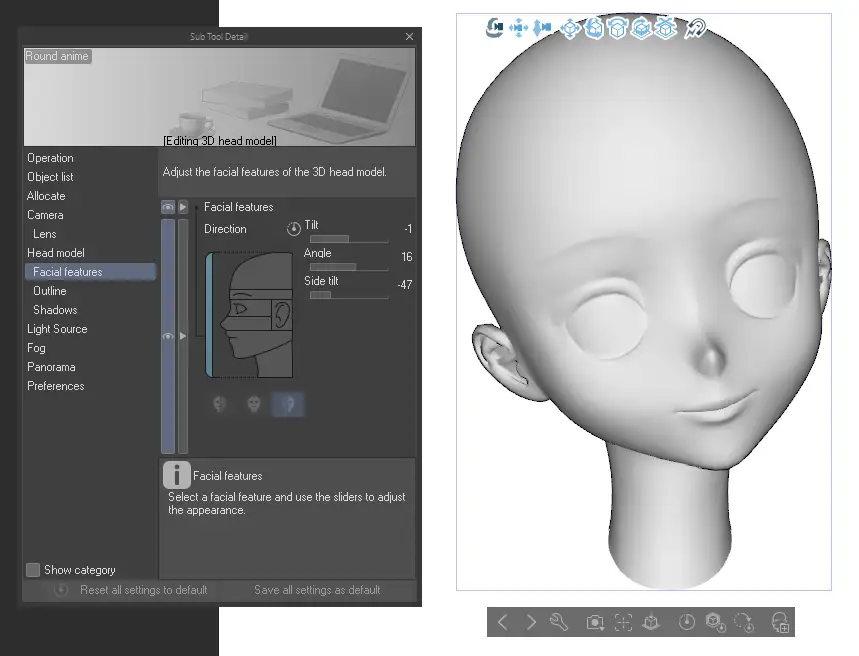
The image below is the example of the adjustment. Here I adjusted the slant of the eyes and the character in the second image has more sleepy look.
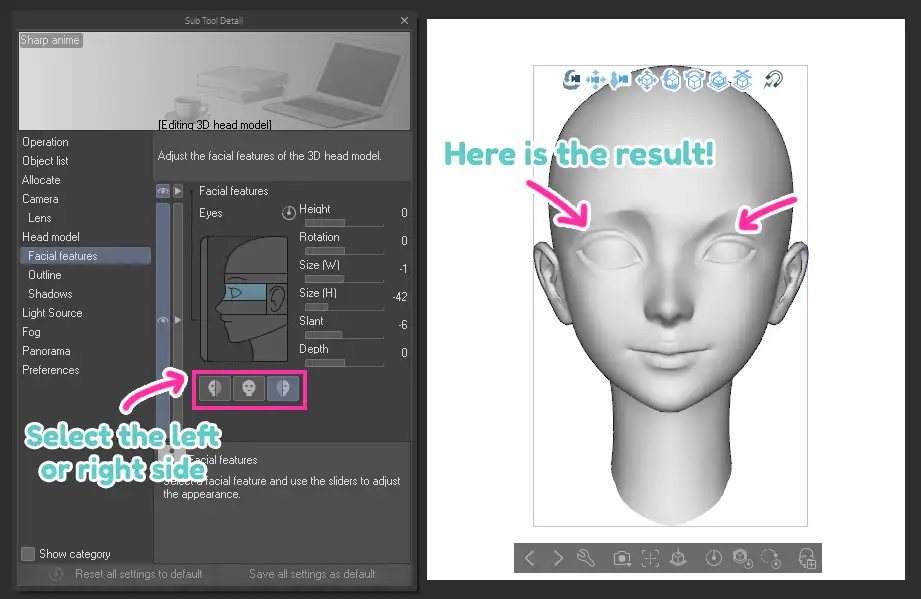
You can also choose to edit the facial features only on left or right side by clicking here. This allows you to create asymmetrical face style like the image below.
Adjust the Head Scale
If you want to change the scale of the head, you may do so by click and drag on this icon. Let's see the result of this function in the image below.
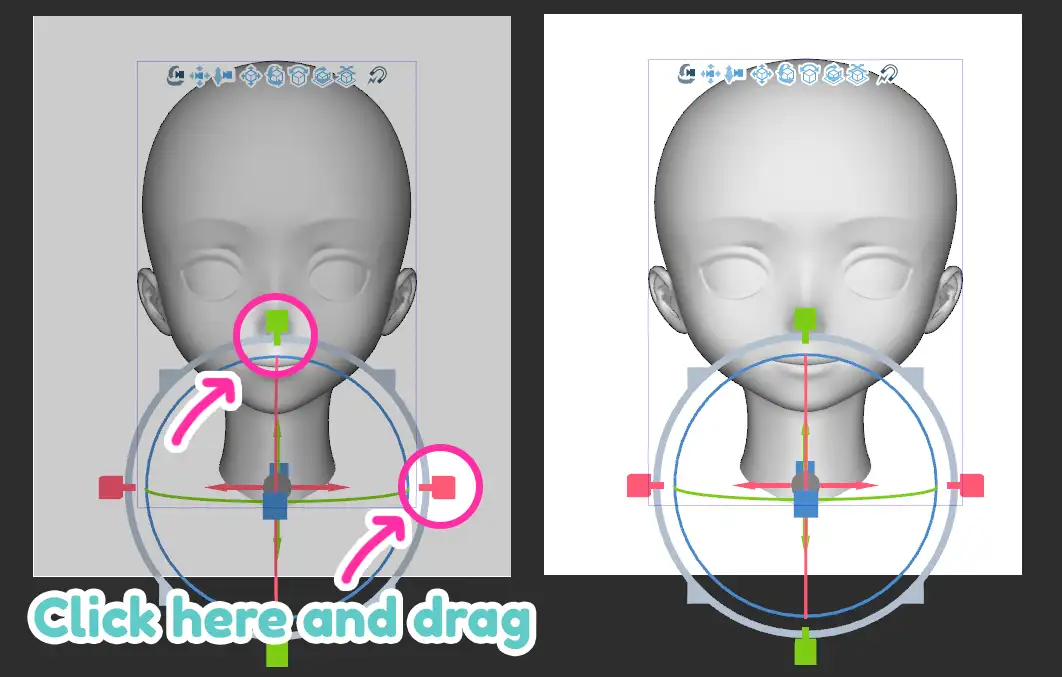
Rotate the 3D Head Model
You may click on the Direction in the Facial Features tab and adjust the head direction and tilting.
Adjust the Shadow
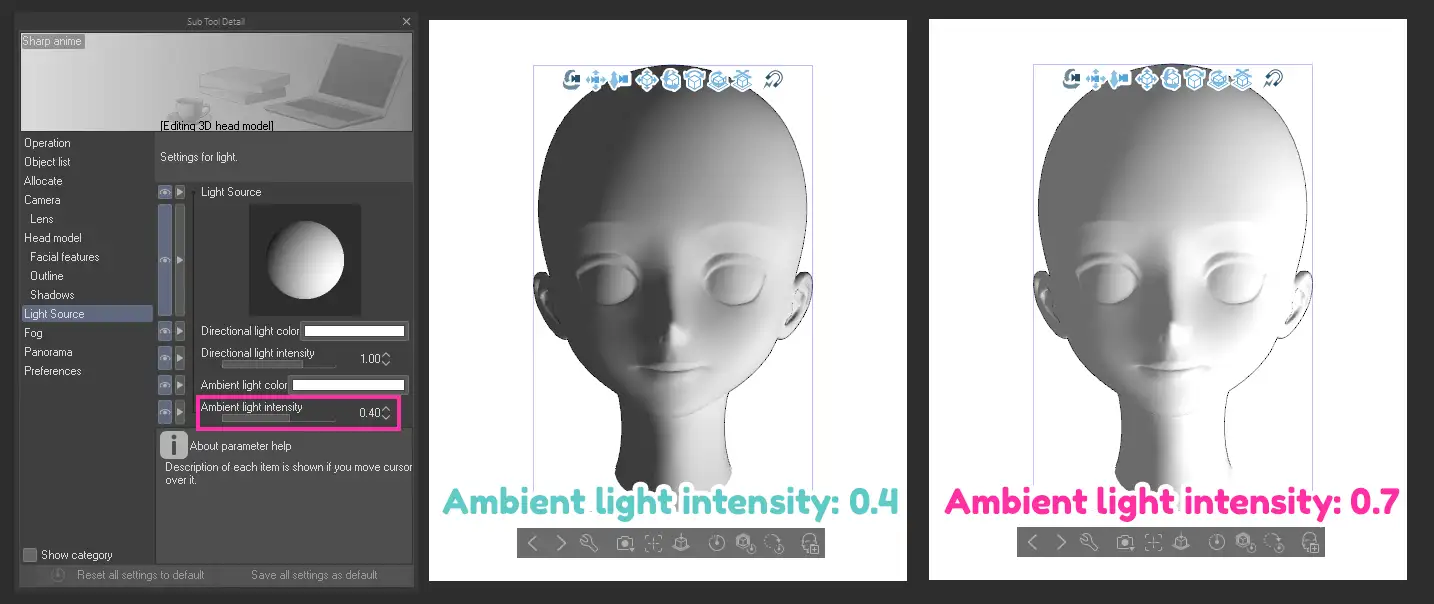
The 3D head model came with default lighting. However, you can change the light source of the model by navigating to the Light Source section in the Tool Property panel, like in the image below. Click and drag on the sphere to change the light direction!
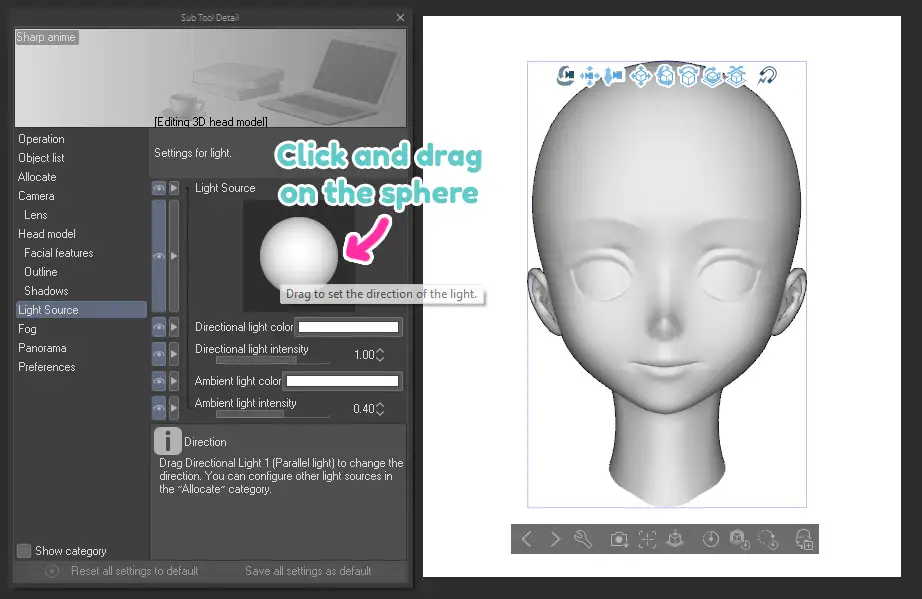
You can also change the intensity of the light by increasing the ambient light intensity to 0.7. (The default is at 0.4.) This will make the 3D model look brighter.
Save Your 3D Head Model Settings
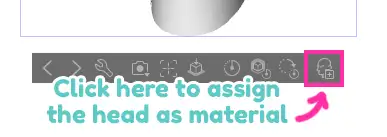
After you finish your setting and want to save your customized 3D head, navigate to the Material palette and click register it as a 3D. And now you can reuse this 3D head as much as you want at any angle and in any lighting!
I recommend adjusting the 3D model head for the character you frequently draw, such as the anime or game character you like drawing fan art for and your original character.
#5 Use the 3D Head Model as a Base for Drawing Difference Face Styles
OK, first I need to clarify that, from my perspective as an artist in the art industry, using a 3D model as a base for drawing is not cheating and requires a lot of skills to use it properly.
I learned to use 3D models to help with my drawing when I was working for a Japanese game company. And the client and art director suggest we use it to improve our productivity and art quality. So, please don't be shy about using it in your art process.
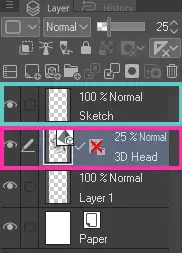
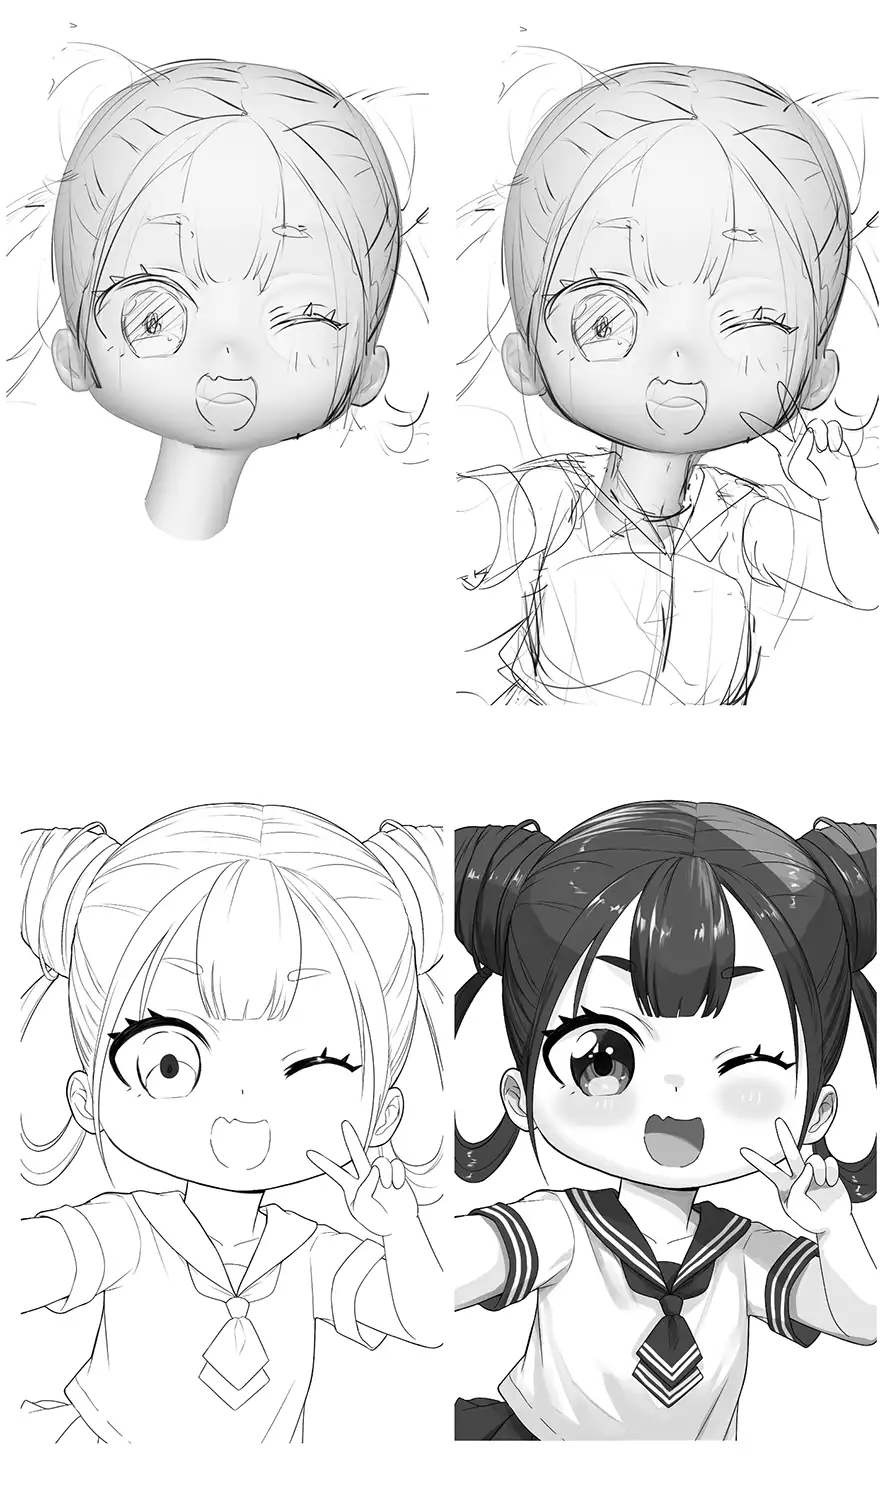
You may adjust the head in the direction you want and lower the opacity of its layer. Then create a new layer over it and use the 3D head as a base.
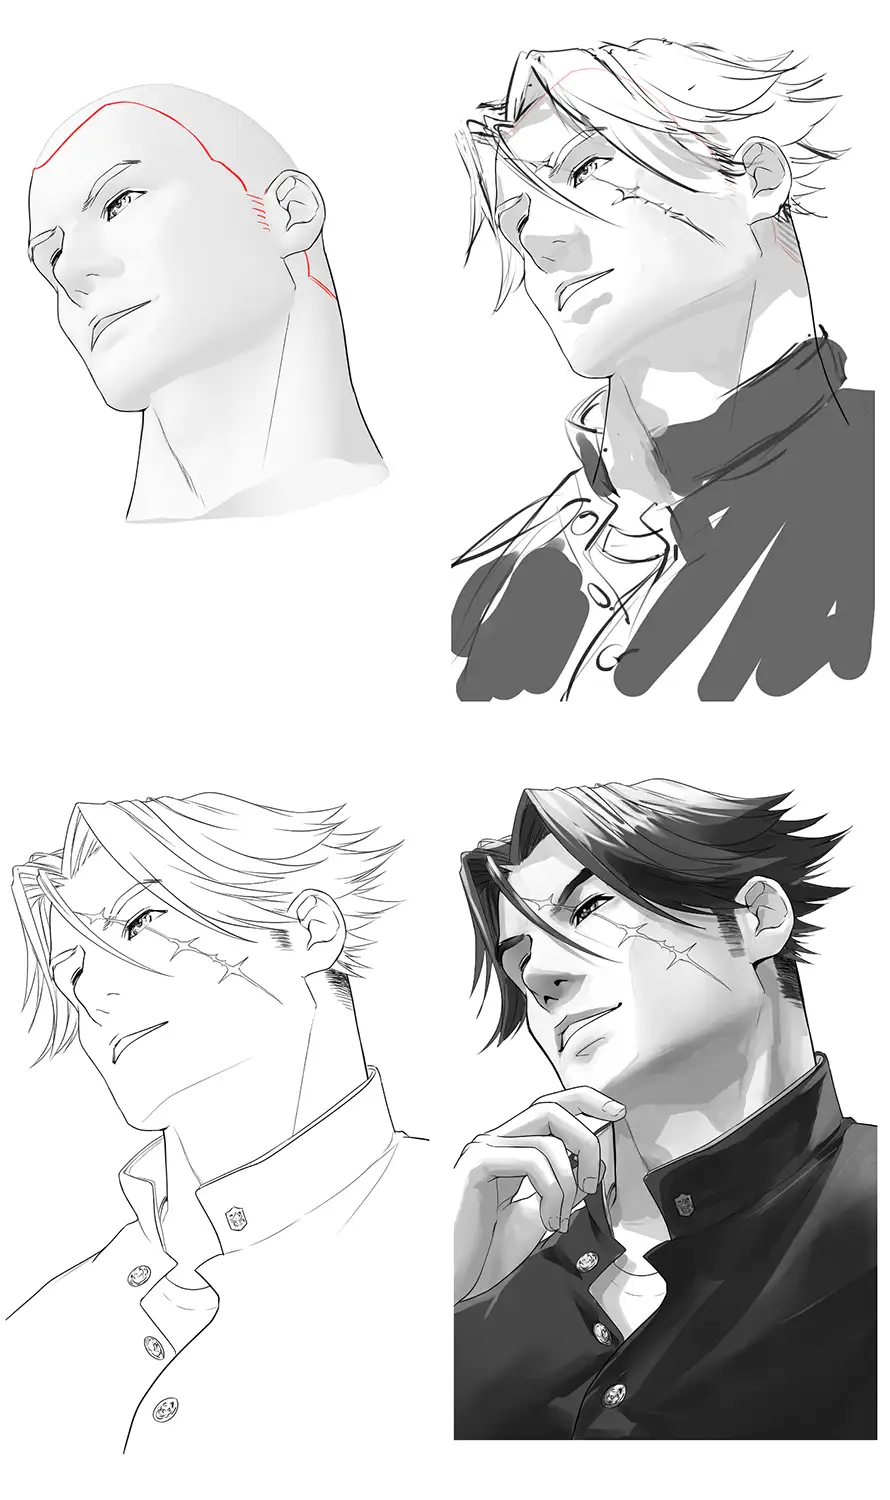
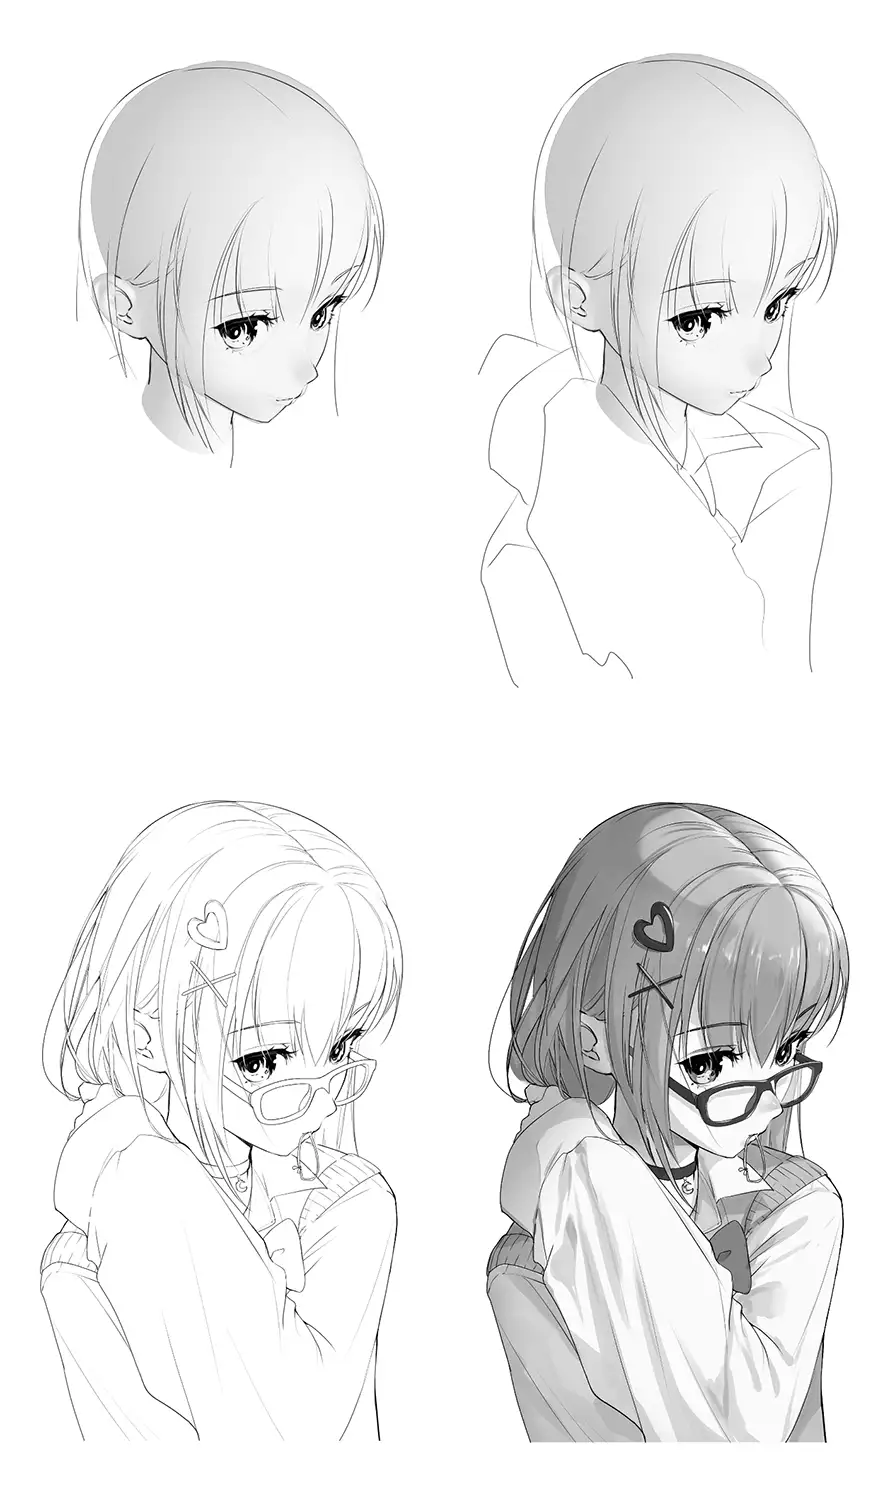
You may see from the image below that I didn't trace everything from the model. On the other hand, I added my own adjustments to make the character look better.
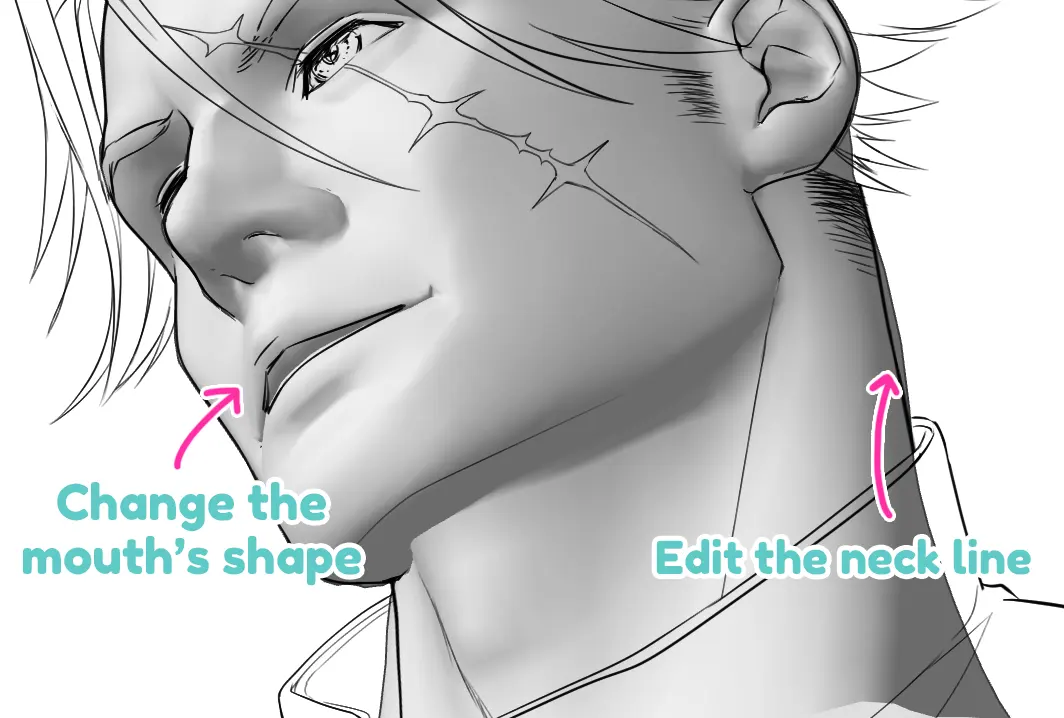
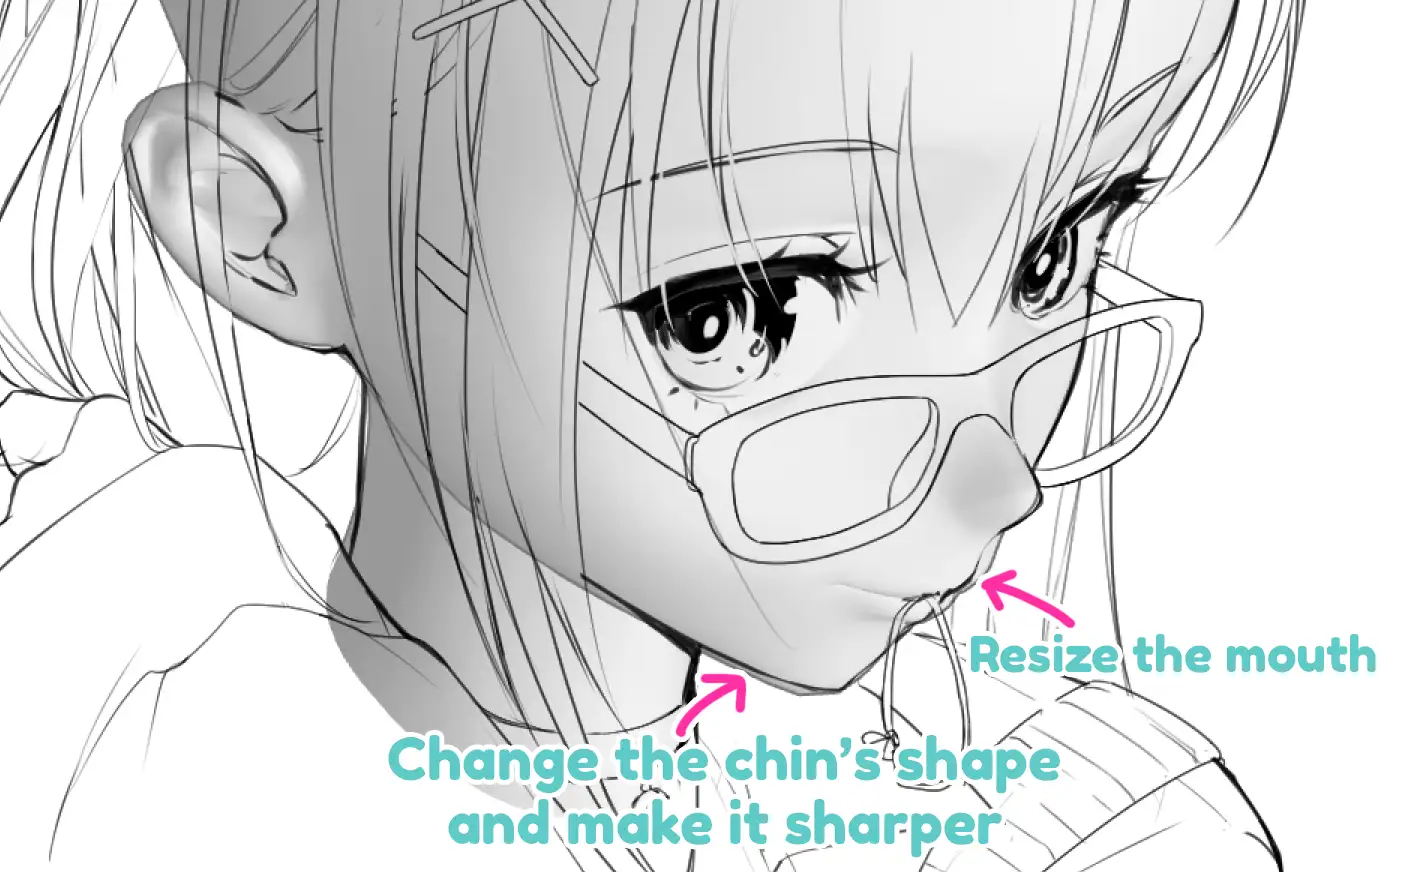
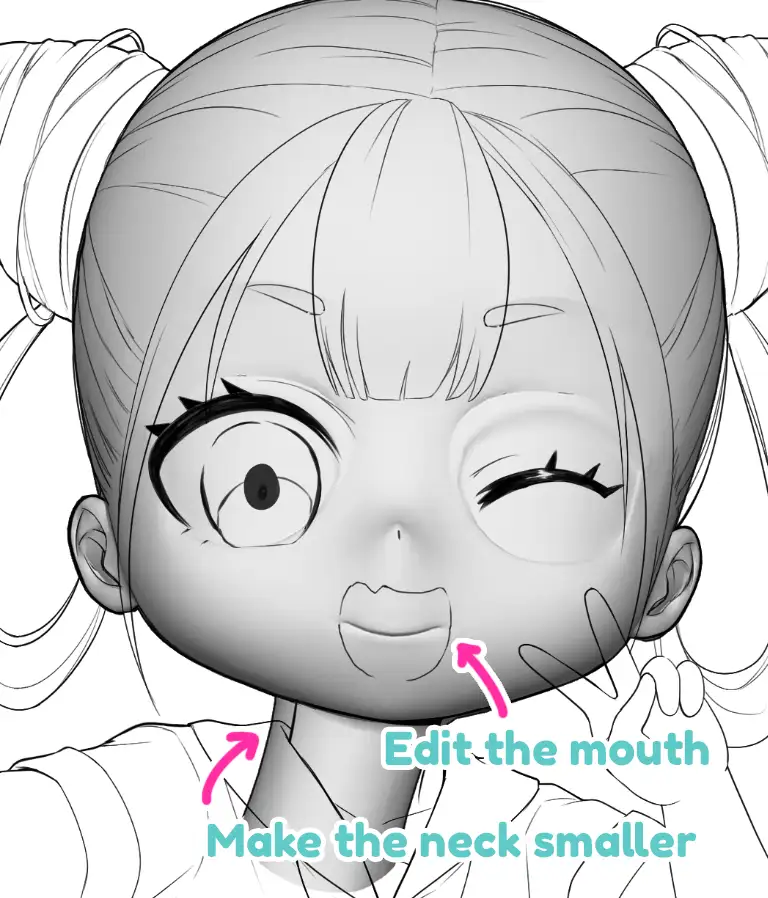
As you may see basic anatomy knowledge, such as understanding perspective and knowing how to draw hair is still crucial. Let's see all of the step-by-step process below.
Conclusion
That's how the 3D head model helped me produce my artwork. From the sample image, the 3D model can help guide me for the hard-to-draw angles, such as the view from below. It also helped me a lot with drawing male character and muscular character!

This is really a game-changer for me. Plus, with the variety of the face preset, I can mix the head design and use it as a drawing base for any character. Finally, I can draw male characters with ease!
Don't forget to update your Clip Studio Paint to 2.0 version and level up your art with this wonderful tool!
Finally, if you like art tips and content like this, feel free to subscribe to my weekly newsletter
I share my anime art tips and experiences in my digital art career in a weekly email. You'll get the insight and behind the scene of the art career! Really recommend if you're a beginner anime style artist.
Thank you so much for reading this post! I really appreciate your visiting and using your valuable time reading my content!
Much Love 💖

Want to know how to start your anime art journey?
Download my ANIME ART STARTER GUIDE and start your artistic path right away for FREE!