


3D models in Clip Studio Paint can be a great way to improve your character's pose. You can use it as a reference to help you position your character in a more natural-looking pose.
Additionally, you can use the 3D model to create sample compositions for your art. This can be especially helpful if you're trying to create a convincing setting for your character.
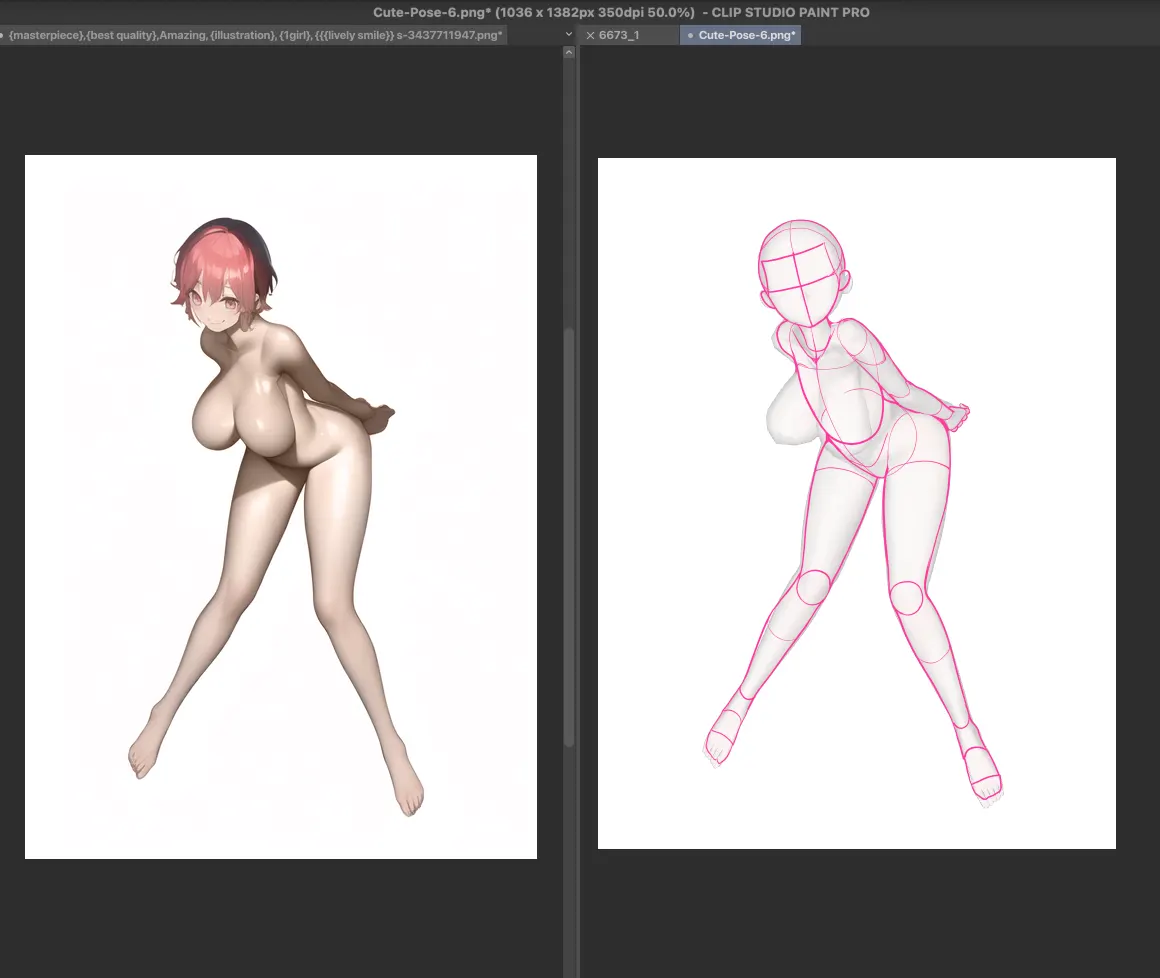
Using the before/after sliders below, you can see an example of how to use a 3D model in a drawing.
Some may say that using 3D models is cheating, but it's one of the great techniques to save your time and help you improve faster.
With a 3D model, you can roughly see how the final product will look before you even start drawing. This helps you avoid making mistakes that can be costly and time-consuming to fix. All you need to do is practice using it and try to implement it into your workflow.
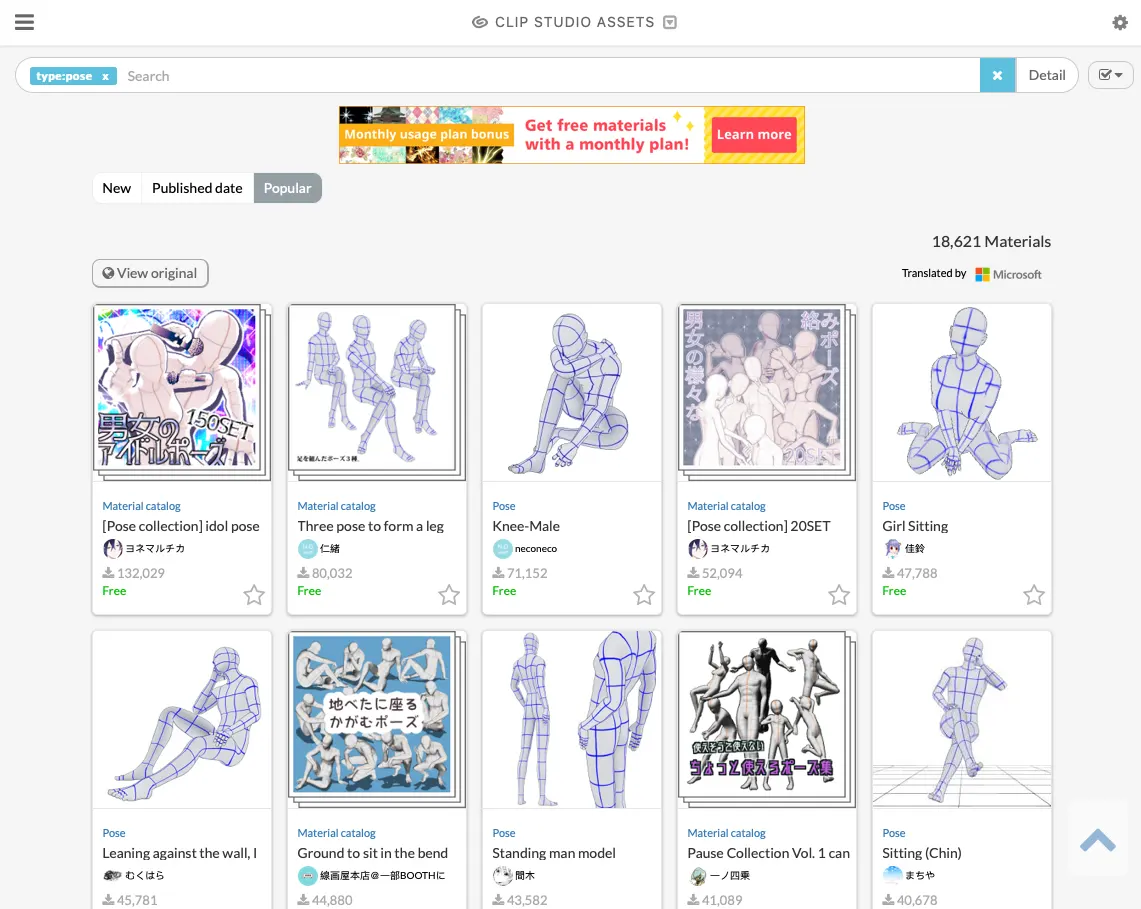
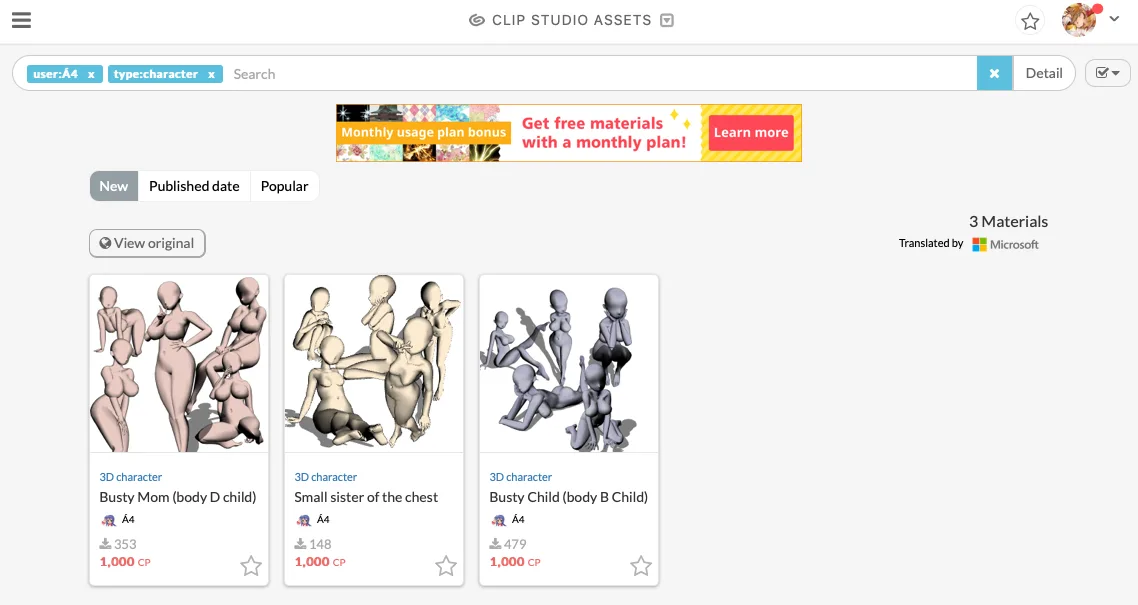
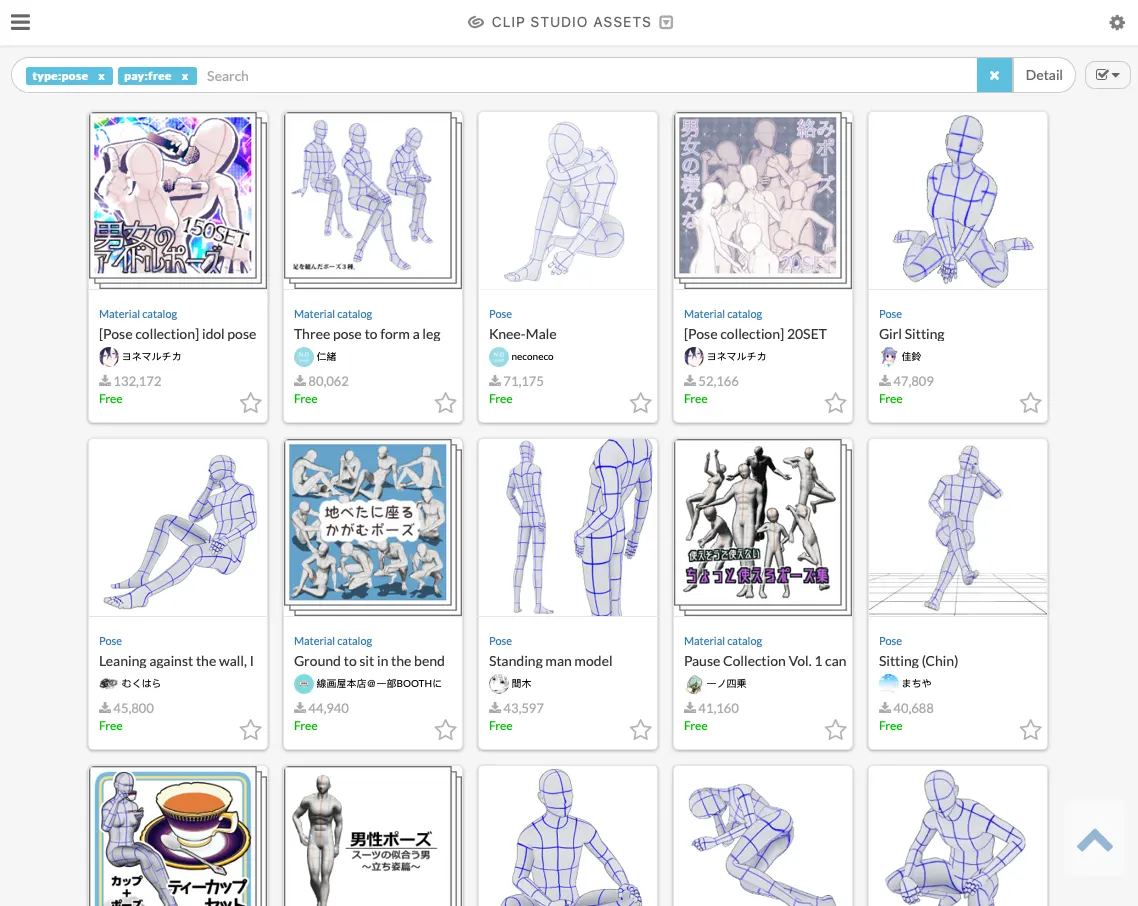
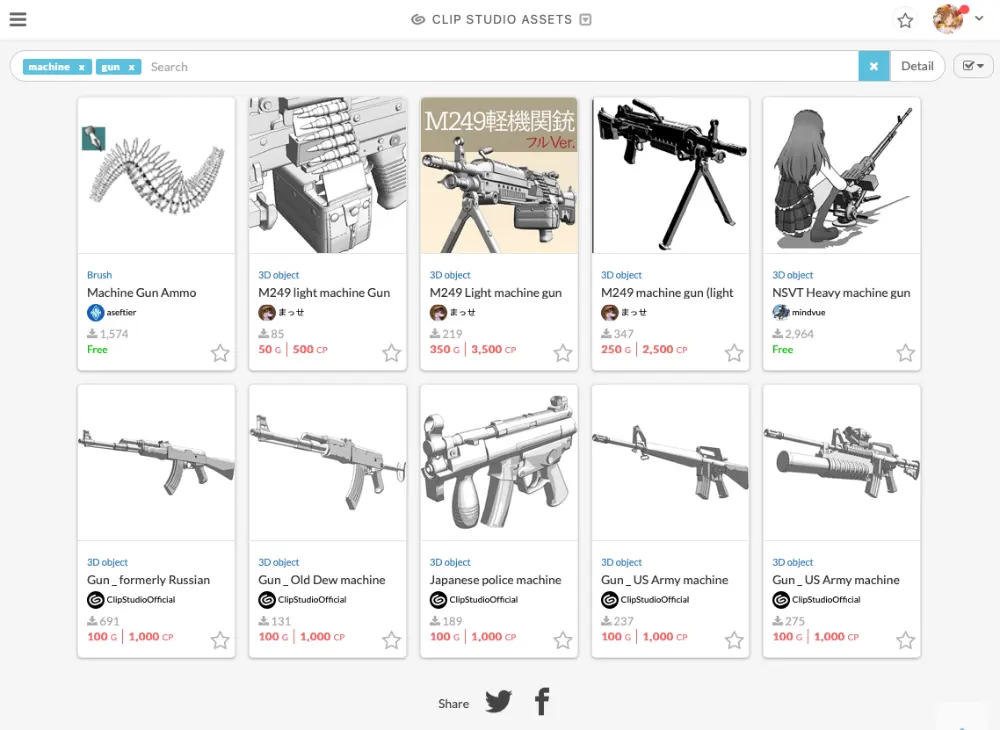
If you don't own Clip Studio Paint yet, you may try the FREE trial version here. They have a large free and paid assets in the asset store and the 3D model is one of them. I really recommend using the 3D model in Clip Studio Paint since it's super handy to adjust the pose and trace it directly in CSP. The picture below is the sample of 3D models in their asset store.
By the way, after I learned to use AI, I occasionally use the 3D model in my artwork since I can also use the AI to generate posture and composition ideas as well. That being said, learning to use 3D models is still beneficial!
No worries if you're new to using 3D models for your drawings, let me help walk you through the basics!

The pros and the cons of using 3D model?
First, we need to explore the pros and cons of using 3D model with your artwork. There are a few things to consider when thinking about using a 3D model.
The benefits of using a 3D model in your artwork
- Reduce the amount of guesswork in drawing the pose and composition.
- Great for lighting and shading guidelines when painting.
- Help you understand the perspective and mass of the human body and objects.
The thing to keep in mind while using a 3D model
- A high-quality 3D model is required to guide your artwork. You will waste time and efforts if you use low-quality models or poses. To get the most out of 3D models.
- You should be proficient with basic posing, anatomy, and composition. You can't rely on tracing it completely, but you can make it appear more realistic by adjusting your character's anatomy and composition while tracing the 3D model.
- Don't forget to find additional photo references or other artists' artwork to use along with the 3D model for the best quality outcome.
Where to find the 3D models for Clip Studio Paint
Clip Studio Paint offers a wide variety of 3D models to choose from. You can find them in the asset store of Clip Studio Paint. There are models for both human and non-human characters, as well as a variety of props and scenery. You can also purchase additional 3D models from third-party websites such as ACON.
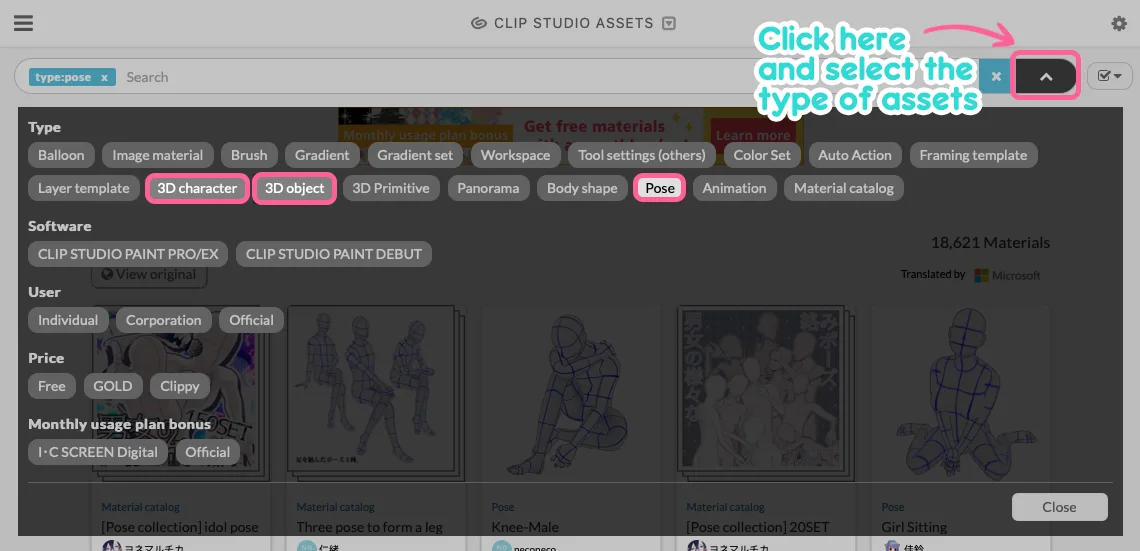
When you're searching in the CSP asset store and want to filter just only the 3D model, poses, or other 3D object, just click on this button and select the type of assets as “3D character”, “3D object”, or “Pose”.
Actually CSP has the basic 3D models in their software and the picture below is the sample of them. However, I prefer the 3D model I downloaded from the asset store lot more. I'll recommend you my favorite 3D model set in the next topic. Just keep read on!

Understanding the difference between “3D model” and “Pose”
A 3D model is a three-dimensional model of an object, character, or scene, whereas a pose is the character's stance or posture. A pose, in this context, is a precise posture or arrangement of a 3D model.
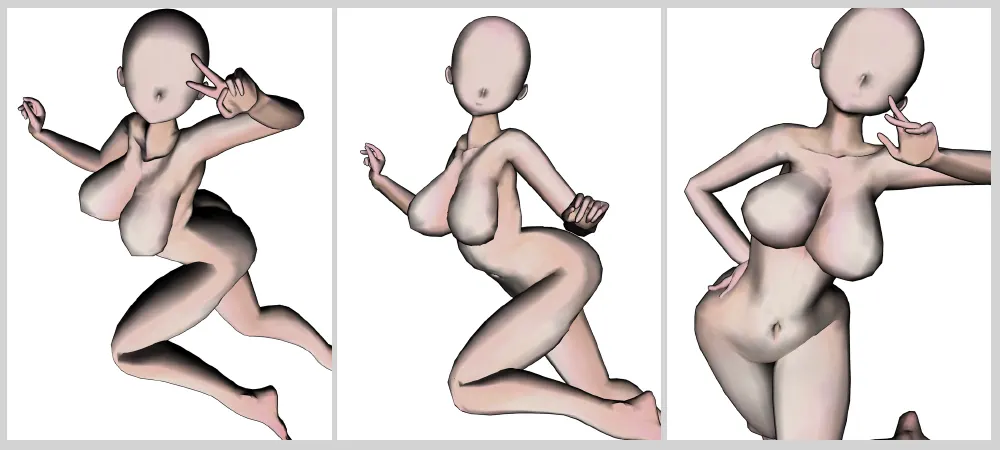
-

- Sample of 3D models
-
- Sample of poses
The pose and 3D model are available for download separately. It means you need the 3D models of the characters first, then the postures to go with them. No worries, I'll show you how to import both the 3D model and the pose to the Clip Studio Paint canvas later.
A list of recommended high quality 3D model you should use in Clip Studio Paint
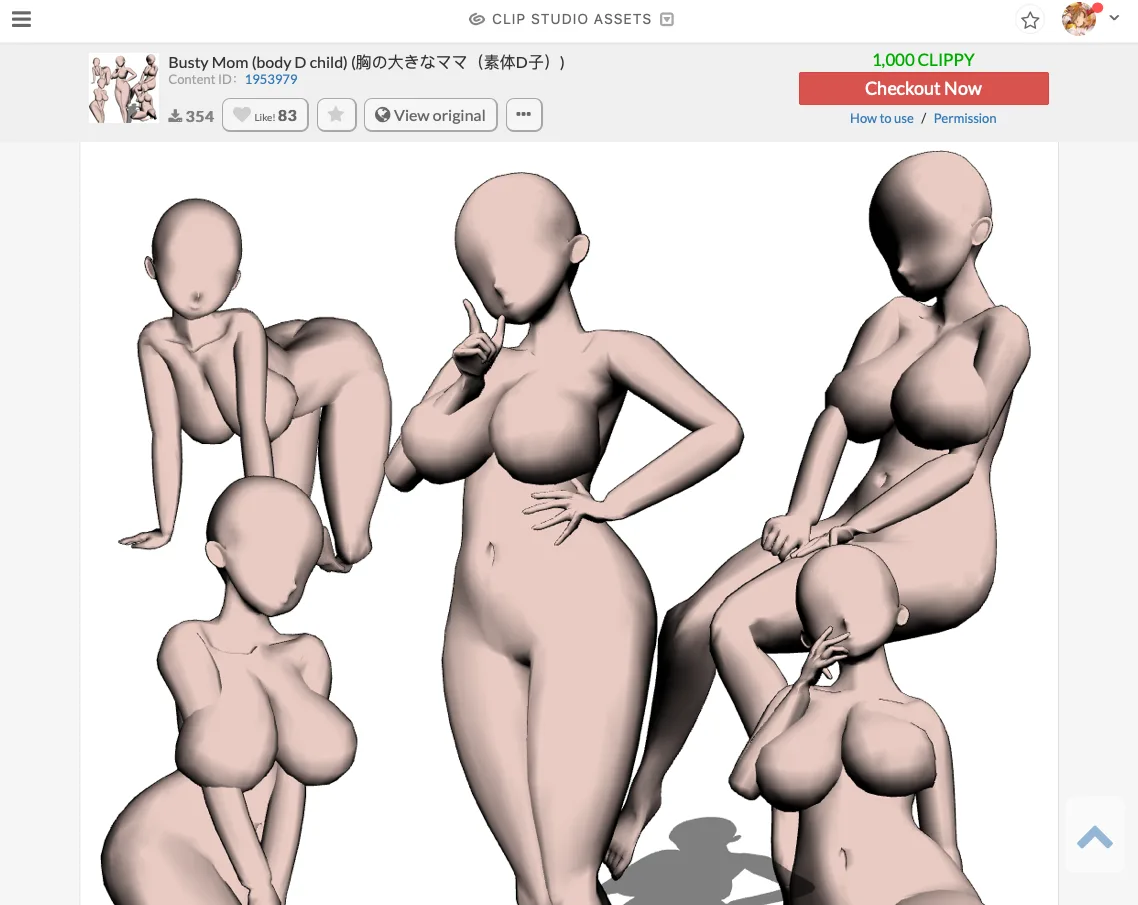
There are a lot of great 3D models out there that you can use in Clip Studio Paint. Here are a few that I recommend:
Recommended 3D models
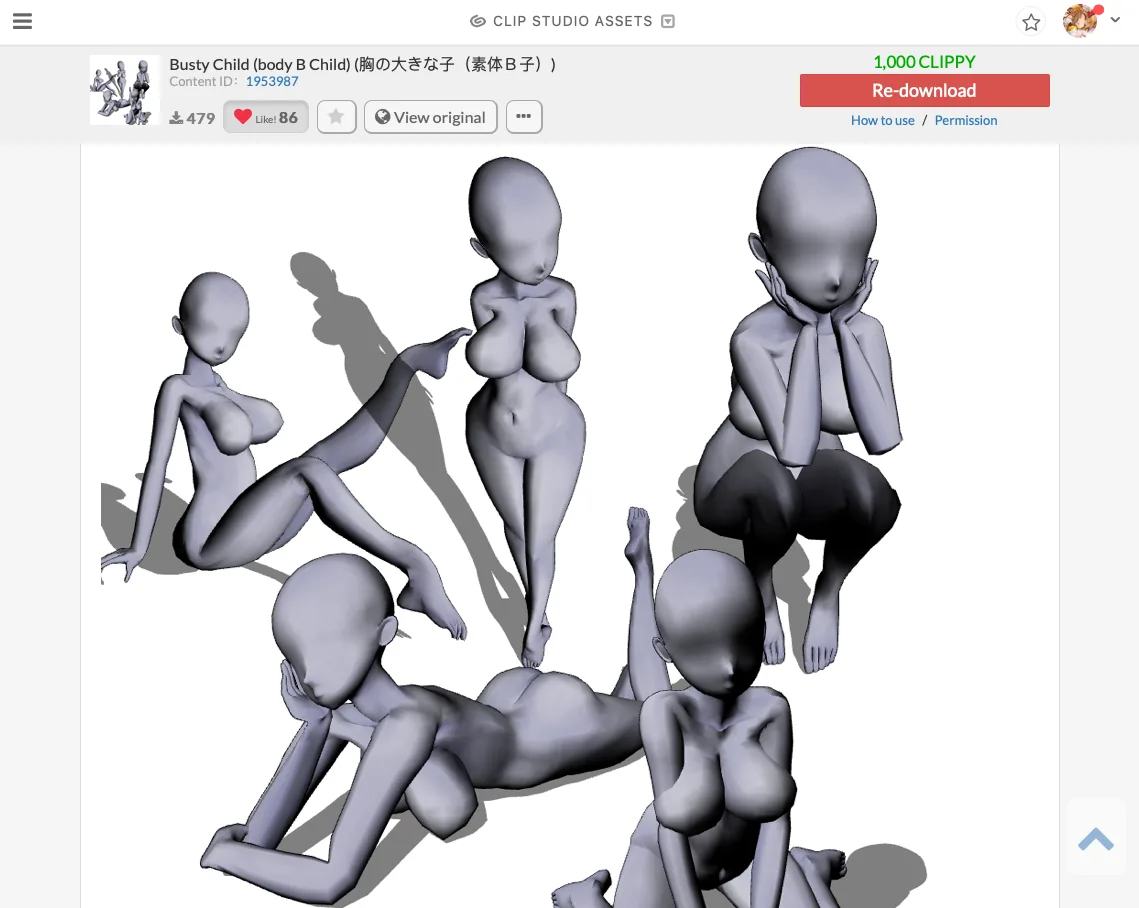
1. Busty Child (body B Child) (胸の大きな子 (素体B子))
Content ID:1953987
Price: 1,000 CLIPPY
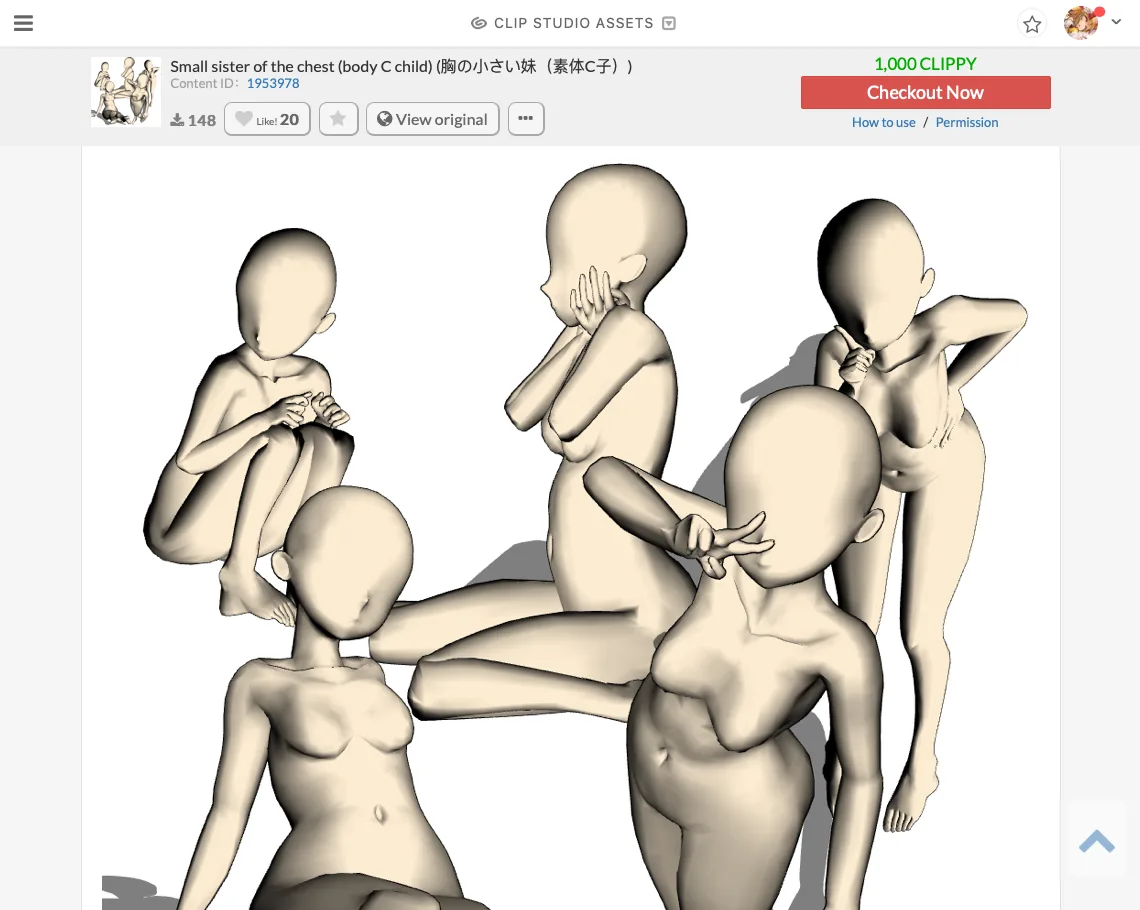
2. Small sister of the chest (body C child) (胸の小さい妹 (素体C子))
Content ID:1953978
Price: 1,000 CLIPPY
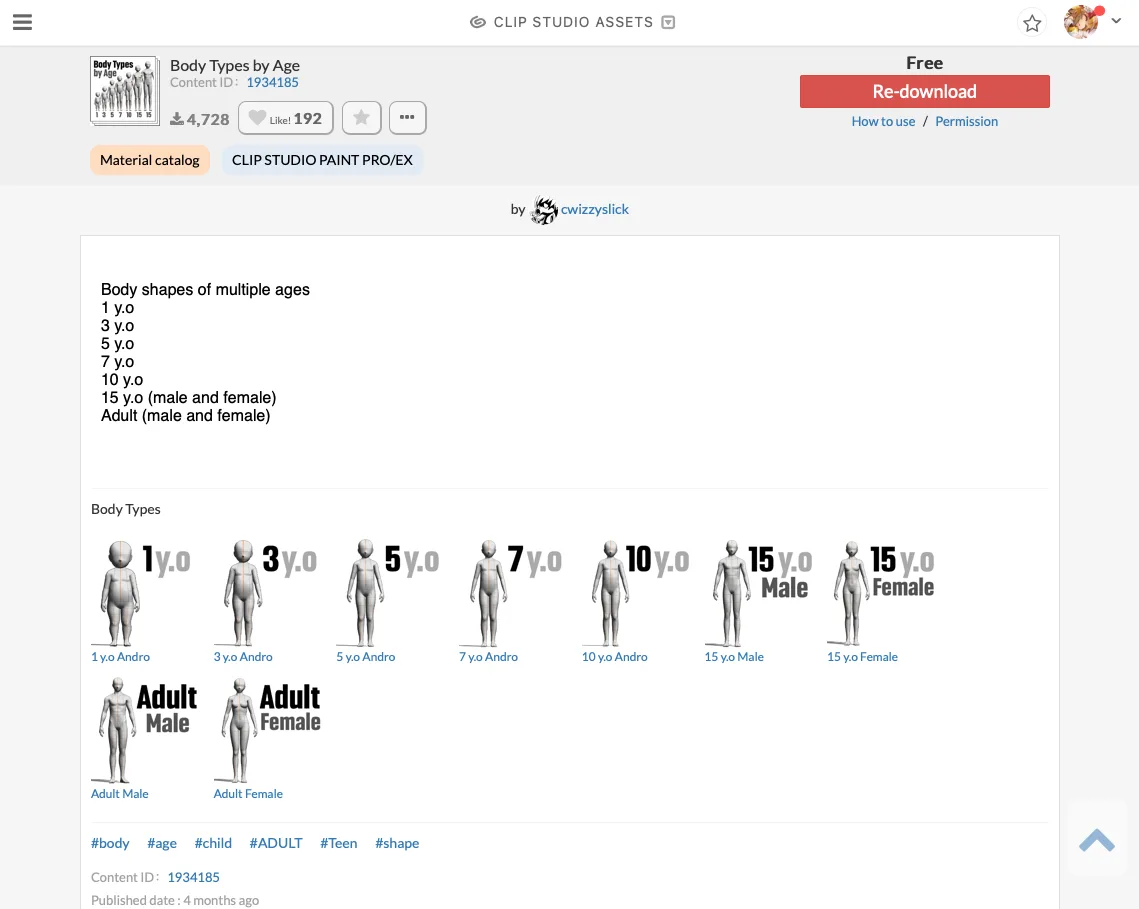
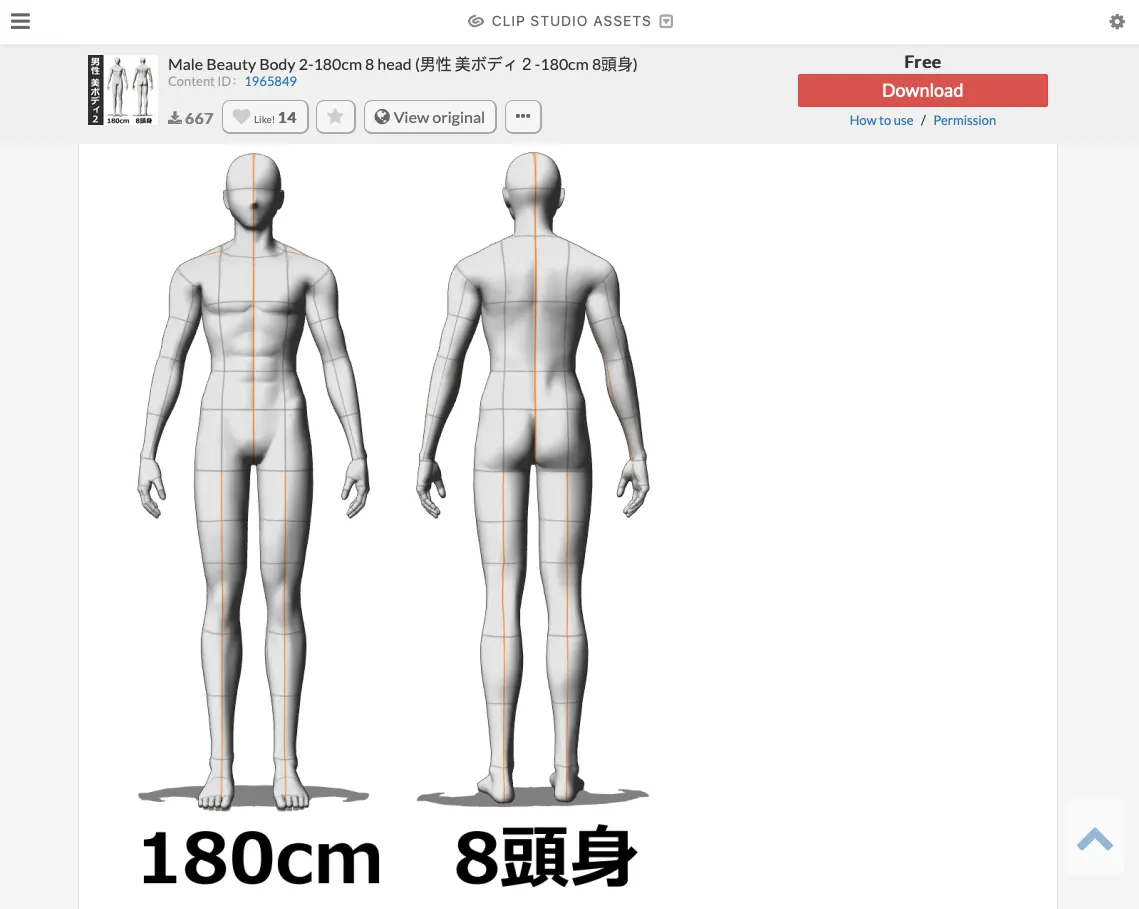
4. Body Types by Age
Content ID:1934185
Price: FREE
5. Muscle men (筋肉男性)
Content ID:1717561
Price: FREE

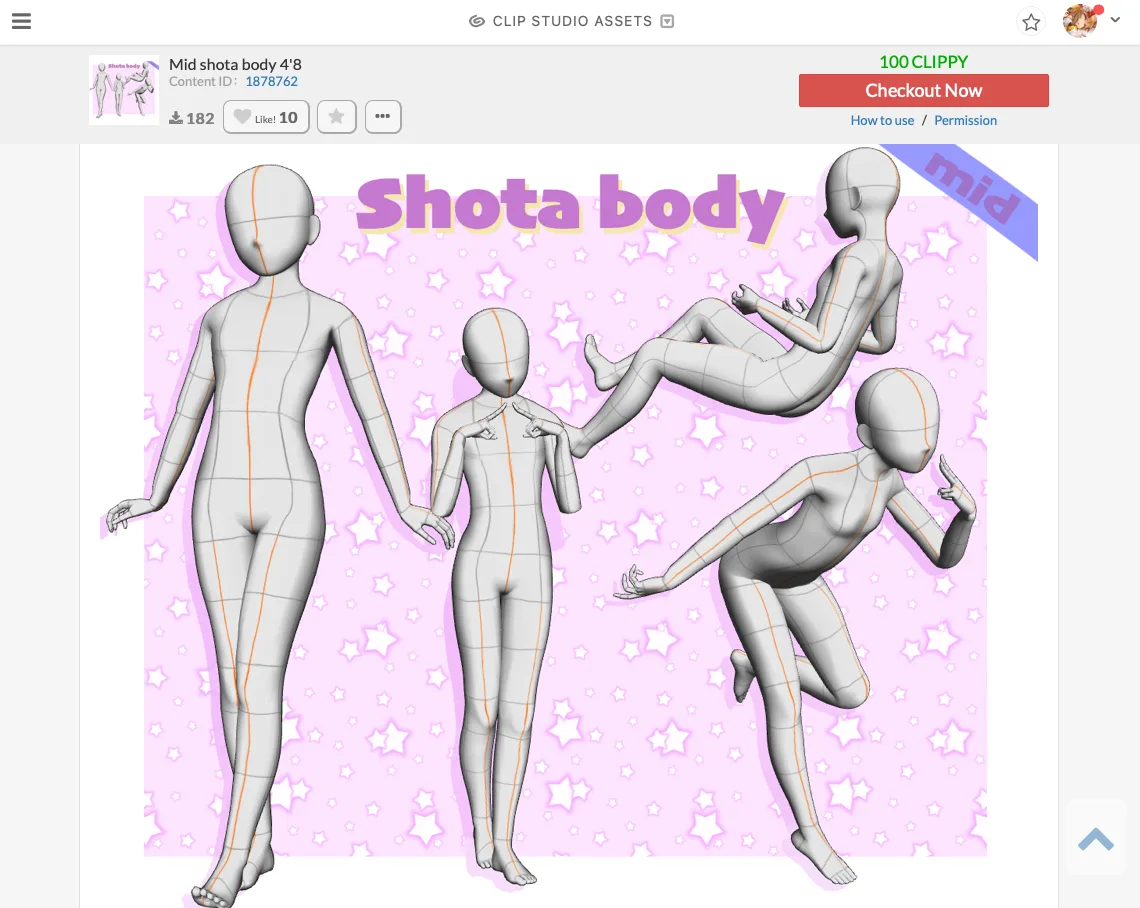
6. Mid shota body 4'8
Content ID:1878762
Price: 100 CLIPPY
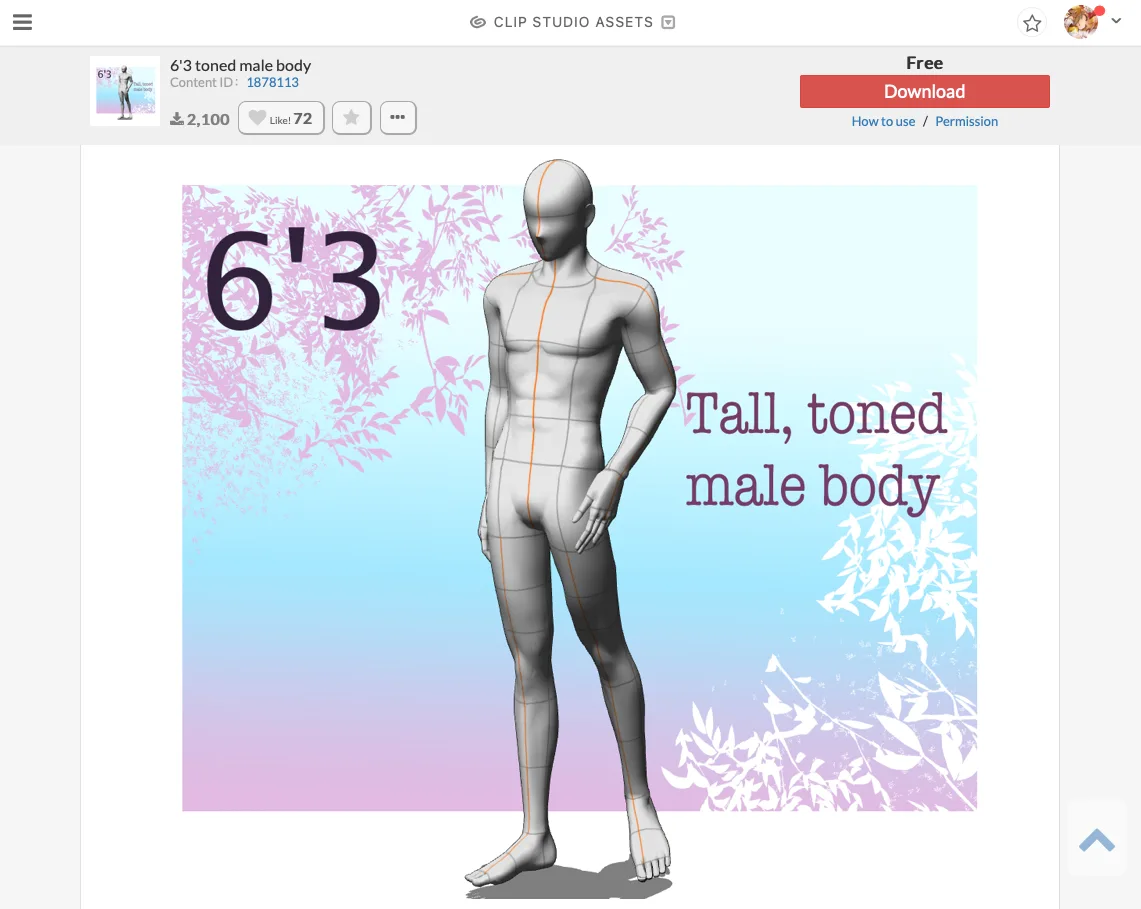
7. 6'3 toned male body
Content ID:1878113
Price: FREE
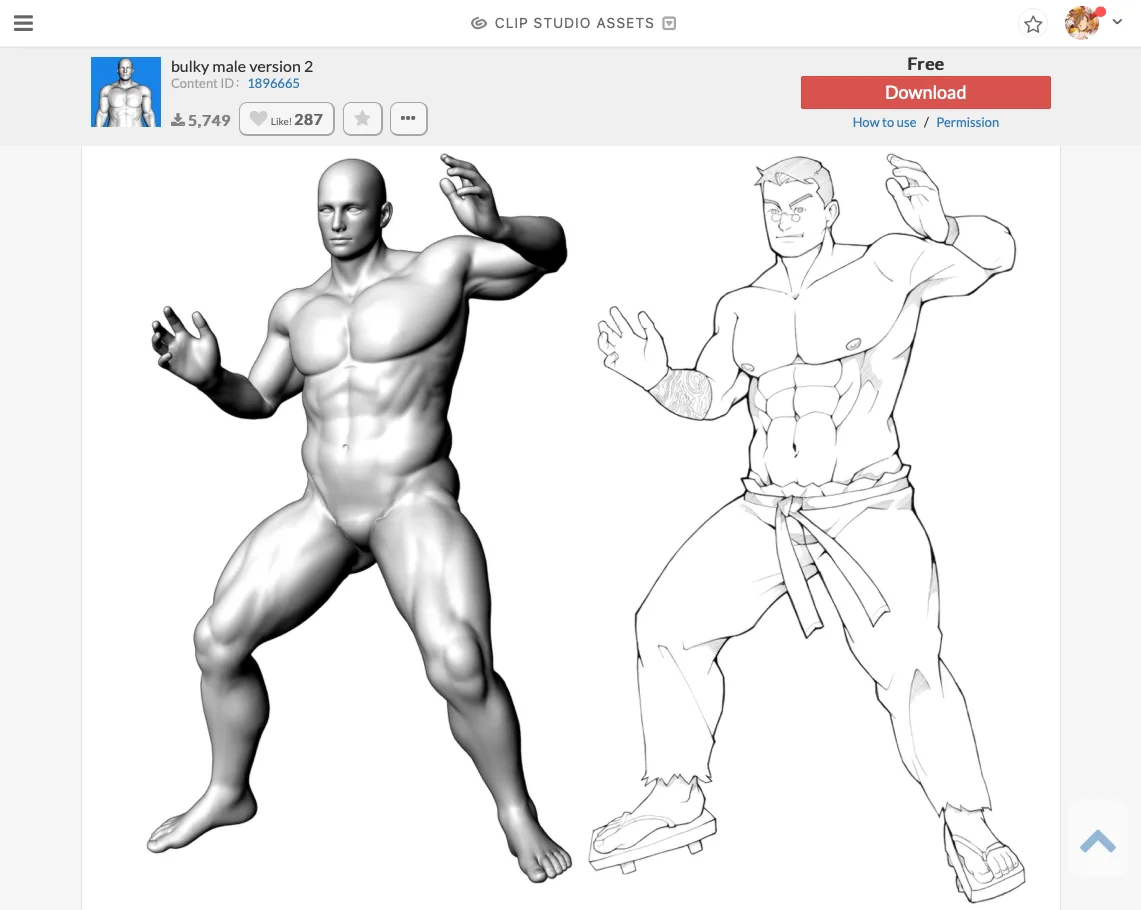
8. bulky male version 2
Content ID:1896665
Price: FREE
Recommended Poses
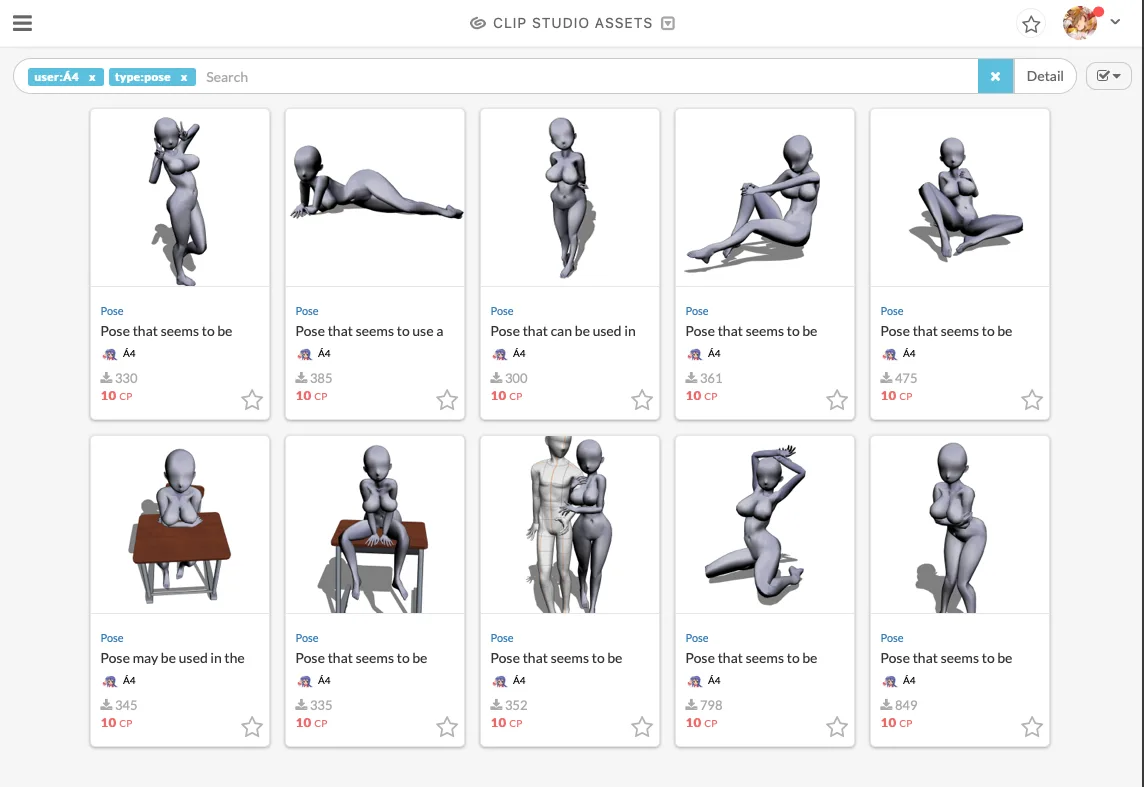
1. Poses from Á4
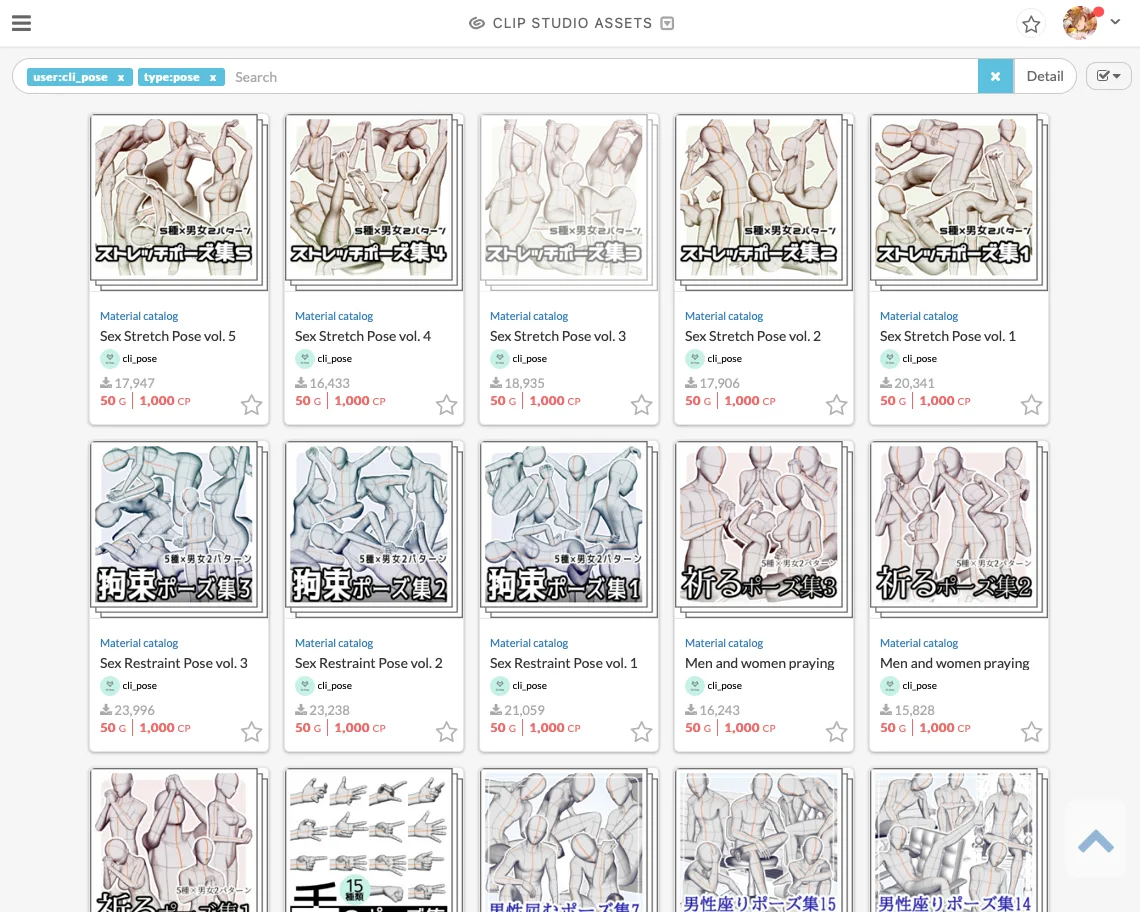
2. Poses from cli_pose
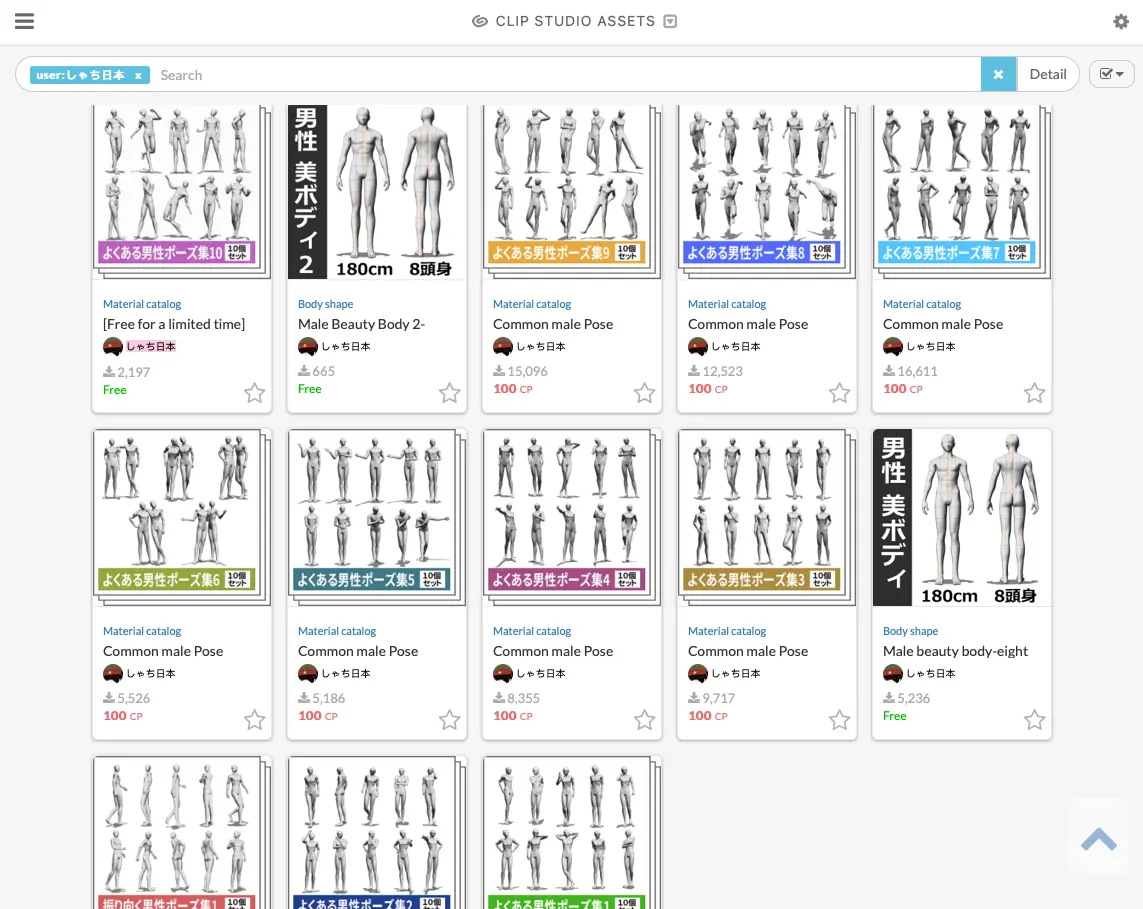
3. Poses from しゃち日本
4. Free poses in Clip Studio Asset Store
How to adjust 3D models in Clip Studio Paint?
In this topic, I'll walk you through the fundamentals of using 3D models in Clip Studio Paint from the ground up. You'll need to know how to download and import the 3D model to your canvas first, and then I'll show you how to adjust the model's stance and camera angle to suit your needs.
Step 1: Download the 3D model and poses from Clip Studio Paint Asset Store
3D models and poses can be downloaded from Clip Studio Paint Asset Store to use in your canvas. There are both free and paid models. Be sure to select the high quality one for your project, as poor quality assets won't help you improve the artwork quality.
Don't forget the list of recommended 3D model I gave you earlier. It'll help you find the proper 3D models and poses easily.
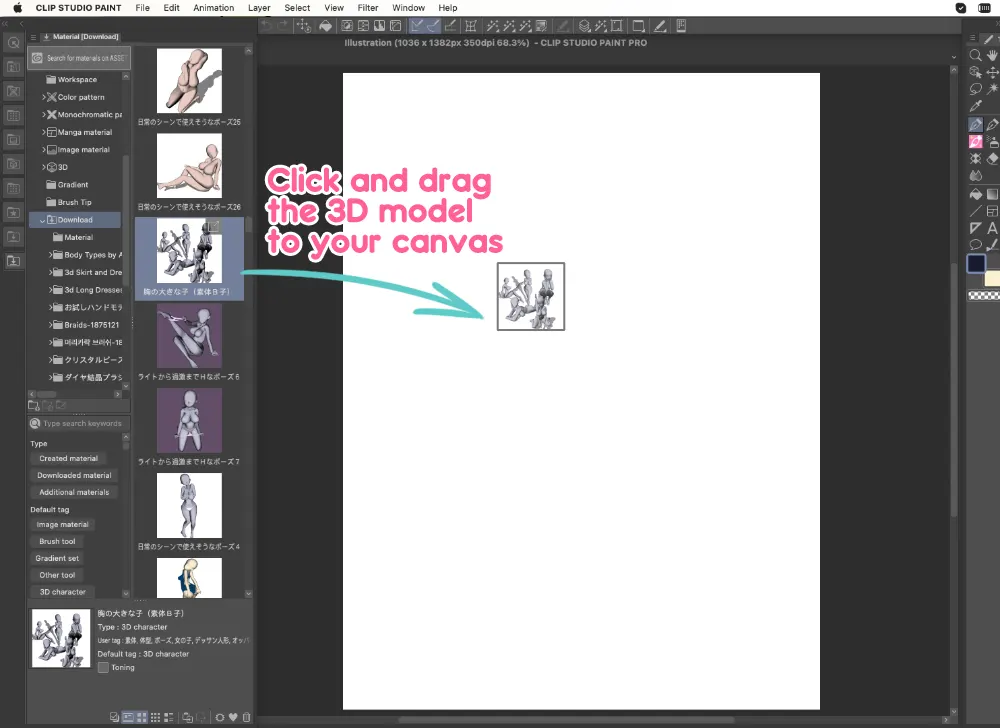
Step 2: Import your 3D model and pose to the canvas
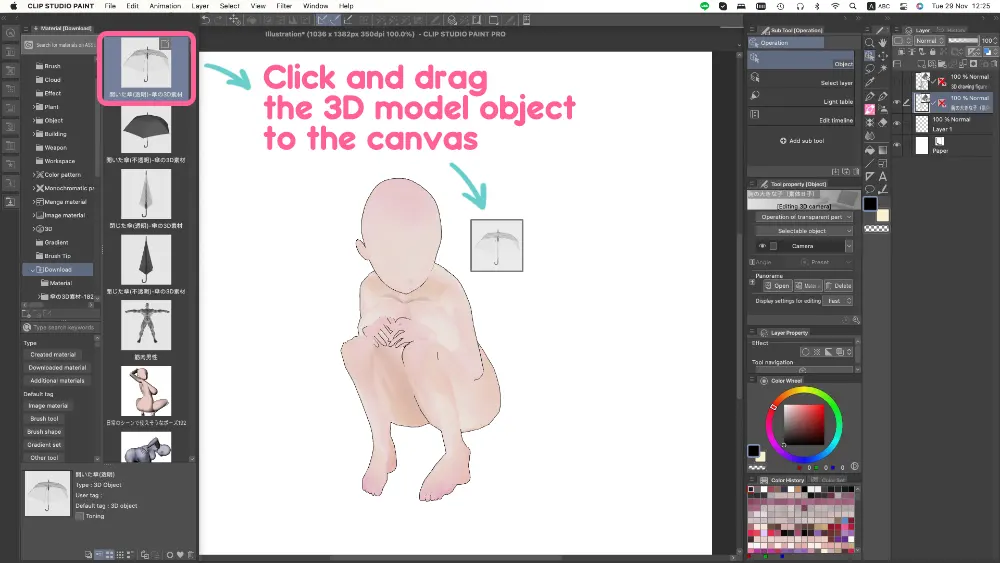
After downloading the model and poses, you need to import them into your project. Simply open the “Download” folder in the “Material” tab and drag the 3D model to your canvas.
Then, click and drag the downloaded character's pose onto your 3D model.
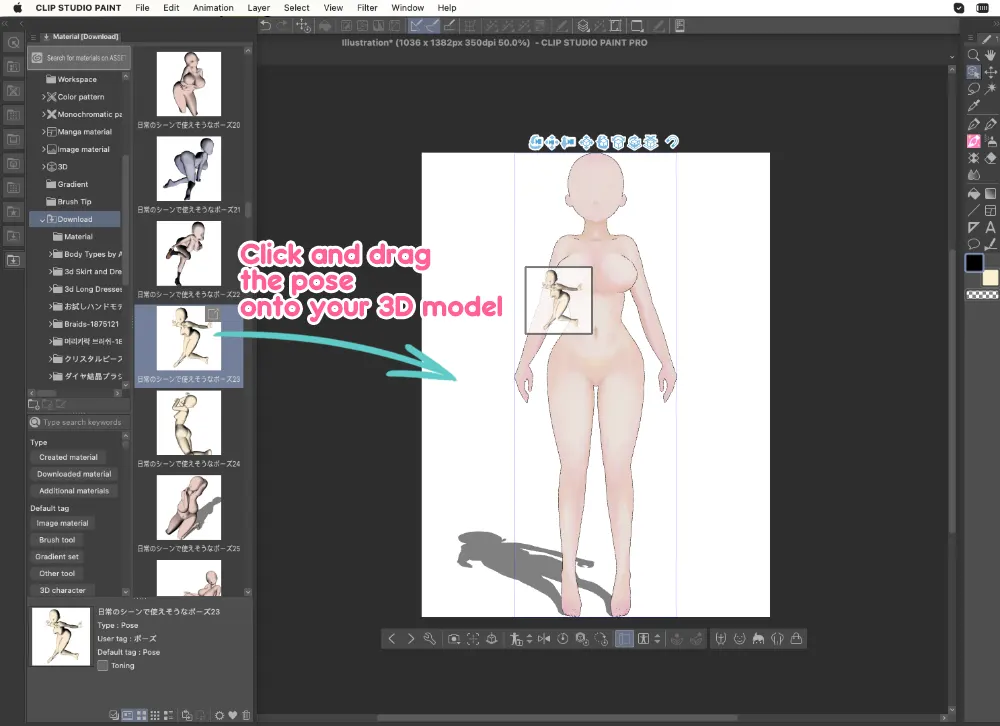
The pose will be imported to the 3D model and it'll look like this.
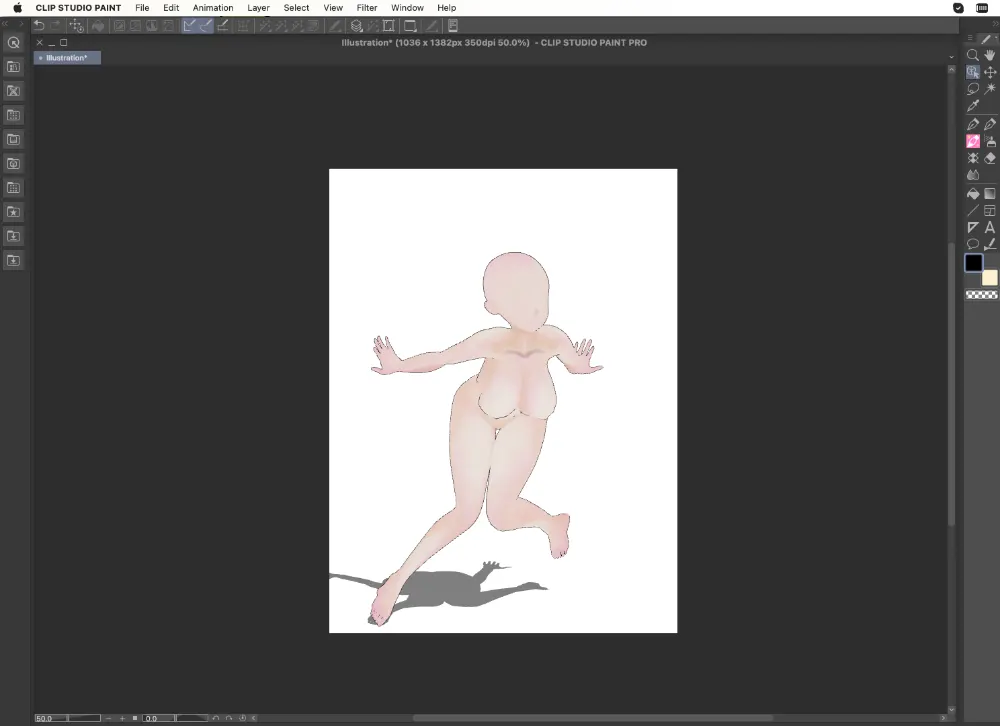
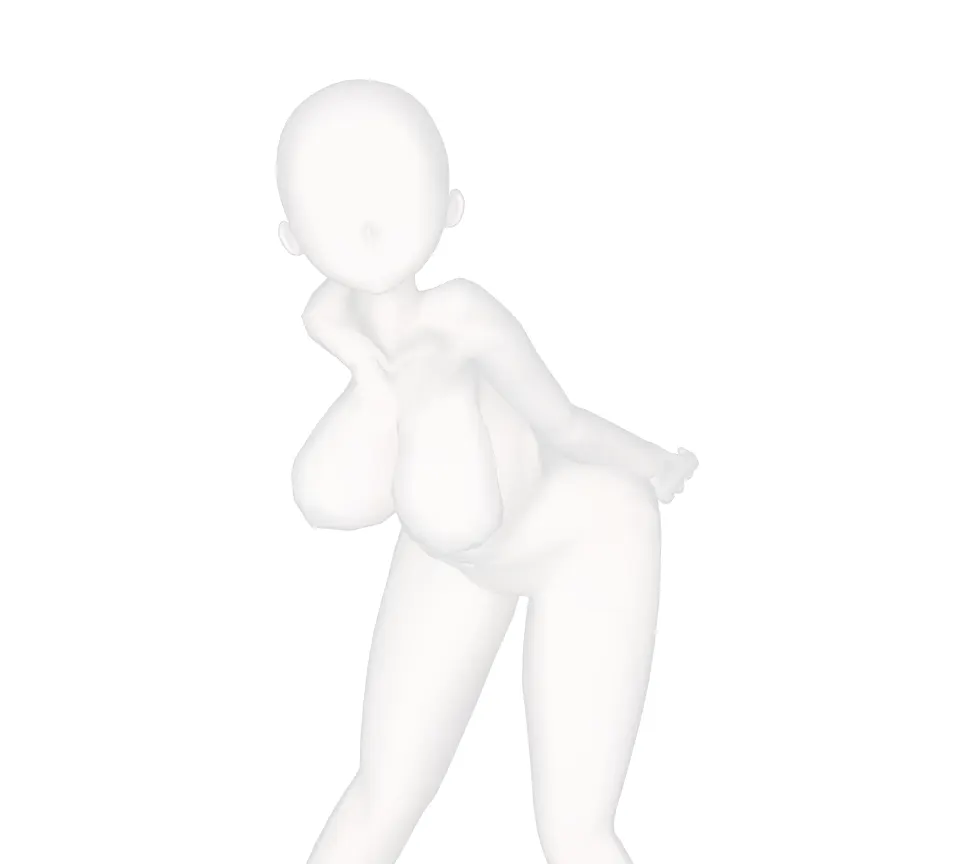
If you only import the posture without importing the 3D model first, CSP will choose the basic male 3D model for you, resulting in hilarious outcome like this if the pose is for female character. 😂 LOL
If you want to applypre-made hand pose to your 3D model, you can do so by using the same click and drag method.
Step 3: Edit a 3D model pose
Here I'll show my favorite 3D model control in Clip Studio Paint that I constantly use. Remember all of this, and you'll be able to change the composition and pose of the character, as well as any other components of the 3D model.
Basic camera and 3D model control to make your life easier
- Rotate camera

- Pan camera
- Zoom in/out
- Move the object
- Rotate the object
- Rotate the object to the left and right
- Move the object around the scene
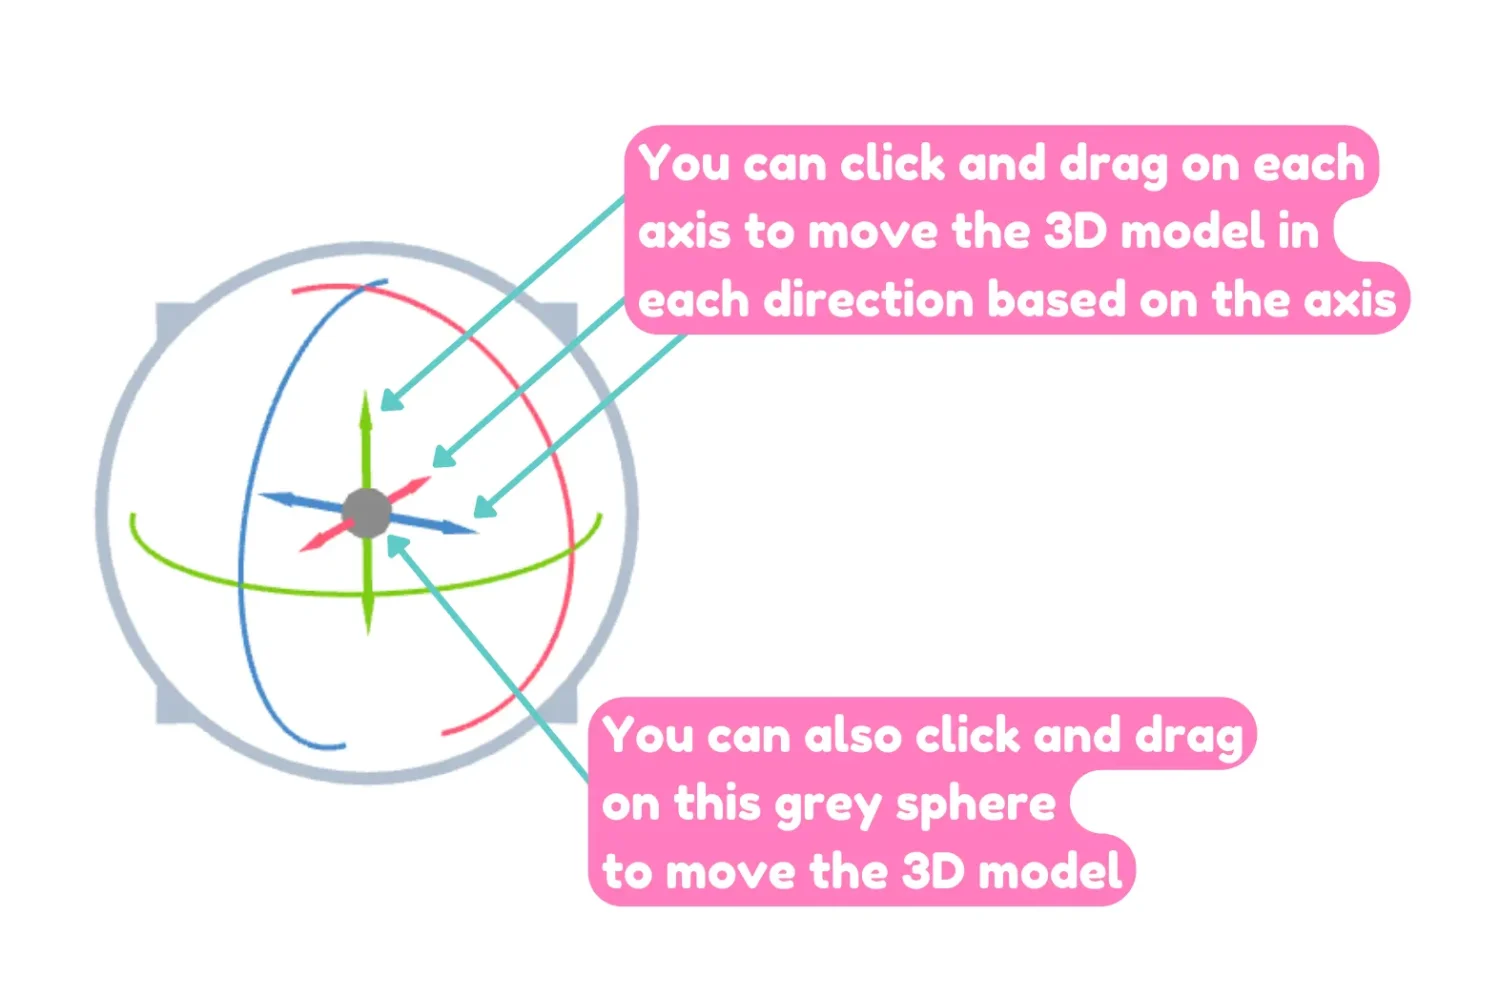
- Move the 3D model using the axis controller
- Perspective adjustment: Use mouse scroll wheel to adjust the perspective.
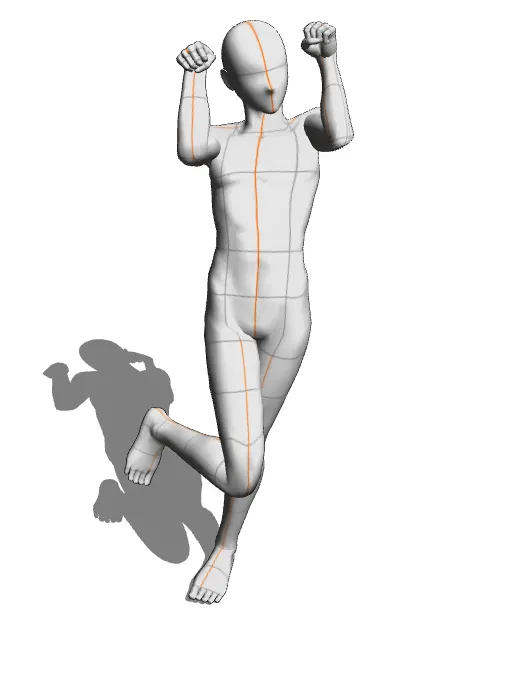
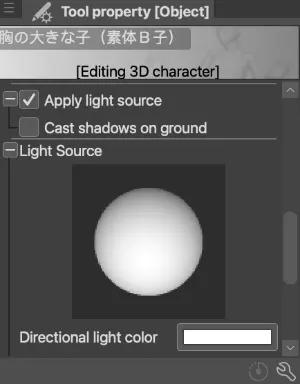
- Light adjustment: Click and drag on the sphere in the tool property panel to adjust the light source. You can also tick on the “Cast shadows on ground” check box to toggle the 3D model's cast shadow.
Basic 3D model adjustment
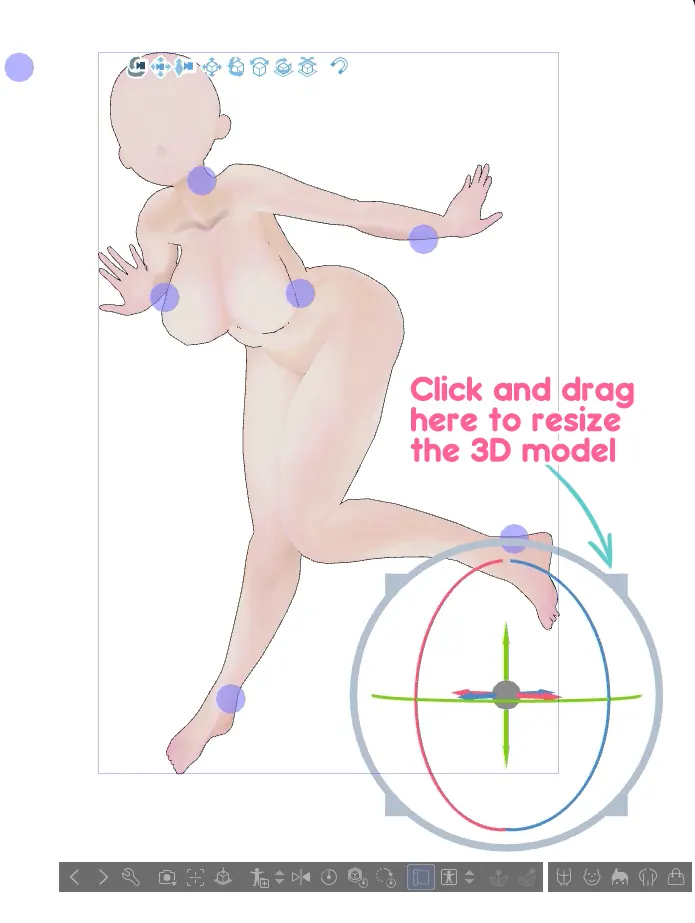
- Resize the 3D model
- Hide and show the 3D model: Click on the eye icon here to hide or show the 3D model. It'll be beneficial when you have more than one object in the scene.

- Edit the 3D model's body shape: If the model you're using is compatible with the shape adjustment, you'll be able to adjust the model as following.
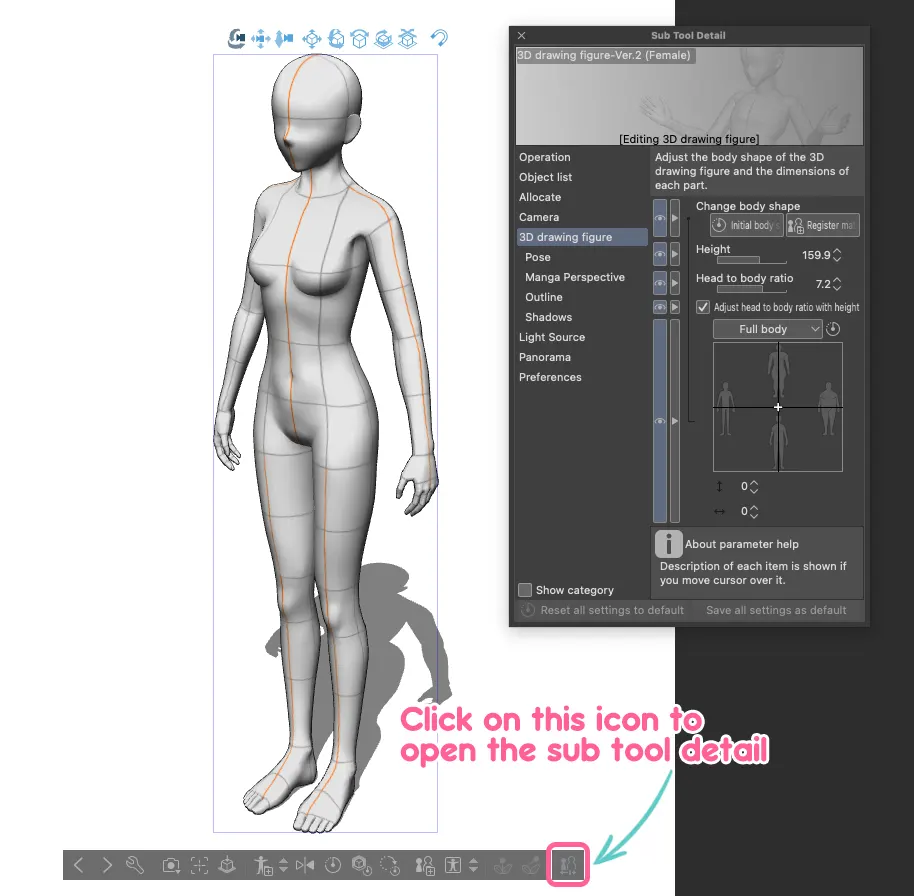
On the sub tool panel, you can adjust the shape, body height, and head to body ratio. Let's see how to use them in the picture below.
Basic 3D model pose adjustment
- How to edit the pose: You can click and drag the blue sphere to adjust the pose
Or adjust the posture by using the movement curve line or click and drag on each body part like the picture below.
How to add props to the model
First, just simply click and drag the prop to the canvas like you did with the 3D models and poses.
Then move the prop and adjust the size and angle.
To move and adjust the prop model, you can use the same method as you did with the character 3D model. You may download more 3D props from CSP asset store! It will help you a ton when you need to draw a complex object such as vehicle, weapons, and so on.
Step 4: How to trace the 3D model
In this section, I'll share some of my own tracing tips. I don't trace everything from the 3D model, but I attempt to alter the body and stance to make it less stiff. If you're not familiar with the anatomy, you can use this tracing method to practice!
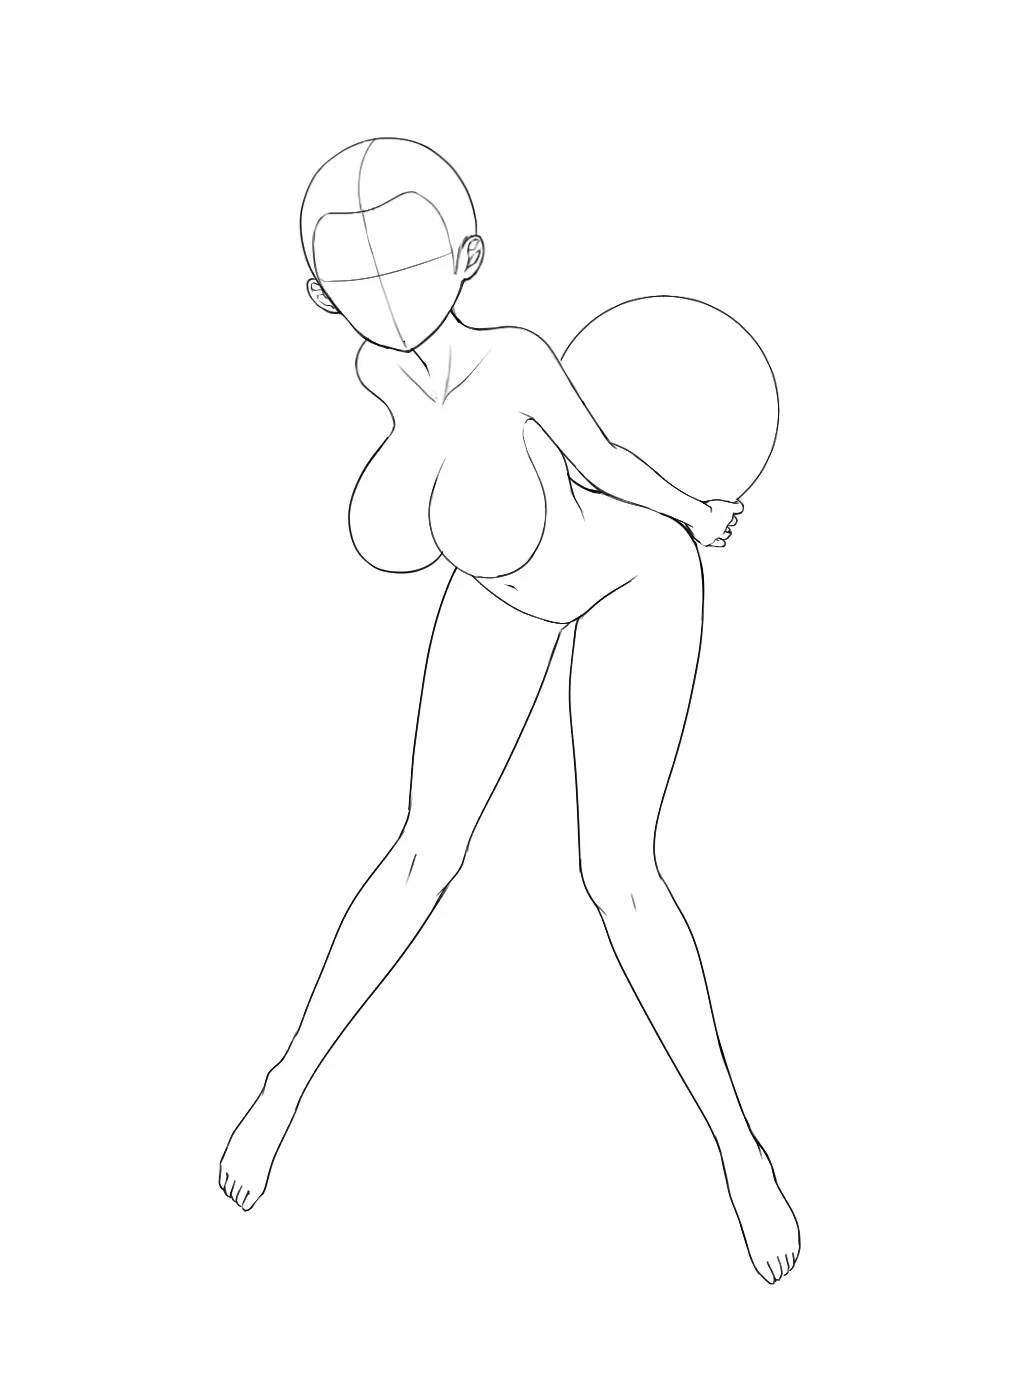
First, I'll reduce the opacity of the 3D model layer.
I start tracing the 3D model from the the simple body shape. While tracing, I inspect some parts that the 3D model look off and edit them. You may use reference photos to help you with this process.
My trick is to feed the 3D model image to NovelAI, then use the image-to-image function to produce the particular reference, as seen in the image below.
I use the AI generated image as a reference when tracing the 3D model. This helped me a lot to understand the perspective of the character and pose. Plus, I can use it for lighting and shading reference.
How you can use 3D model in the artwork creation process
3D models can be used in artwork creation process in a few different ways. Here is how I actually use them to improve the illustration quality and save time.
Using a 3D model to adjust the composition and character posture
A 3D model can be a helpful tool when adjusting the composition and character posture of a scene. By being able to see the scene from all angles, I can make changes to the positioning of characters and objects to create a more balanced and aesthetically pleasing composition.
Additionally, by seeing the characters in three dimensions, I can more easily experiment with different poses and postures to find the most interesting angles for my drawing.
Using a 3D model as a base for complex objects drawing
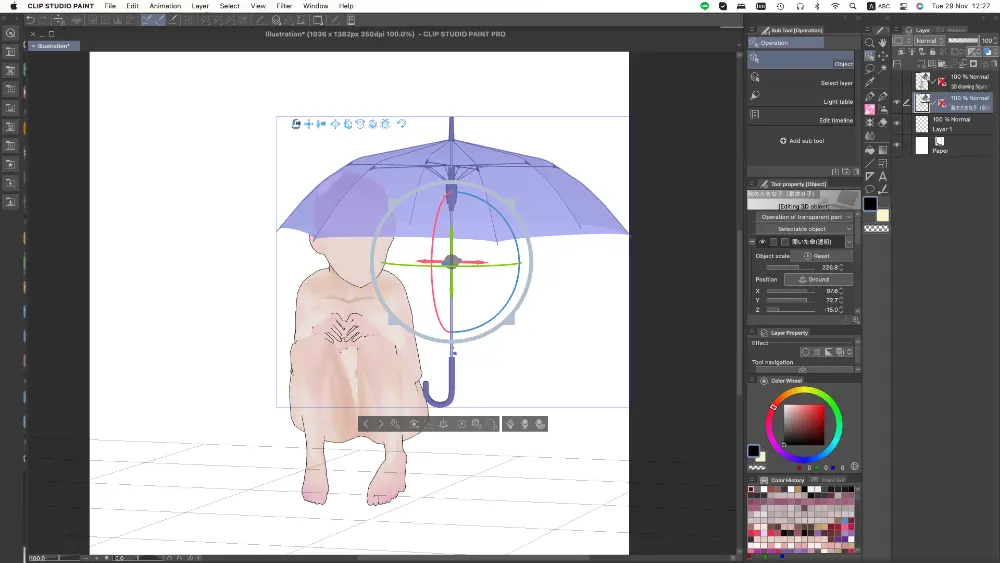
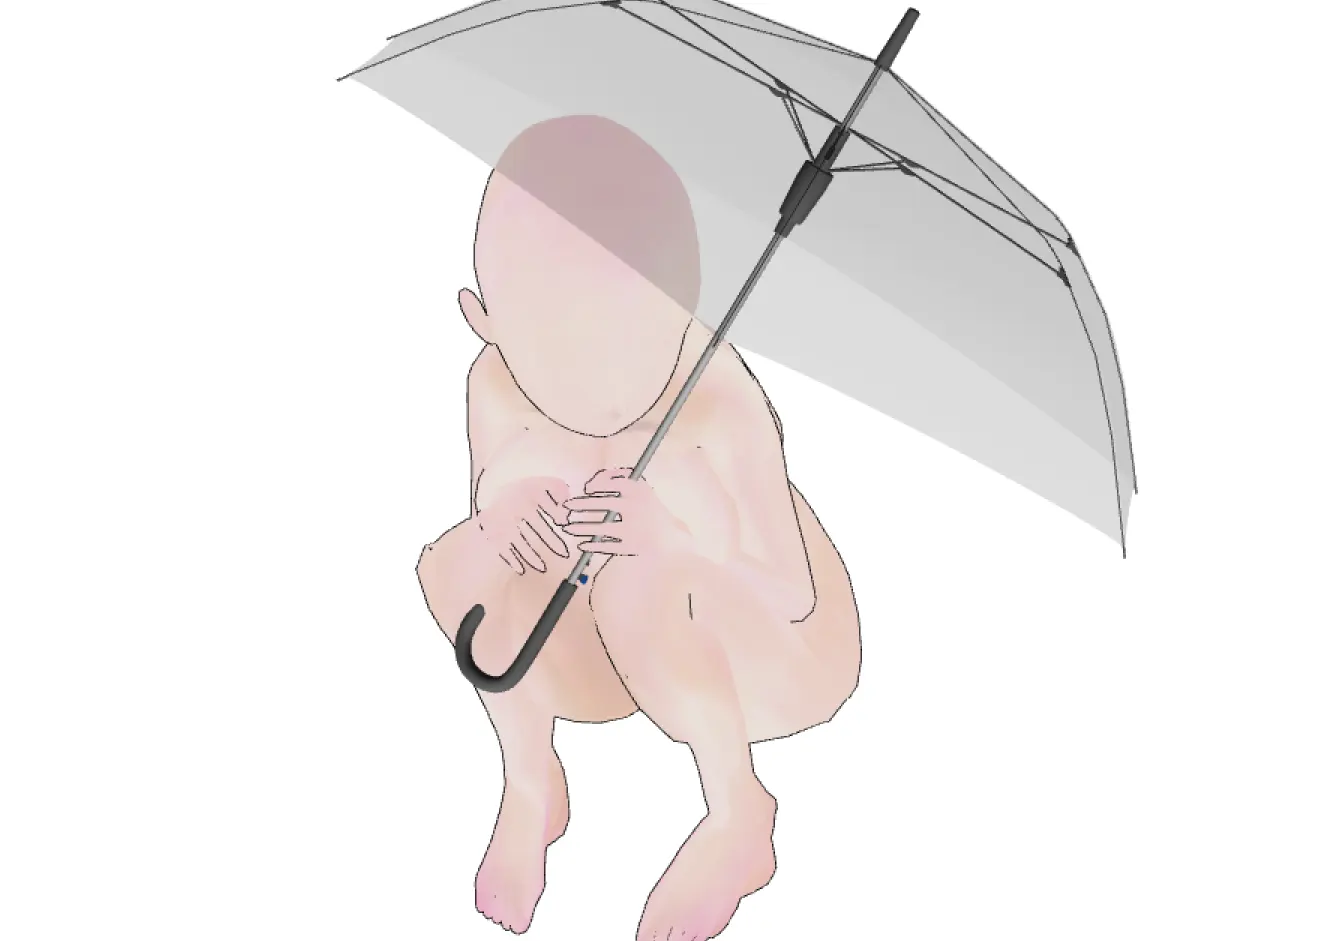
When it comes to drawing complex objects such as an umbrella, a sword, a chair, a couch, a gun, and so on, I always start with a 3D model as a base.
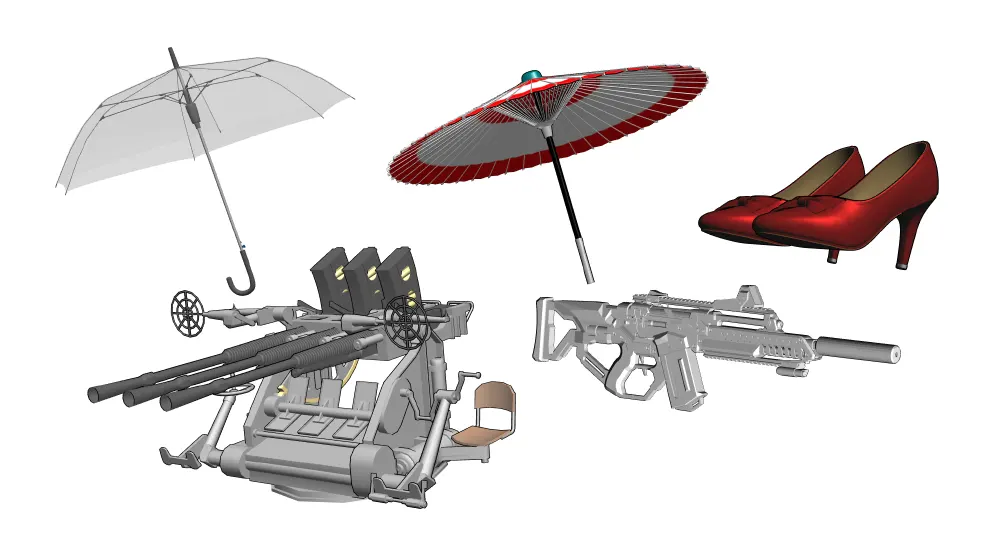
This can be a great way to get a feel for the overall shape of the object and identify the perspective when drawing it. By starting with a 3D model, you can save a lot of time and frustration.
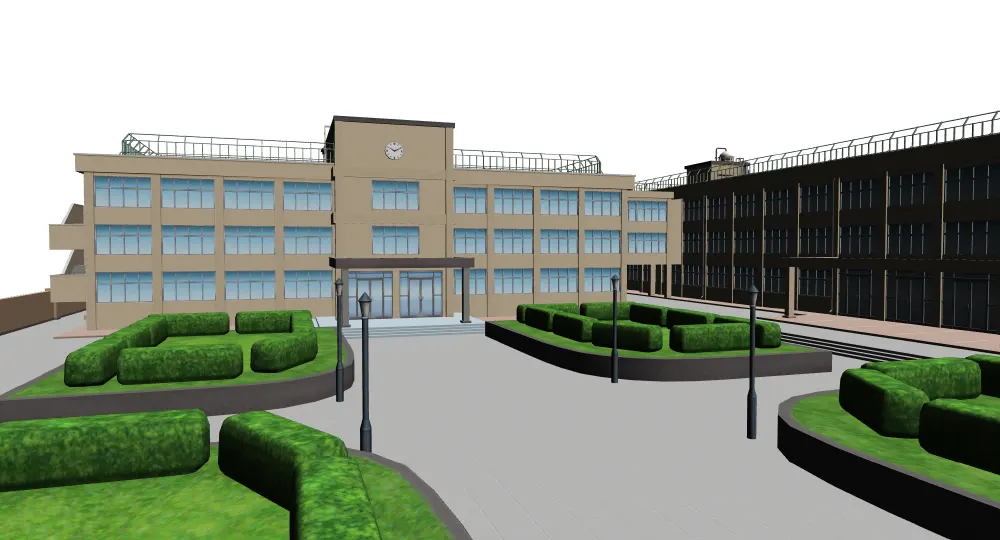
Using a 3D model as a base for background drawing
When I need to draw a character in a complex building scenario, I always trace the 3D model of buildings or use it as a base for background drawing. This assists me in getting the proportions and perspective correct, making the drawing process much easier.
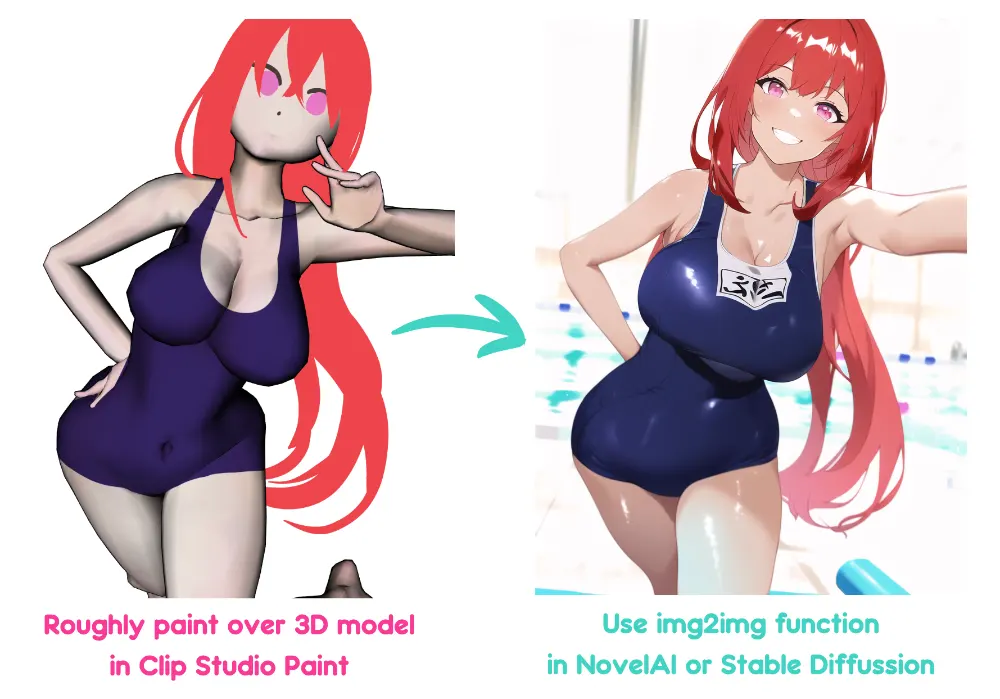
Using a 3D model combine with the AI to generate the character pose and character design ideas
I can generate a wide range of character designs and postures by employing a 3D model in combination with AI. I use Clip Studio Paint to paint over the 3D model and then upload the image to NovelAI to use the image-to-image function. This is a wonderful technique for me to come up with new ideas for my paintings and character postures.
Other 3D model platform you can use (free and paid)
If you don't have Clip Studio Paint, you can use the 3D model on another platform and screen capture it to use with your drawing. Here is a list of 3D model platform you can use (both free and paid).
Eventually, 3D models are an excellent tool for artists. They may be used to design backgrounds, characters, and drawing guidelines. A 3D model may be used to produce photos using AI. Furthermore, it may be utilized as a basic drawing, which significantly decreases the workload and working time for artists. However, there are still limitations to using 3D models in Clip Studio Paint, and we still need a basic understanding of anatomy and composition to use them successfully.


Finally, if you like art tips and content like this, feel free to subscribe to my weekly newsletter
I share my anime art tips and experiences in my digital art career in a weekly email. You'll get the insight and behind the scene of the art career! Really recommend if you're a beginner anime style artist.
Thank you so much for reading this post! I really appreciate your visiting and using your valuable time reading my content!
Much Love 💖

Want to know how to start your anime art journey?
Download my ANIME ART STARTER GUIDE and start your artistic path right away for FREE!