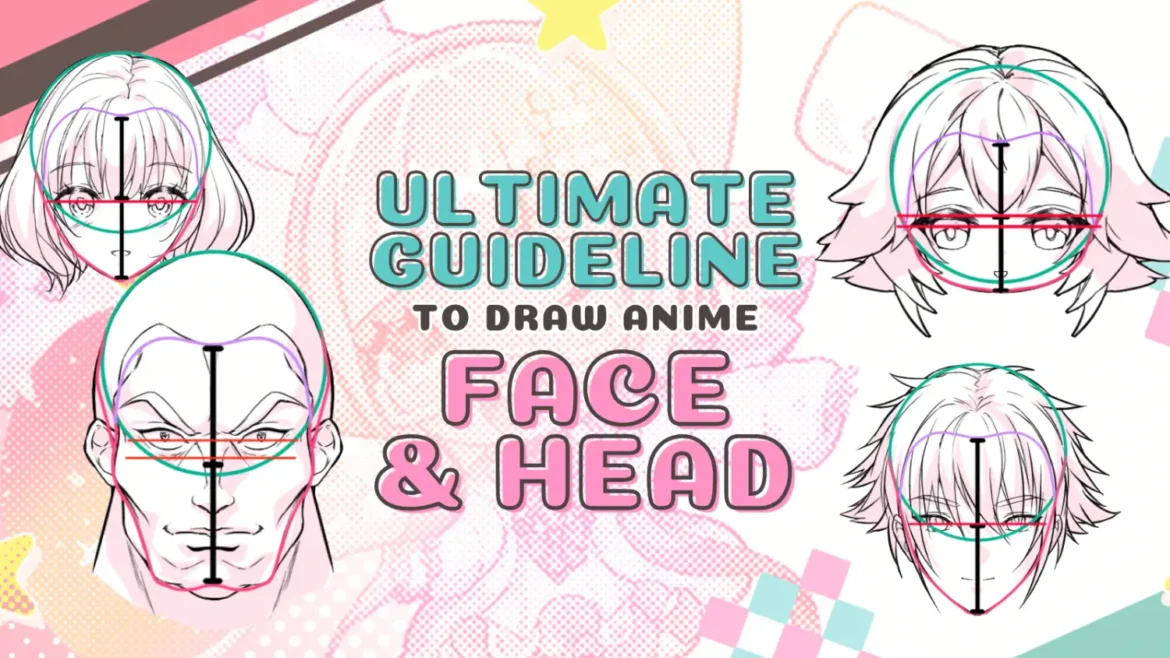
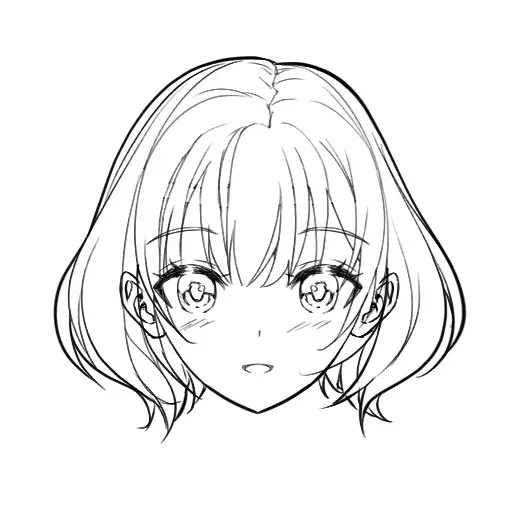
Ever wondered how to draw an anime head and face? Been there myself!
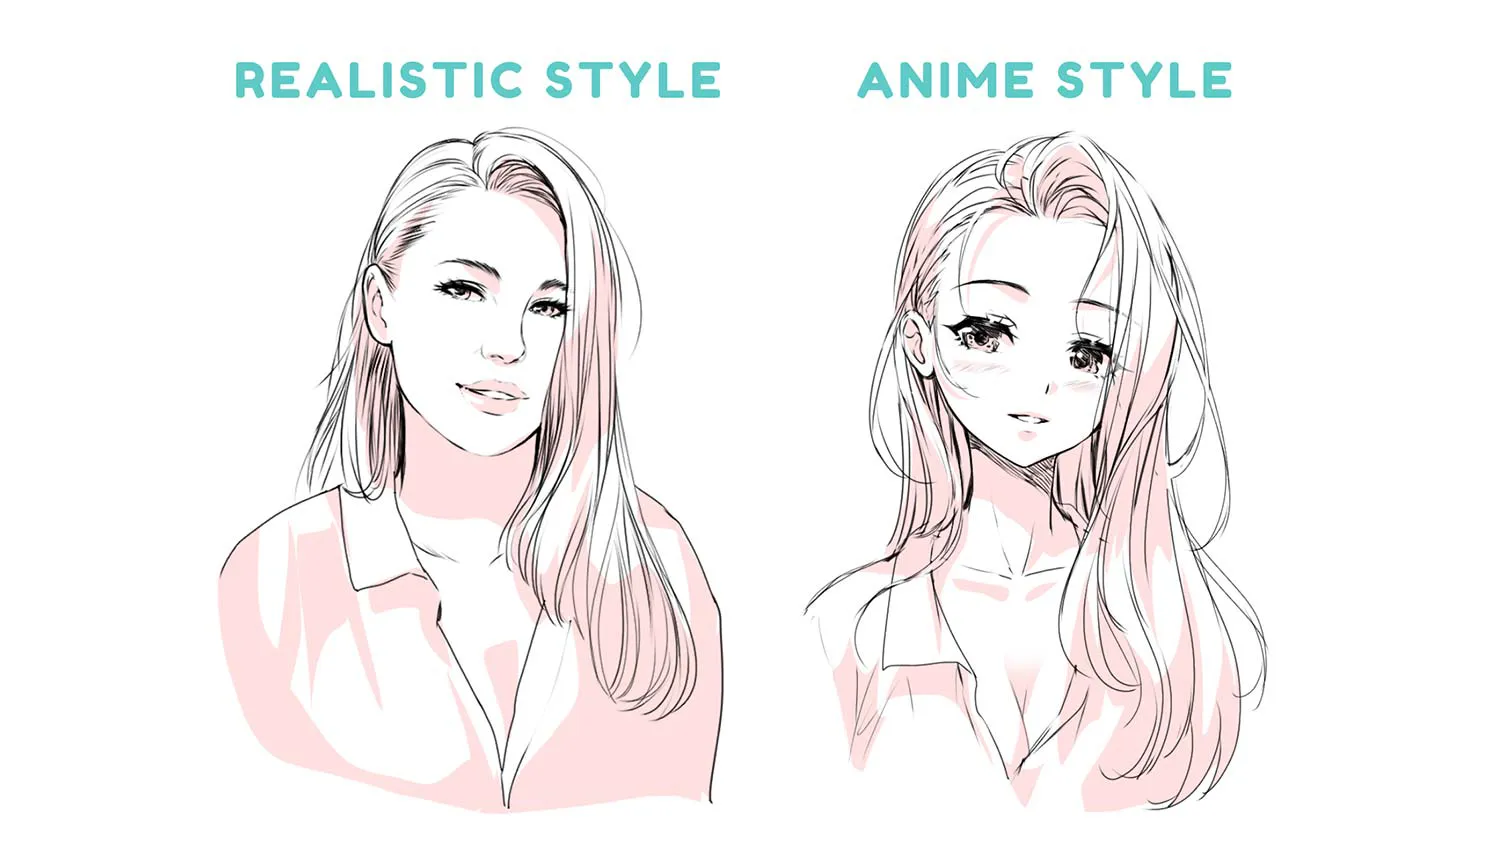
Drawing in the anime and manga styles is quite different from the realistic approach. You can't apply all those realistic rules here. Anime characters have their own set of drawing principles.
But don't worry. In this blog, I'm spilling the secrets to mastering the perfect anime head and face.
In this guide, we will uncover the tricks of proportion specific to anime head drawing. It will help you understand the structure better and improve your drawing skills.
It's your ticket to a better understanding of the anime head's structure and, of course, an easier way to draw it.
Let's learn how to draw anime heads and faces with me!

Why Learn about Head Structure and Proportion?
Before we jump into the exciting part of drawing, let's first grasp the basics of structure. Afterward, we'll delve into the fundamentals of proportion.
You might wonder, ‘Why is this so crucial?'
Well, every drawing method relies on these foundations. It's akin to constructing a house. You begin with the foundation, then the structure, and finally, you get to decorate. (You can't adorn a house if it's not finished, right!?)
Drawing anime heads follows a similar principle. Start with understanding the anime head structure.
Then, delve into the proportions of facial features. And then you're ready to sketch and polish your anime character's head.
Moreover, when you grasp this fundamental, using helping tools like 3D head models in Clip Studio Paint becomes much more easier and effective.
We'll cover that in detail in this post. Ready to level up your anime art skills?
Let's dive in!

Fundamentals of Anime Faces
Let's start with the fundamental structure that forms anime faces. By breaking down the core components, you'll gain a solid understanding of the head and face.
The Foundation of an Anime Head
Let's start by breaking down the head into simple shapes.
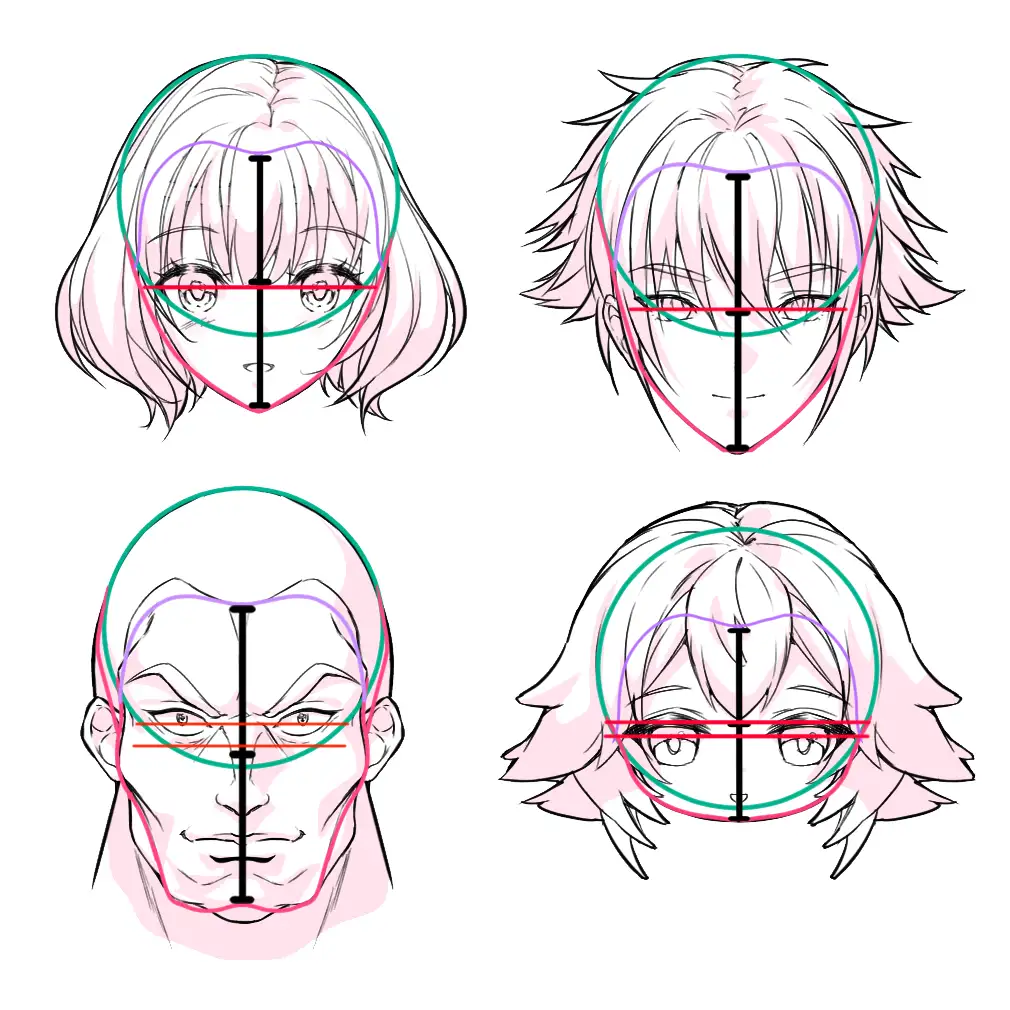
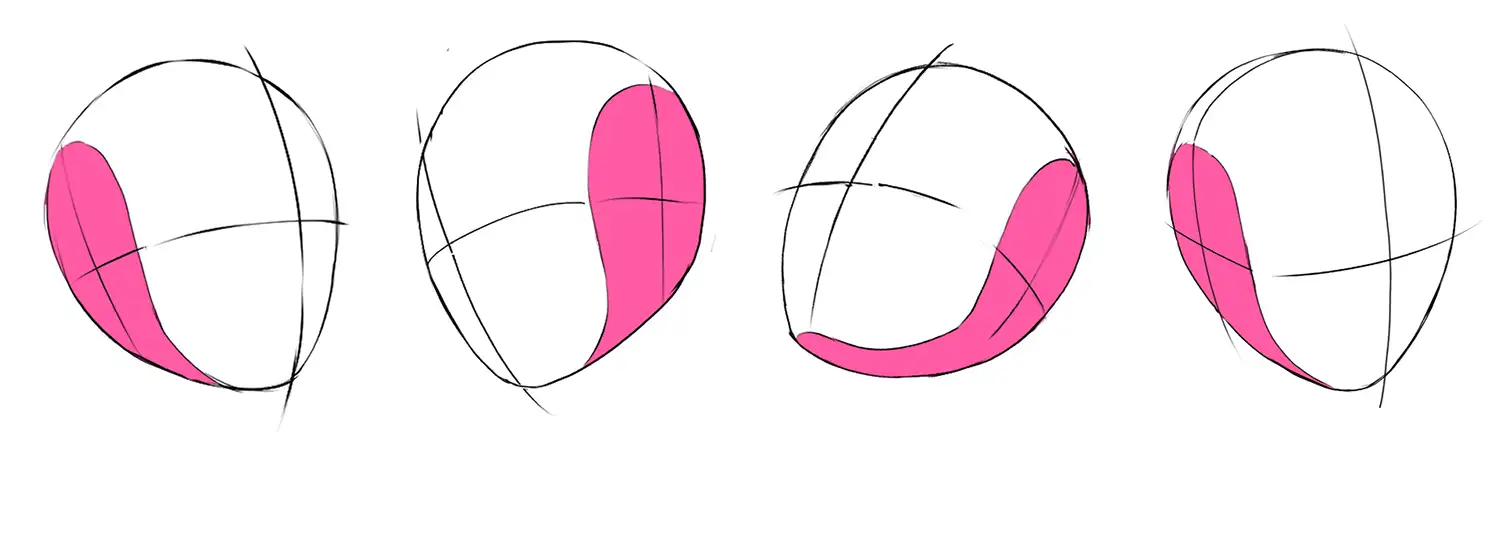
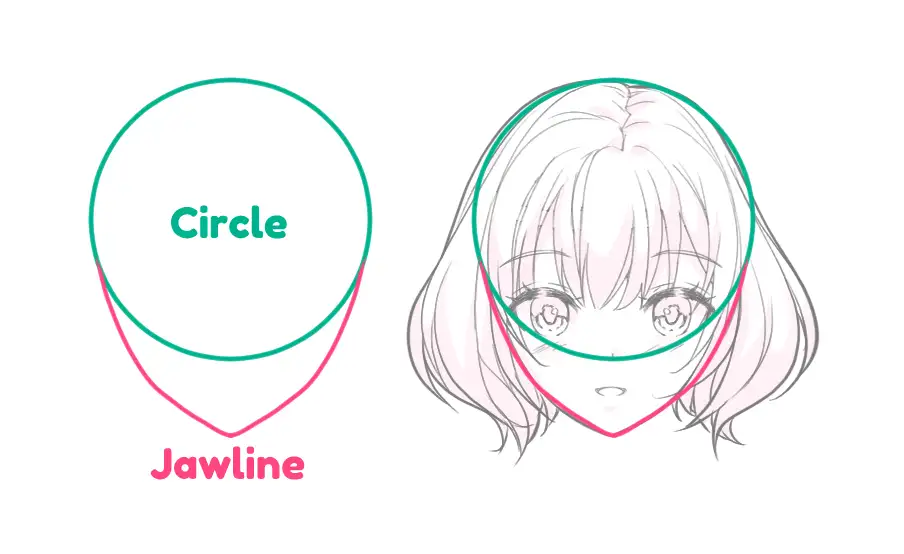
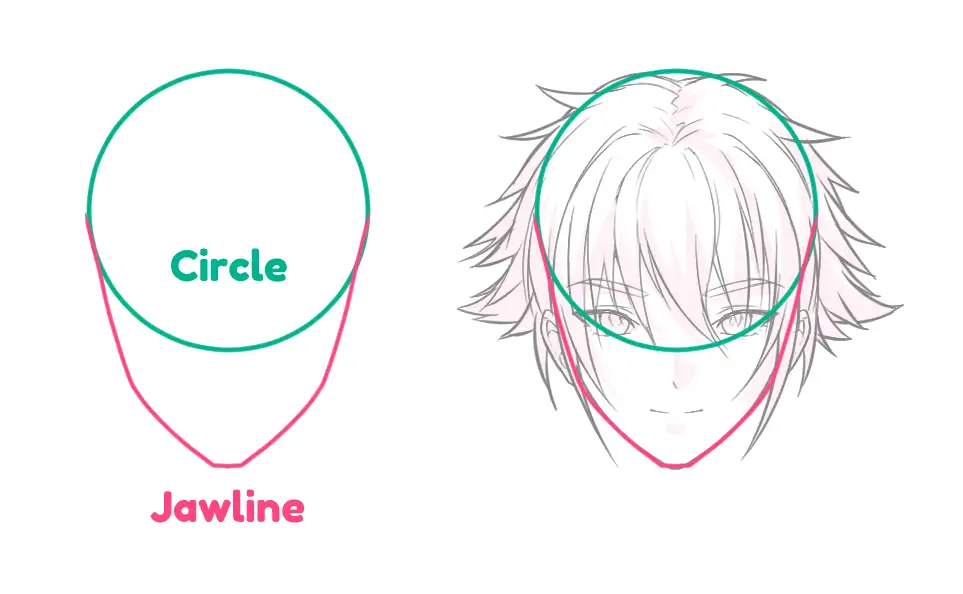
The head isn't a plain oval. Picture it as an oval that's cut off on two sides.
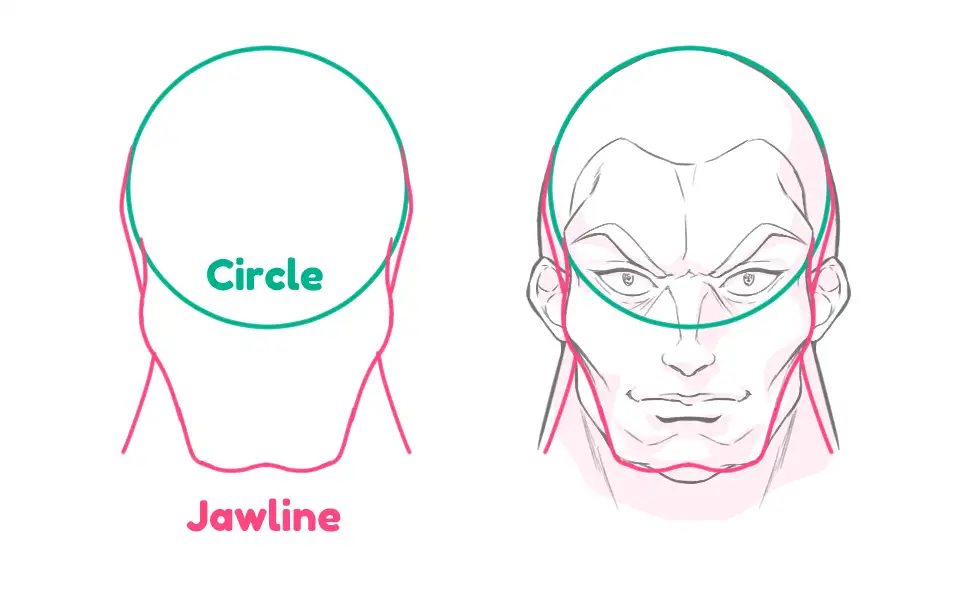
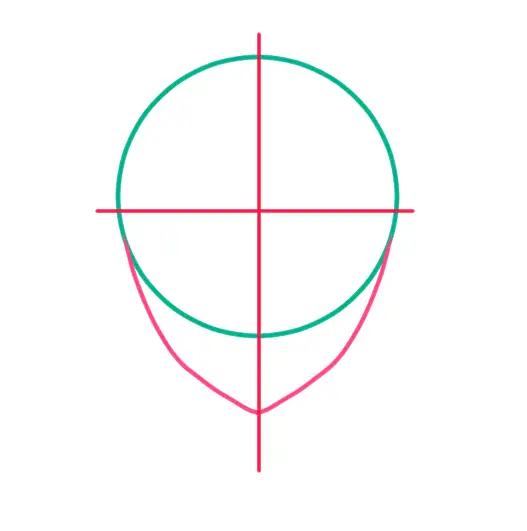
We'll split the head into two parts: the circle and the jawline. Check out the front view of an anime head below to see what I mean.
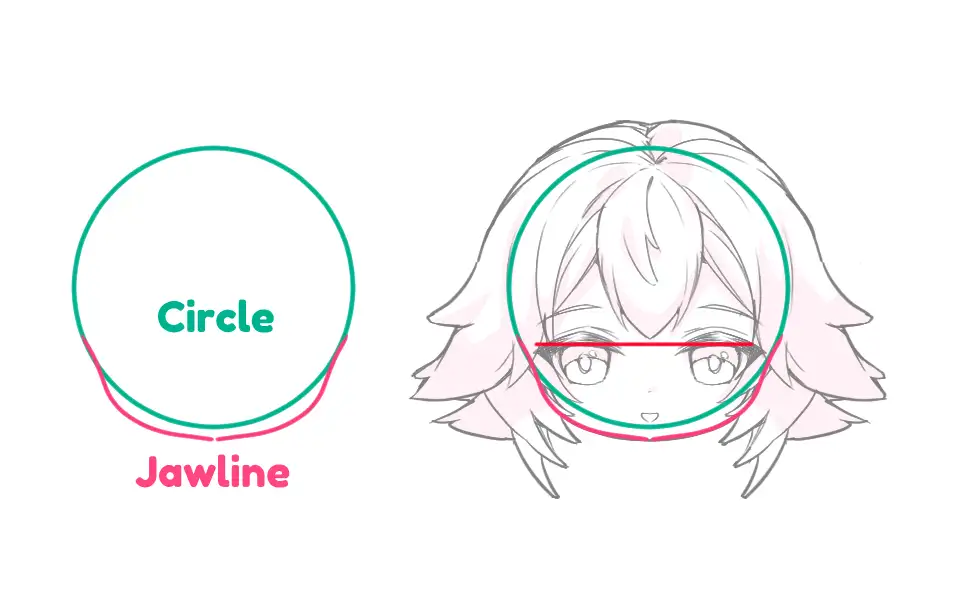
By dividing the head structure like this, you can tweak the jawline shape. This allows you to create various styles for your character's face! Let's inspect the jawline I drew in each character style below.
The Key Features: Eyes, Nose, Mouth, and ears
An anime face consists of four key features: eyes (plus eyebrows), nose, mouth, and ears.
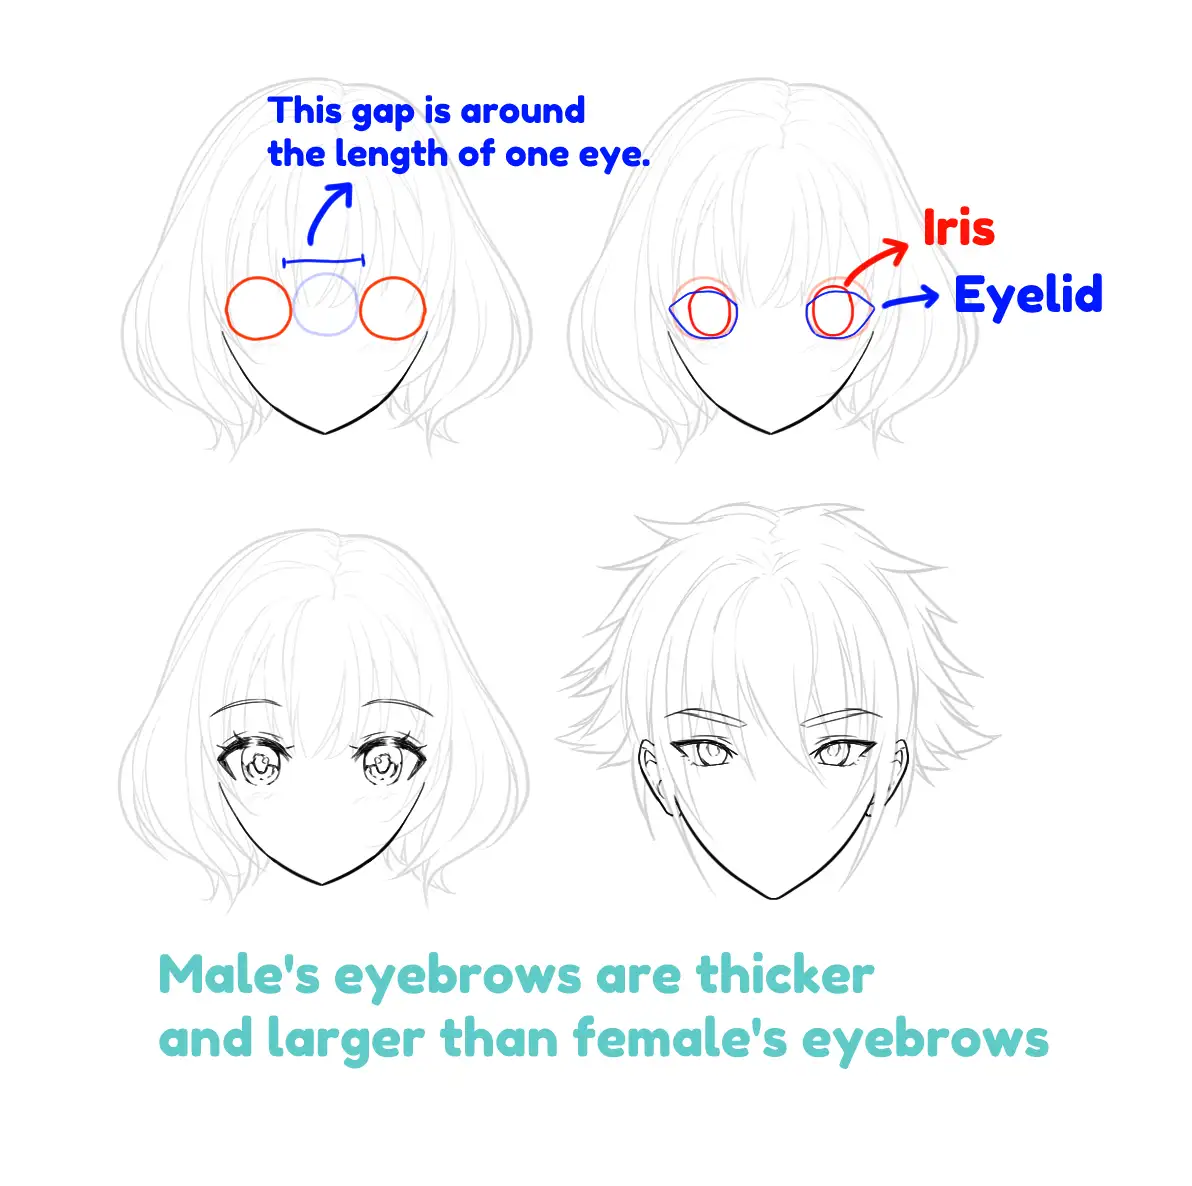
Now, these anime facial features aren't playing with realistic proportions. Even if they borrow a bit from reality, the way you sketch them is a whole different ball game. Check out the image below for a visual tour.
- Eyes: Imagine a little socket on the head where the eyes chill. Start drawing the eyes using sphere shapes. Then add the eyelids onto them. For female characters, pop the eyebrows slightly above the eyes. But for the male anime characters, go big and bold—enlarge those eyebrows and make them thicker.
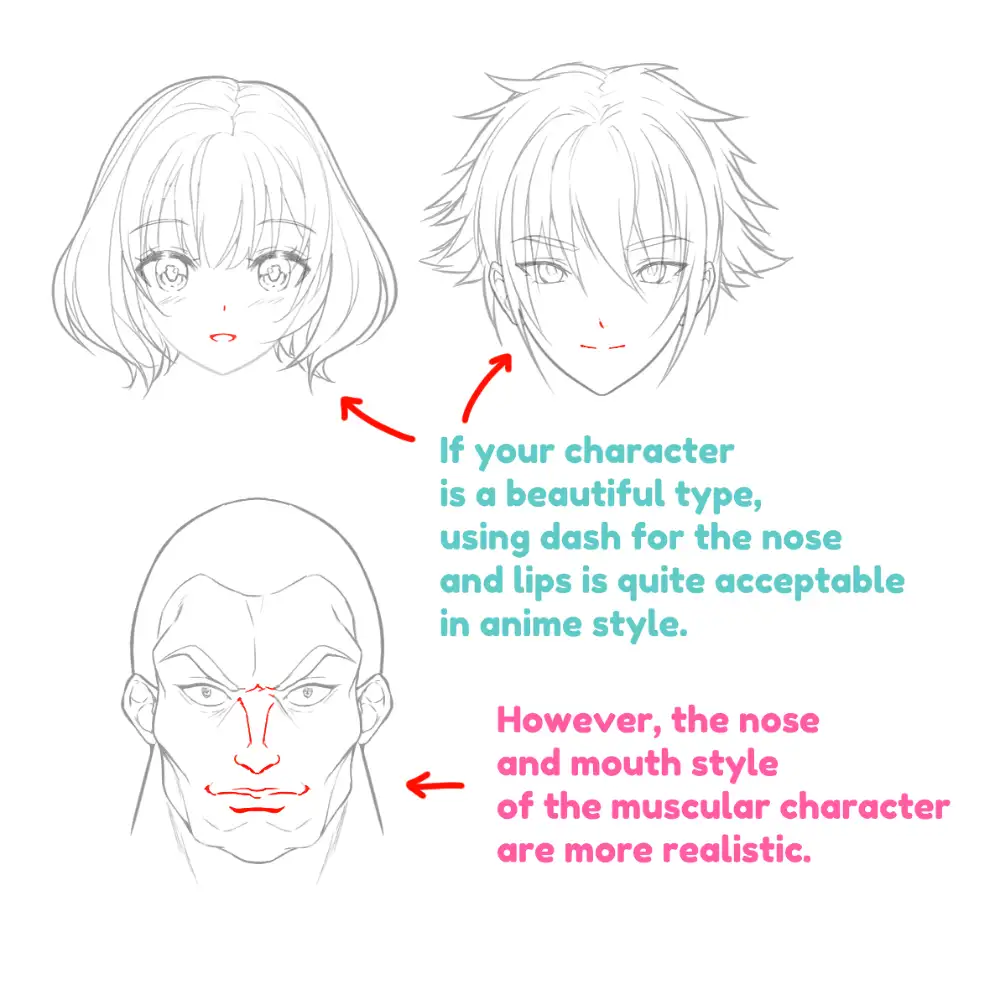
- Nose: Anime-style noses always get the super-deformed treatment. Just a single line does the trick for female characters. However, when sketching male characters, some artists sprinkle in a touch of realism.
- Mouth: Anime mouths also get a dose of deformation. Draw that mouth using a triangle shape or a single line. That's all you need for the anime mouth vibe! Bottom lip? Totally optional in anime art, but if you're feeling it, a tiny single line underneath does the trick.
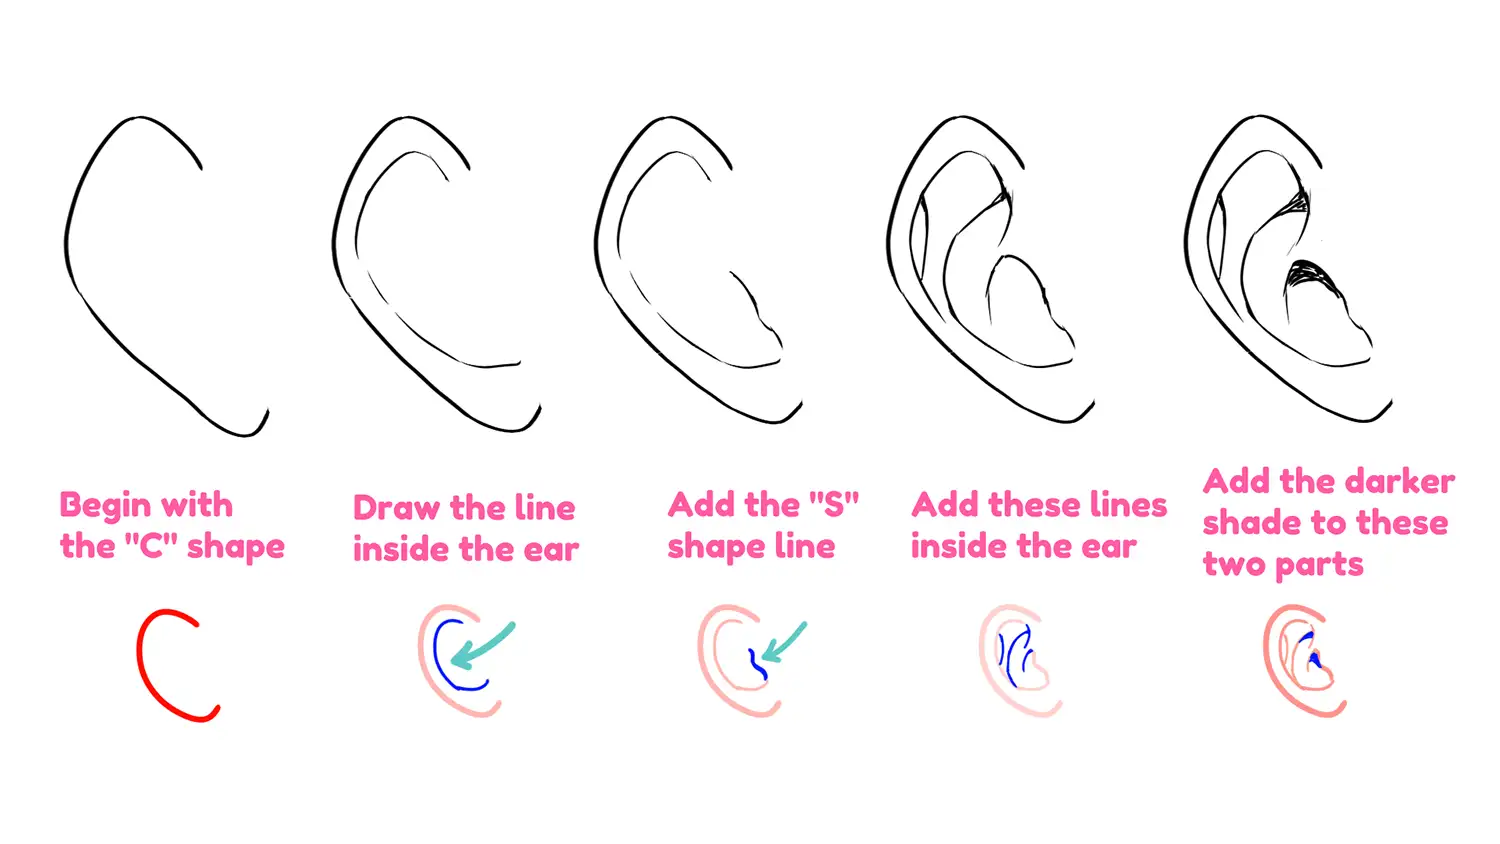
- Ears: Ears always be drawn using imagination. I don't fuss too much about realistic structures when drawing ears. You can even hint at them with just a few simple lines, like I'm showing you below.
Next up, let's figure out how to place these facial features on your anime character's face in a way that's pure magic! That's what we call facial proportion!

Perfecting Proportions in Anime Face Drawing
Similar to the basic art composition, the face also has its own composition principle. Mastering the perfect face proportions is like fine-tuning the placement of facial features.
It'll allow you to craft a balanced and appealing anime face. This results in an impactful character.
Placement of Facial Features
Let me introduce you to my personal technique—the “Half Rule“!
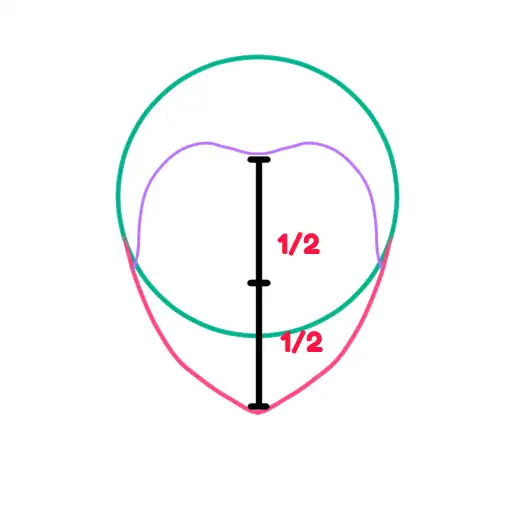
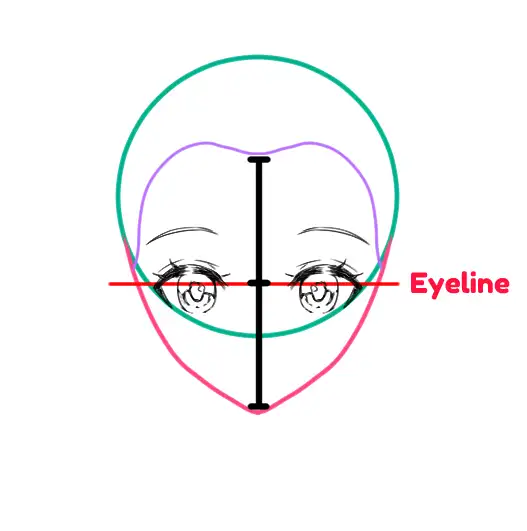
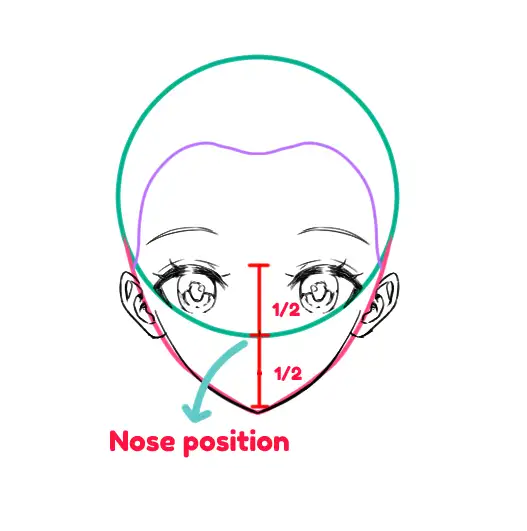
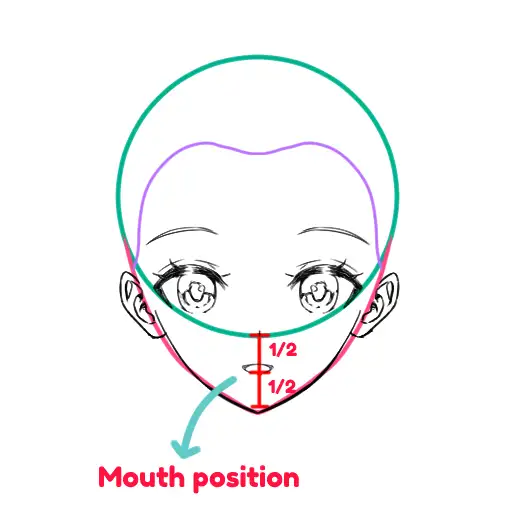
The Half Rule involves dividing the character's face in half, then half again. We do this to perfectly position the eyes, nose, and mouth.
Check out the image below for a visual guide.
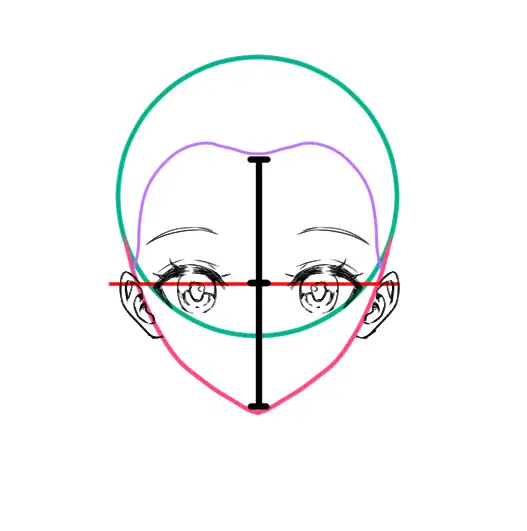
- First, I'll split the space from the hairline to the chin in half and place the eyes.
- Then, I'll divide the space between the eyes and chin in half to position the nose.
- Finally, I'll split the space between the nose and chin in half to place the mouth!
Super easy, right?

Step-by-Step Tutorial
Once you've got the basics of anime heads down, why not join me for a step-by-step tutorial?
Practicing together like this is way more effective than just reading about it!
We're diving into drawing a front view head. Ready to bring out your pen and draw along with me? Let's get started!
Step #1: Sketching the Initial Face Structure
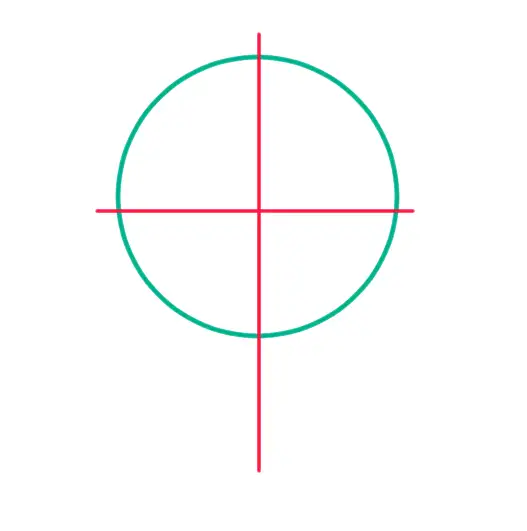
- Begin with a circle: The foundation of every head structure starts with a circle.
- Draw a vertical line and a horizontal line: These lines serve as guides, indicating the direction in which the face is tilted. In front view, they create a plus sign on the character's face.
- Incorporate the jaw line: Add the character's jawline and chin at the bottom of the circle, using the vertical line as a reference.
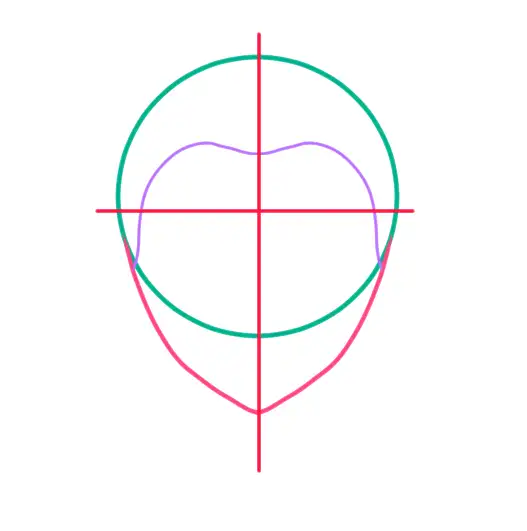
- Draw a hair line: This line marks the starting point of the hair. Drawing it is crucial—you must include it every time you draw the head. This way, you'll always know the precise area where the hair begins to grow.

Step #2: Placing Facial Features
- Let's bring in the Half Rule: Apply it by dividing the space between the hairline and chin in half. This section is where your character's eyes will go.
After you got the position of the eyes, you can now put the ears a bit below the eyes like this.
- Now, another half: Shift your focus to the nose. Divide the space between the eyes and chin in half and pop in the nose.
- Yes, one more half!: Now, for the mouth. Divide the space between the nose and chin in half, and position the mouth in this area. Easy peasy!
- Draw the hair!: After you put all facial features in place, it's time to draw the hair. And… DONE!

Eye Line Tips for Character Design
Check out this nifty trick that can totally transform how you design a character's face!
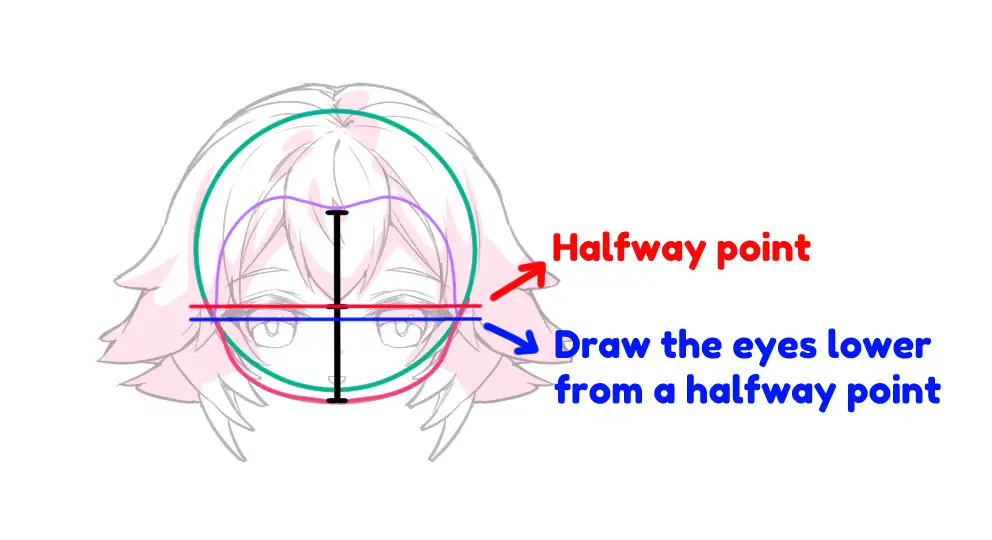
When experimenting with different character styles, like creating a male character, try shifting the eye line a bit higher from the halfway point. This tweak gives your character's face a slightly longer look, capturing the iconic style of an anime male face.
On the flip side, lowering the position of the eye line can make your character appear younger! If you're aiming for a cute chibi character, give this trick a shot. I guarantee it'll make a significant difference!

Common Mistakes to Avoid When Drawing Anime Head
Drawing anime heads is a creative and enjoyable activity, but steering clear of common mistakes can significantly enhance the appearance of your characters. Let's discuss three common slip-ups and explore how to make your anime characters even more stunning.
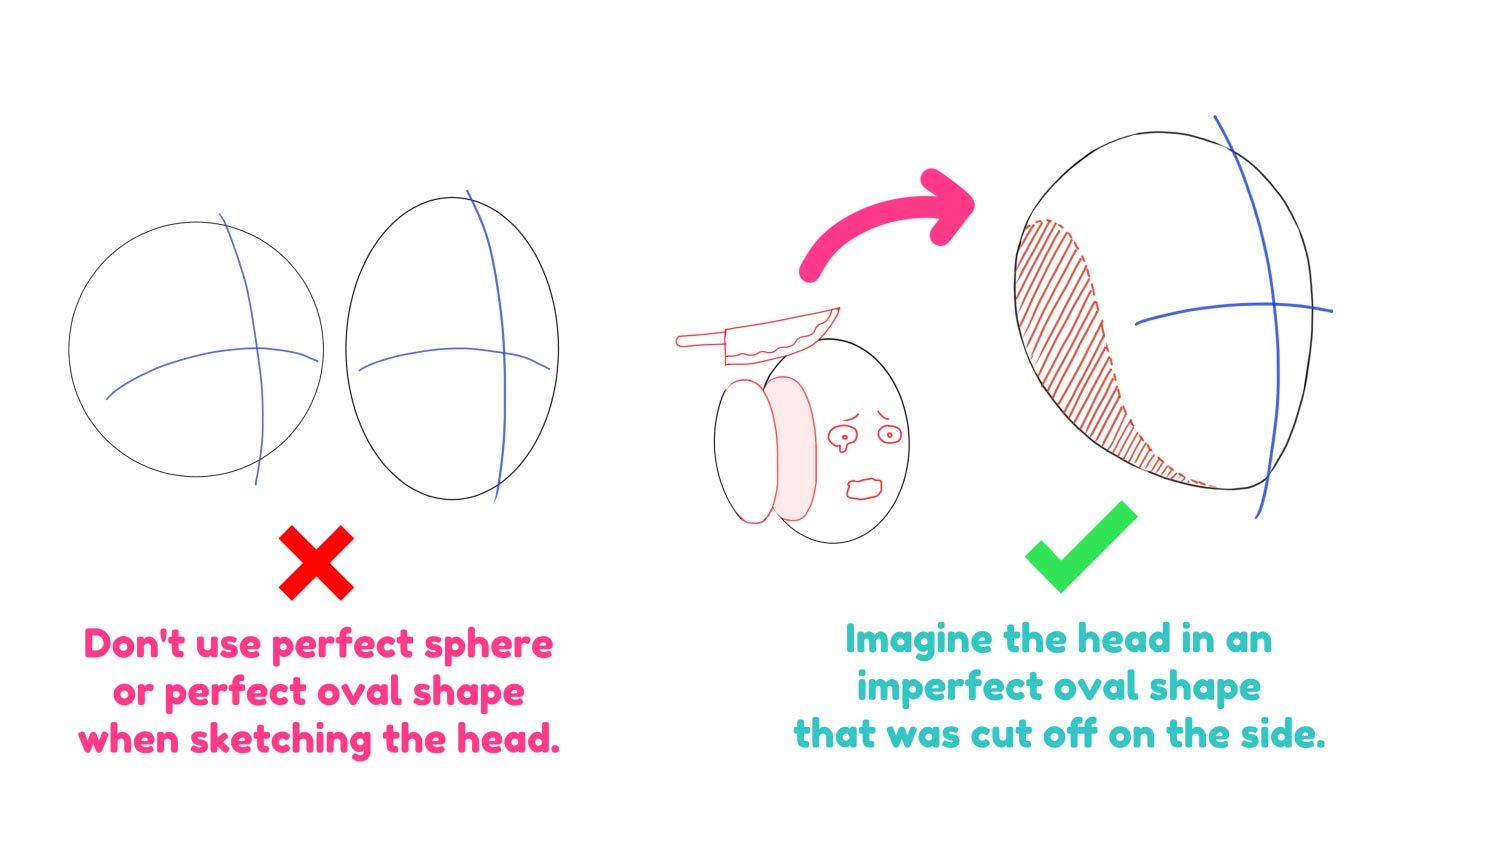
Mistake #1: Drawing the Head Shape as an Oval
A common mistake is sketching the head as a plain oval.
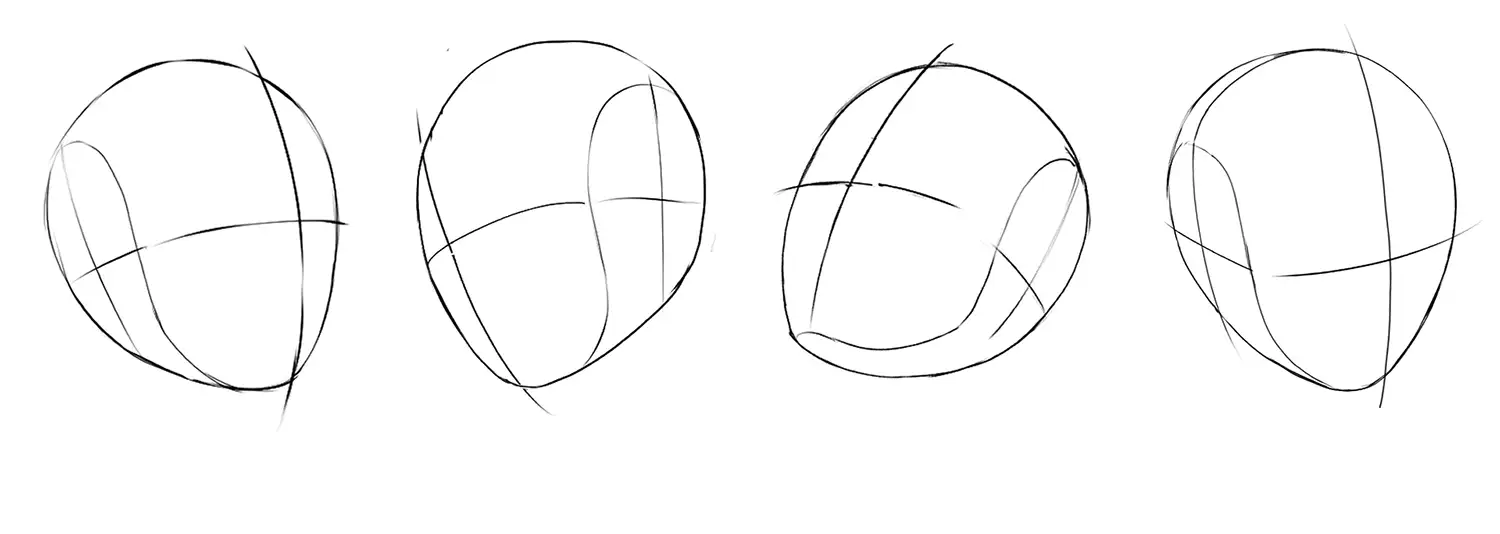
Anime heads boast a unique shape—imagine an oval that's been skillfully sliced on each side! Picture this altered oval shape nestled within a cube or box.
Embracing this form of an anime-style head will add a charming touch to your character in a truly anime way!
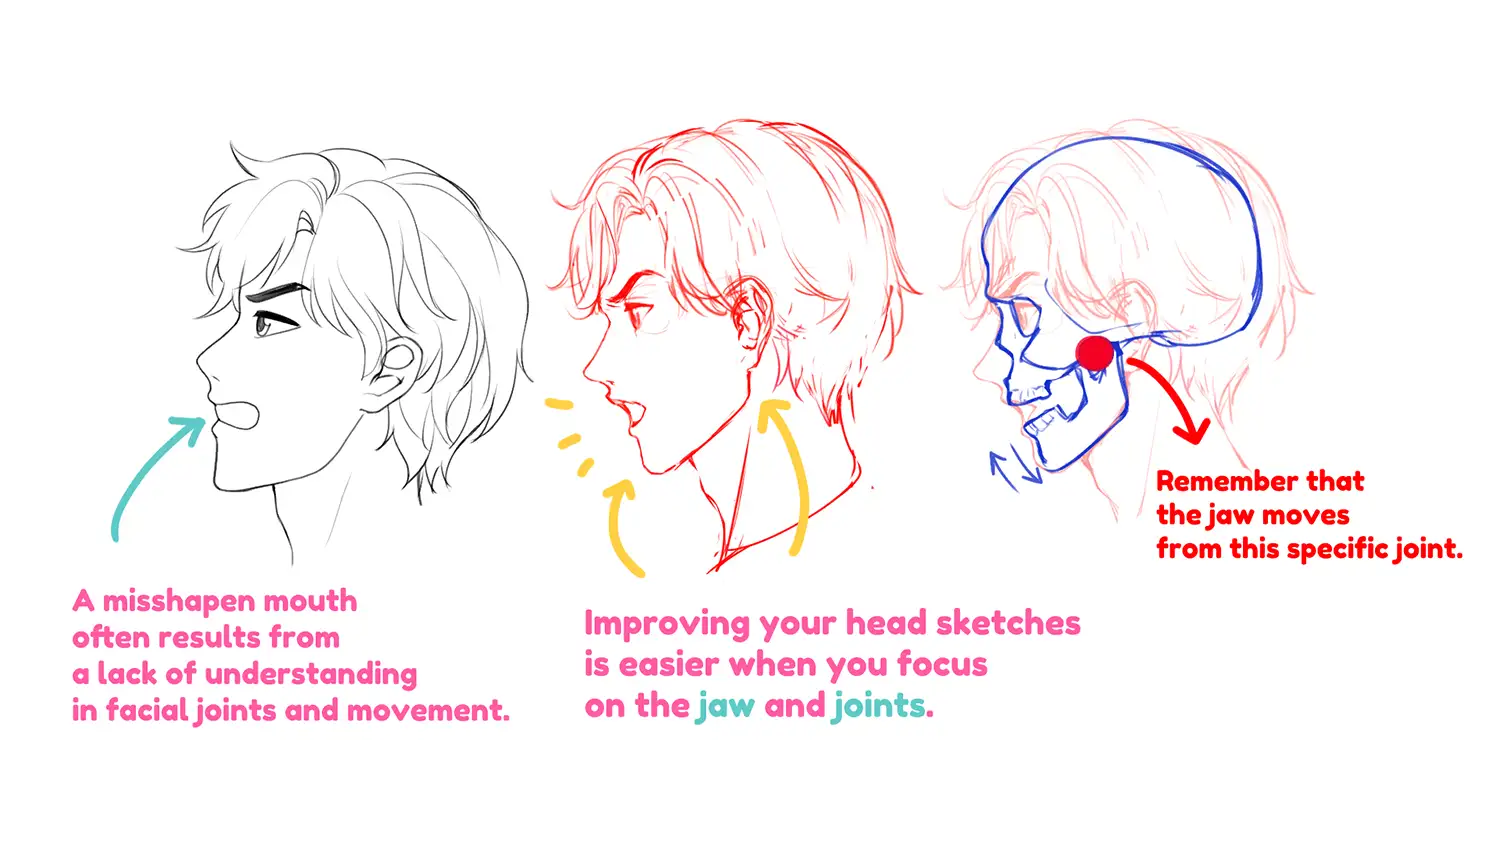
Mistake #2: Placing Disproportionate Facial Features
Keep an eye on the jaw joints, and balance when placing your facial features. Make sure they harmonize with the overall head dimensions to create a visually pleasing composition.
Think about the balance between the eyes, nose, mouth, and how the jaw joints work. Ensuring they work together to enhance your character's overall aesthetic. This focus on proportion not only boosts the character's believability but also adds to their charm.
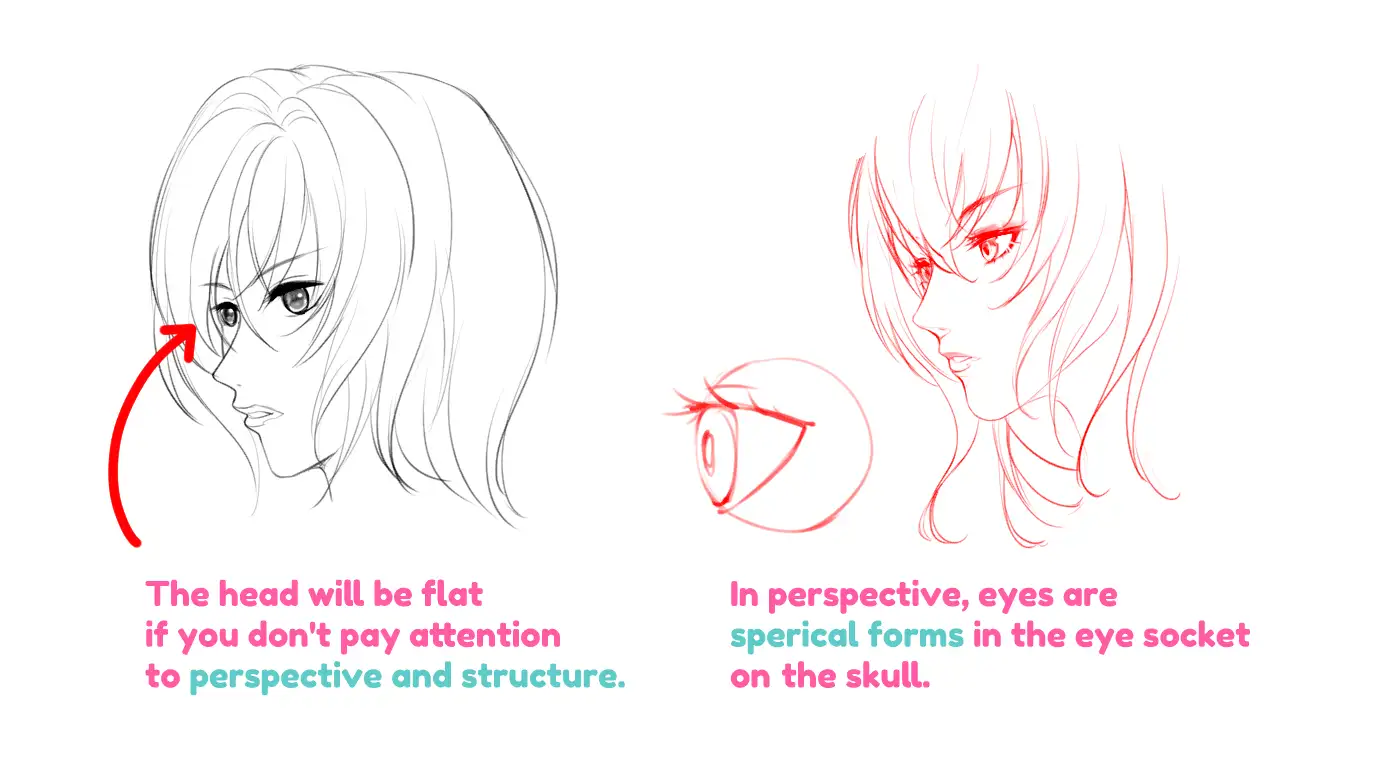
Mistake #3: Facial Features Aren't Aligned with the Perspective
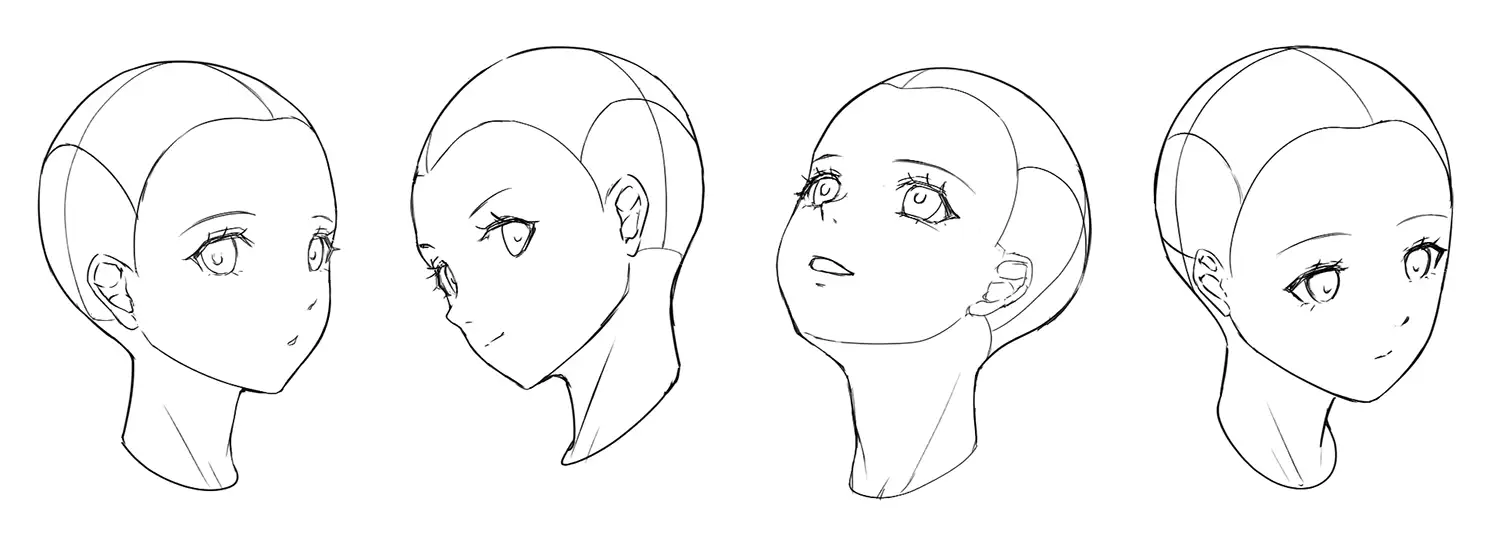
One crucial aspect of creating captivating anime characters is ensuring that your facial features align with the perspective. Picture everything in a 3-dimensional space, and don't forget to draw the hidden parts when you feel a bit lost.
Take a look at the image below, where I corrected the perspective of the character's eyes.
Understanding and recognizing these common mistakes empowers you to refine your artwork effectively.

Conclusion
In summary, mastering the art of drawing anime faces hinges on a solid understanding of structure and proportion.
The basics involve dissecting core components, delving into the fundamental structure of an anime head, understanding key features like eyes, nose, mouth, and ears, and nailing the placement proportions of these facial elements.
For precise positioning of facial features, the Half Rule technique comes in handy, offering a practical guide to achieving a well-balanced anime face.
As you kick off your head drawing journey, remember to initiate with a circle, sketch guiding lines for direction, incorporate the jawline, and highlight the hairline.
After finishing your sketch, remember to double-check your drawing. Is the perspective correct? Did you pay attention to the proportions of facial features? Was the shape of the head accurate? If yes, then you're good to go!
To put these principles into practice, check out the step-by-step tutorial I've provided for a hands-on approach!
Now that you're armed with these insights, go ahead, practice and learn more! I'm sure that with your dedication and the tips I gave you, it will undoubtedly lead to significant improvement!
Finally, if you like art tips and content like this, feel free to subscribe to my weekly newsletter: !
I share my anime art tips and experiences in my digital art career in a weekly email. You'll get the insight and behind the scene of the art career! Really recommend if you're a beginner anime style artist.
Thank you so much for reading this post! I really appreciate your visiting and using your valuable time reading my content!
Much Love 💖
Want to know how to start your anime art journey?
Download my ANIME ART STARTER GUIDE and start your artistic path right away for FREE!
