


Recently I learned how to use Stable Diffusion AI to generate some images. It's really insane that I can manage to generate tons of images using Stable Diffusion However, controlling the output can be challenging.
While Img2Img helps with style control, the pose and object structure in the final image often differ significantly.
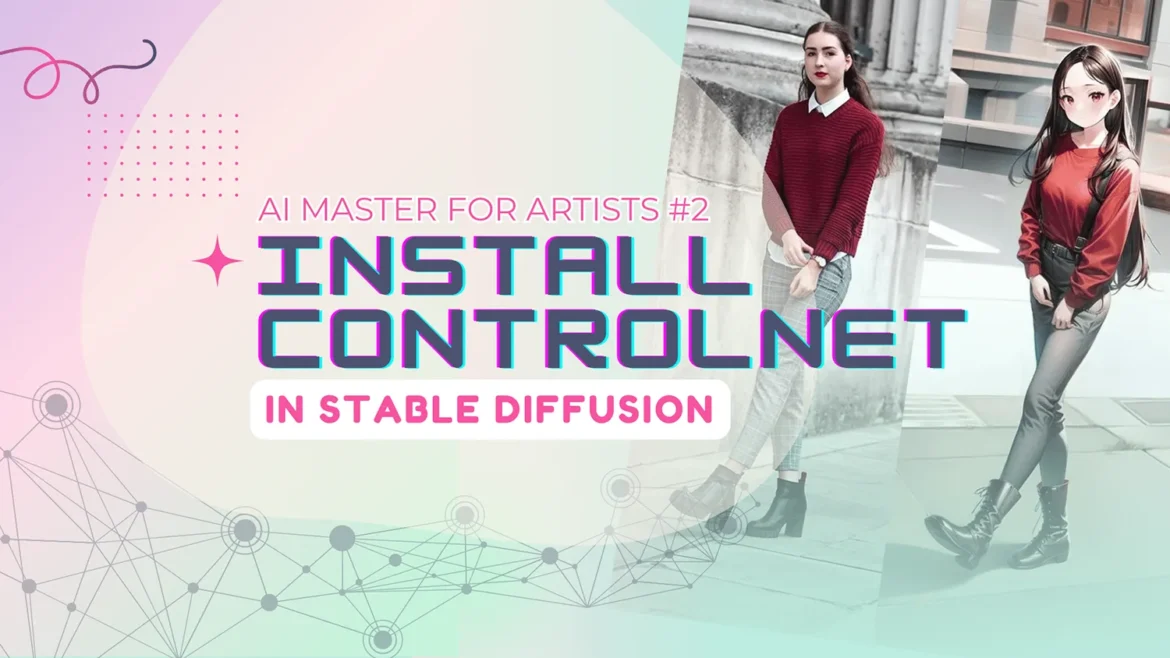
To address this, let's introduce ControlNet, a revolutionary neural network based on Stable Diffusion. It gives artists precise control over image generation by manipulating poses, detecting edges, and using depth maps.
With ControlNet, artists can bring their creative ideas to life with precision, shaping their vision in ways never thought possible. Let's look into ControlNet installation and basic use of it together!

What is ControlNet and how does it work?
ControlNet is a powerful algorithm in computer vision used for human pose estimation. Its main goal is to analyze input images and accurately determine the body posture.
By employing techniques like edge detection, openpose, and canny edge detection, ControlNet achieves precise results. This algorithm excels in handling complex images, enhancing the efficiency of the image generation process.
🎉 AI PROMPT VAULT for ANIME ARTIST !
Let's access a Notion document where I share all of my AI generated images with all the “prompts” I used to create them!
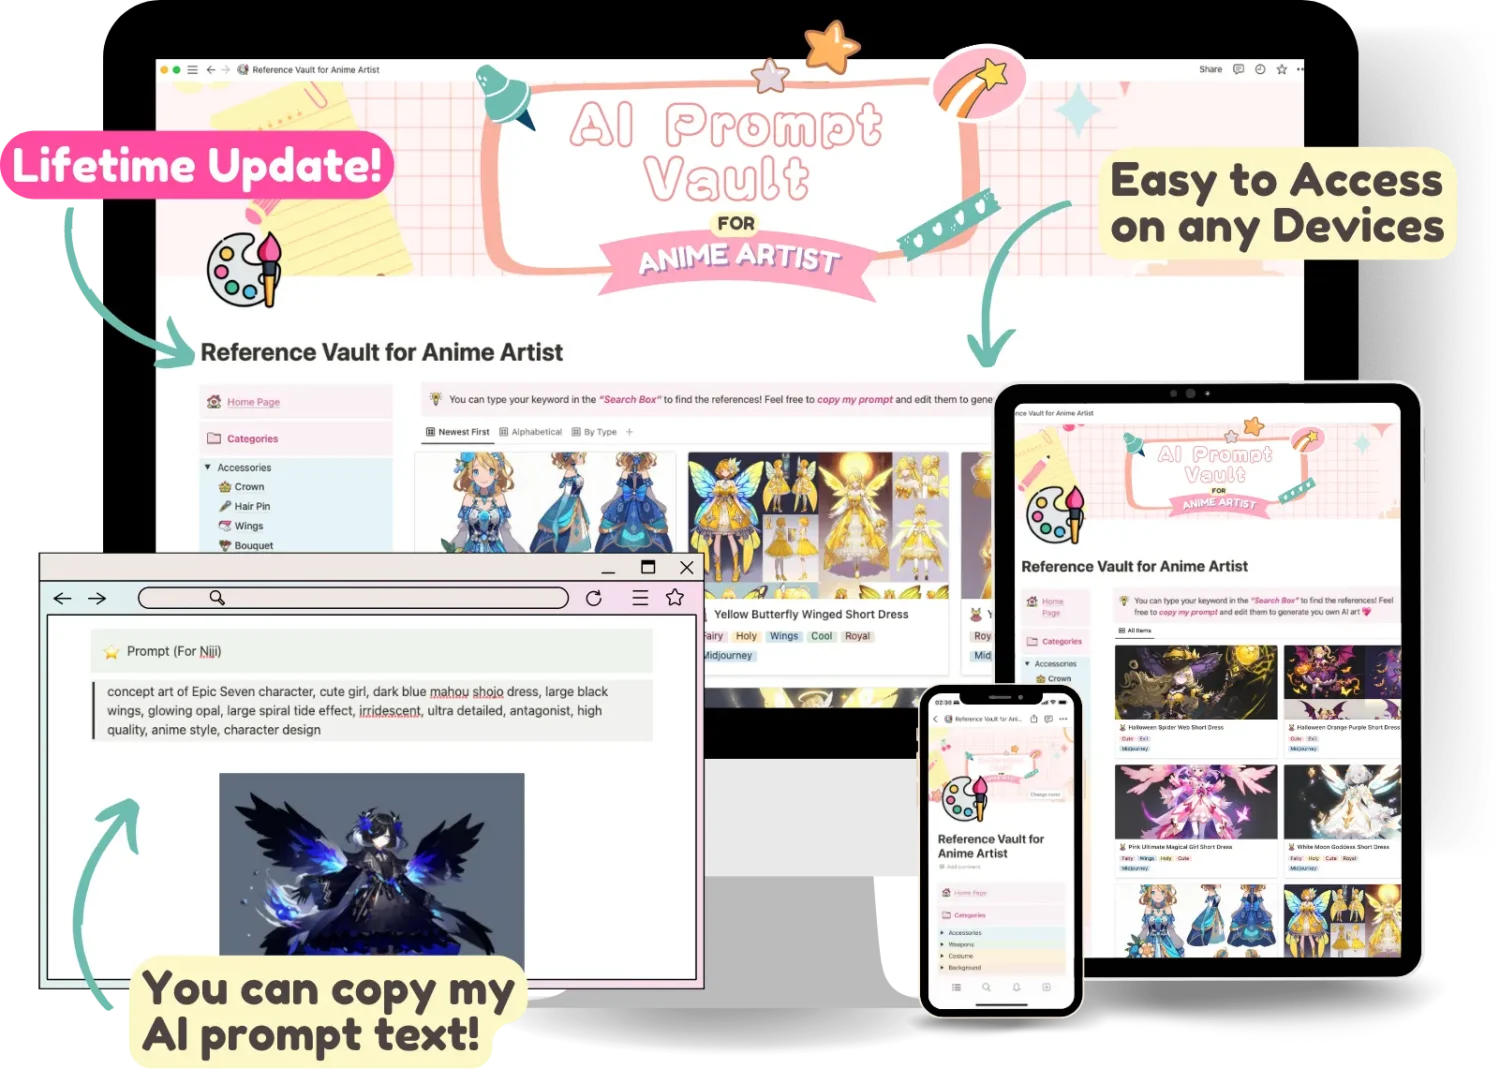
Unleash your inspiration with these Midjourney AI prompts! With over 100+ curated prompts, you'll have all the inspiration you need to fire up your creative process. Plus, with our constantly updating prompts and recommended keywords, you'll never run out of ideas. And for a limited time, get access to all of this for just $5 before the price goes up! Click here to access now.
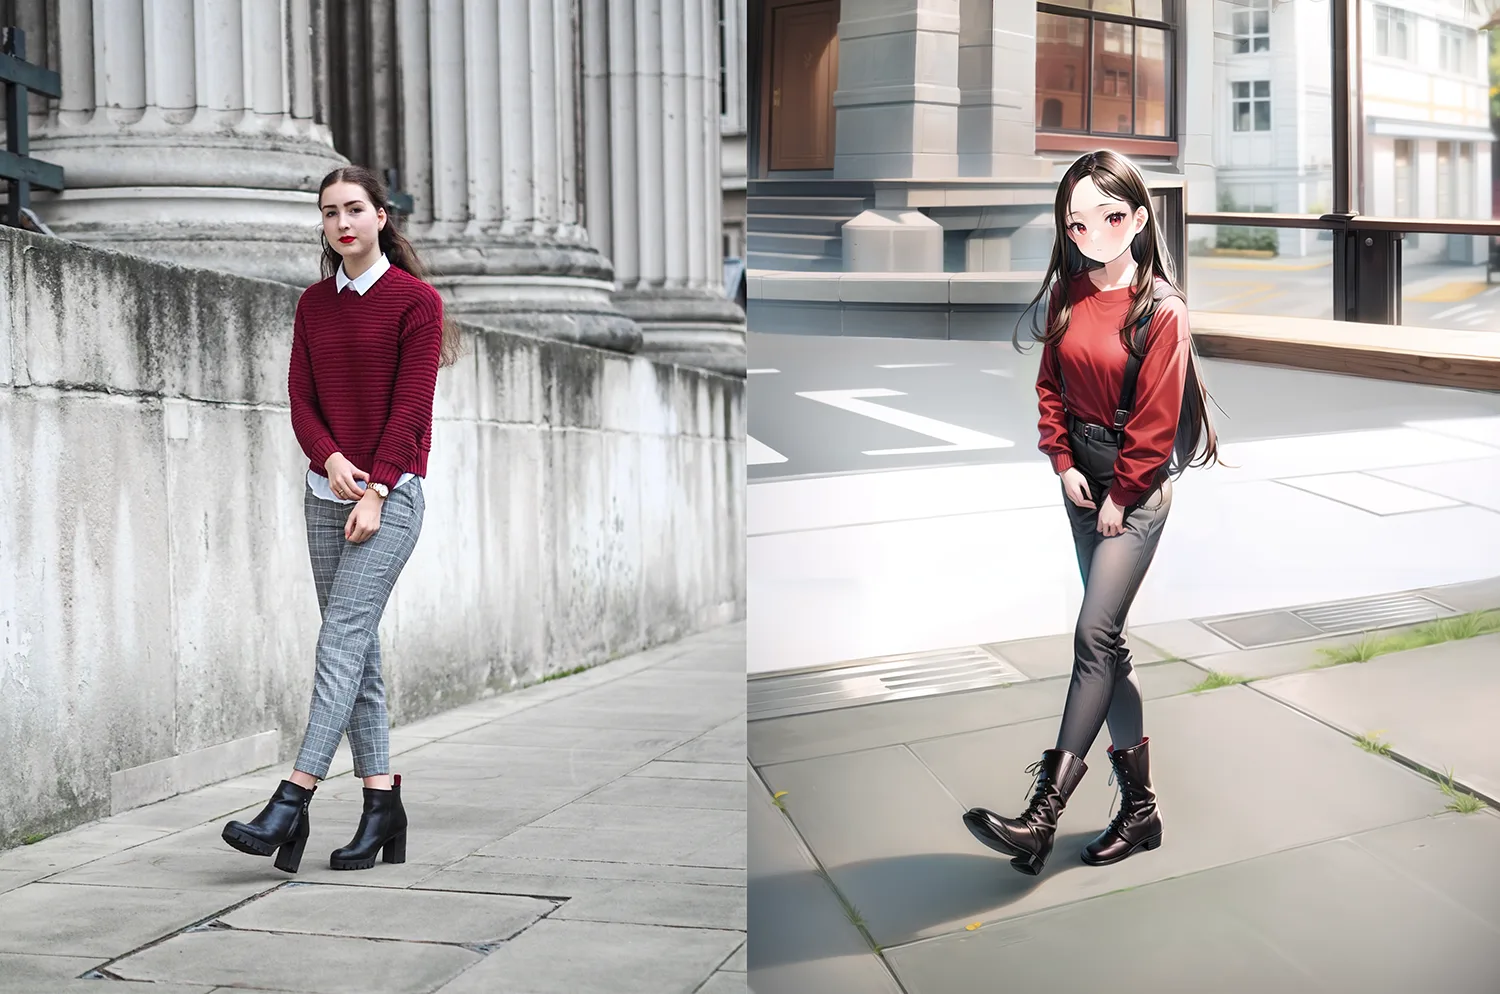
The image below is the result I made from ControlNet in Stable Diffusion. You can create new images with the character in the same pose as the source image.
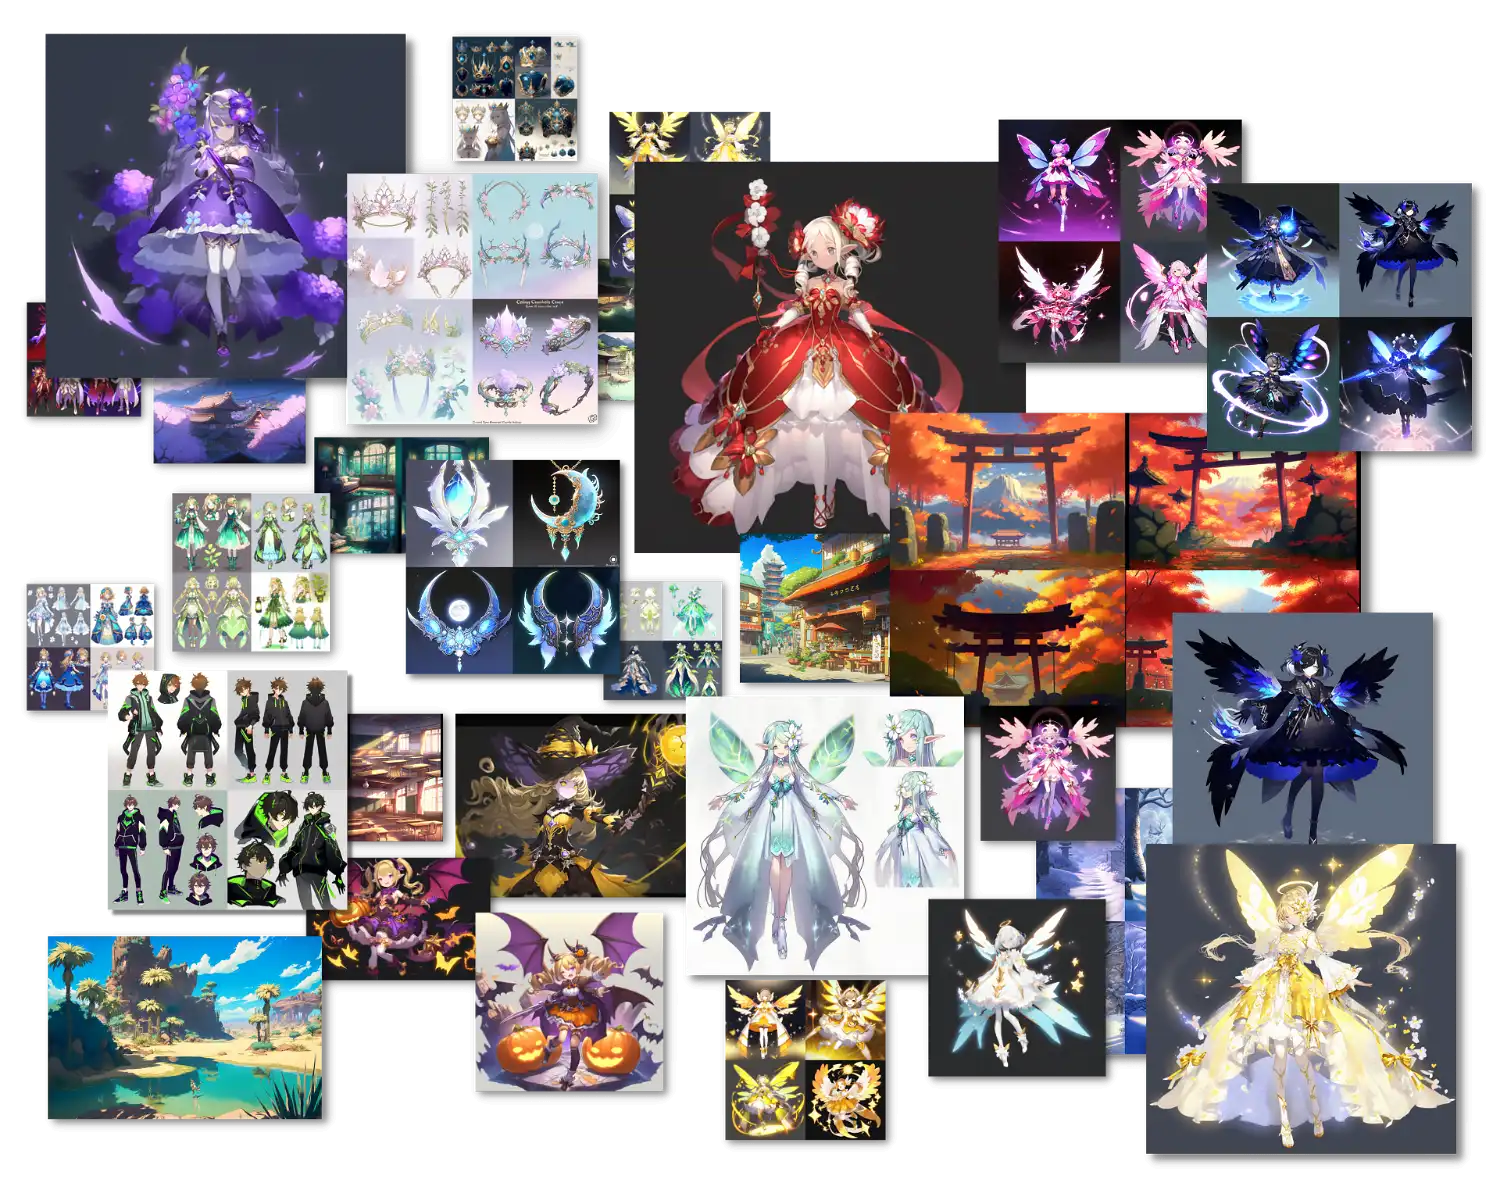
Actually ControlNet can do so much more like the example below.
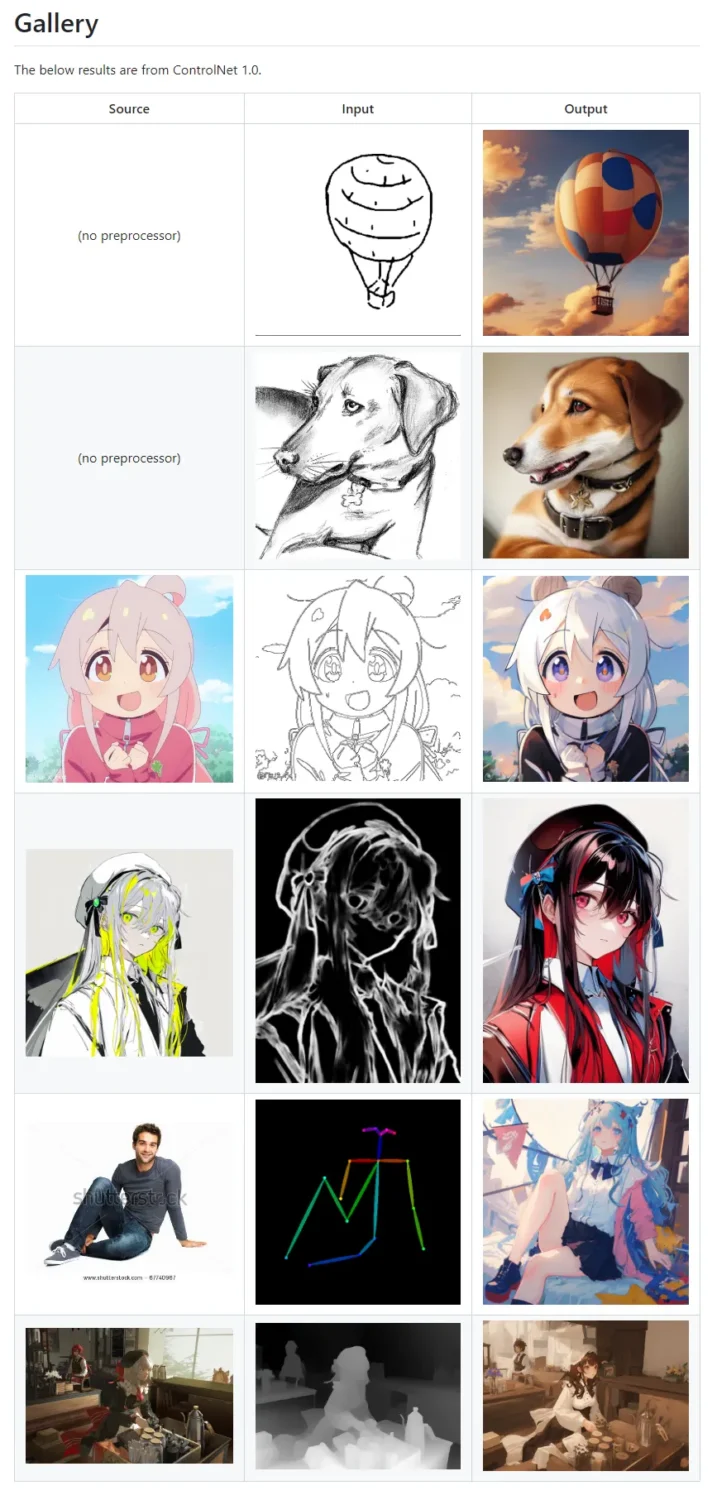
Original Image from: github.com/Mikubill/sd-webui-controlnet
Installing Stable Diffusion ControlNet
In order to install ControlNet, it is necessary to install Stable Diffusion on your PC or Google Colab first. No worries, this blog will assist you in installing Stable Diffusion on your PC. If you want to install it on Google Colab, please visit this site.
After you finish installing Stable Diffusion, let's install ControlNet using my easy step-by-step guide below!
Step #1: Install OpenCV
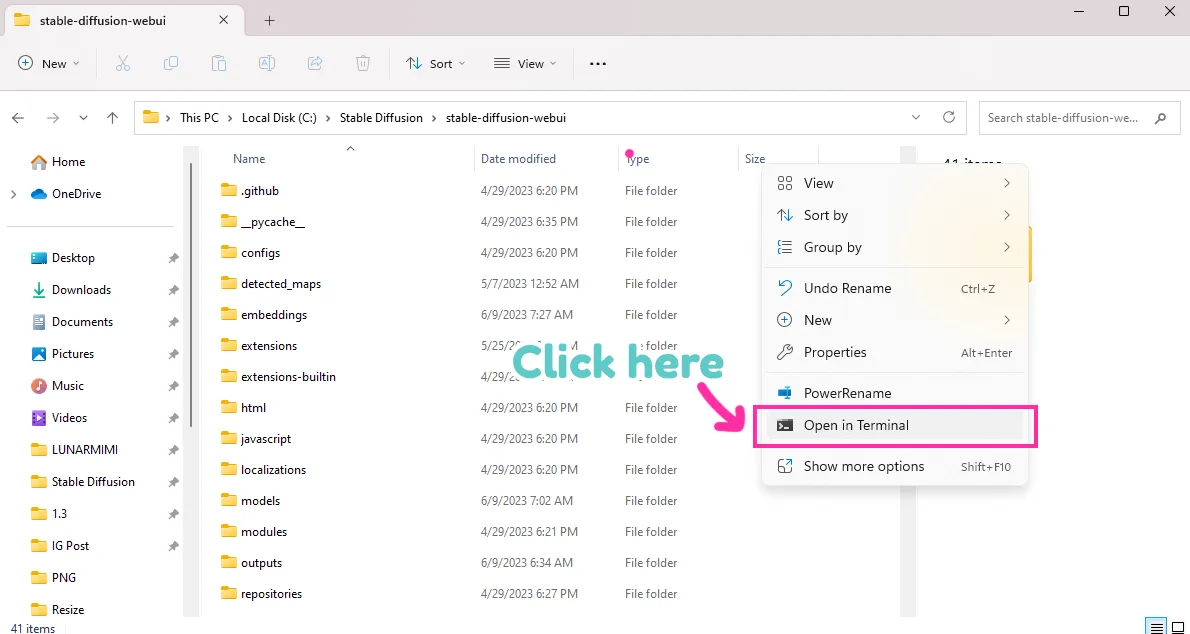
1. Navigate to the folder where you installed Stable Diffusion. In my case, it's Stable Diffusion\stable-diffusion-webui Then right-click on the empty space and choose Open in Terminal
2. Type pip install opencv-python and press enter to run the command.
This will install OpenCV on your PC. If you already have OpenCV installed and need to upgrade, it'll show the message that you need to do so.
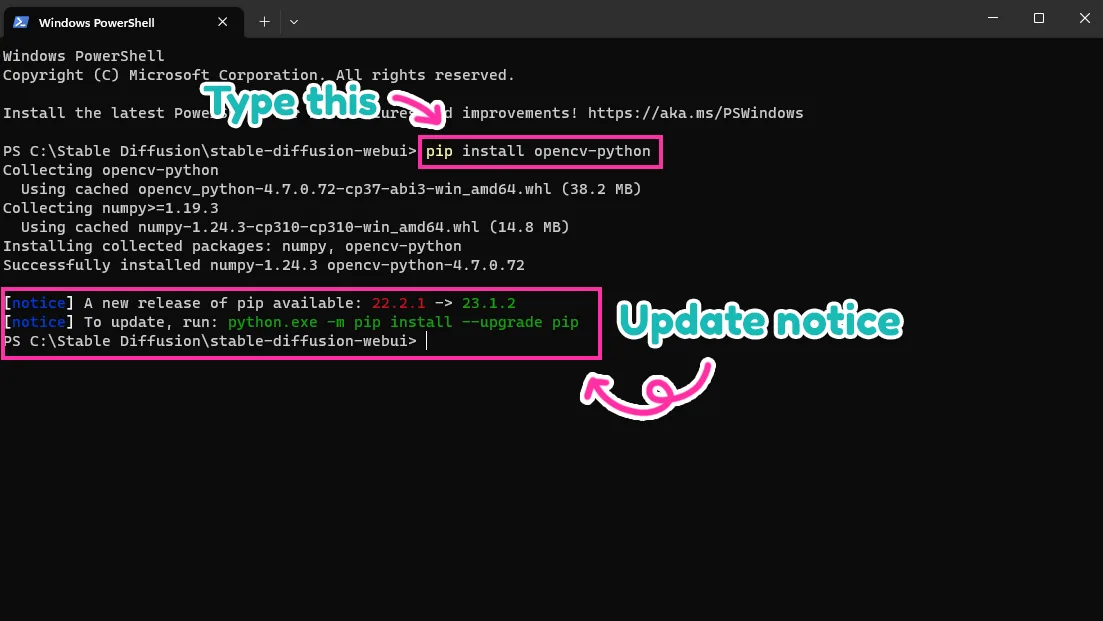
3. Update OpenCV if needed by typing python.exe -m pip install –upgrade pip
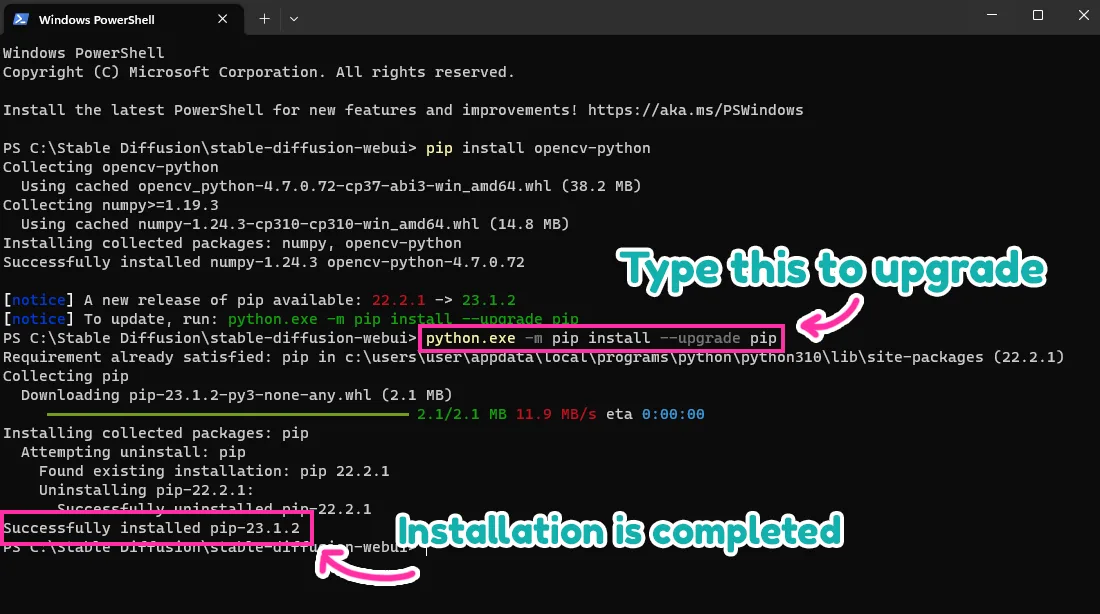
Wait until the upgrade is complete, and let's go to the next step.
Step #2: Install ControlNet Extension
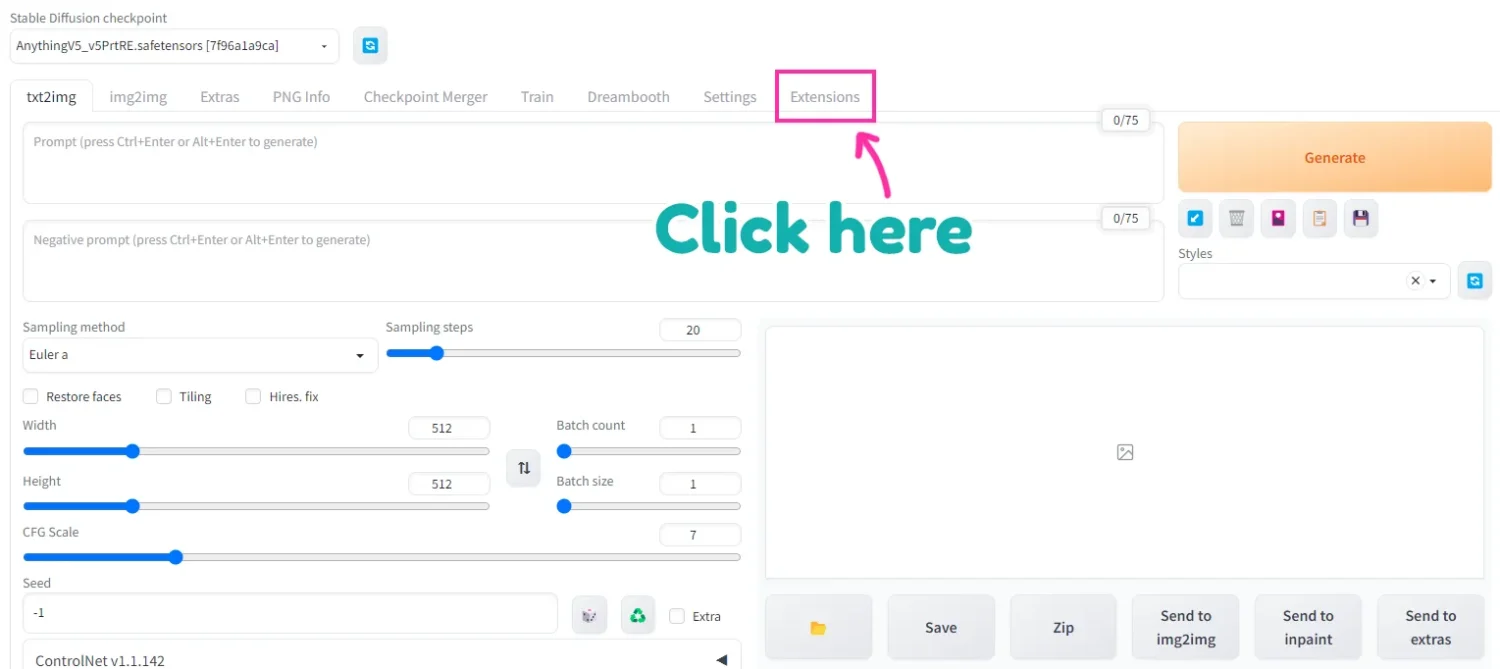
1. Now, open the Stable Diffusion web ui and navigate to the “Extension” tab.
2. Click “Install from URL” and input this URL: https://github.com/Mikubill/sd-webui-controlnet.git
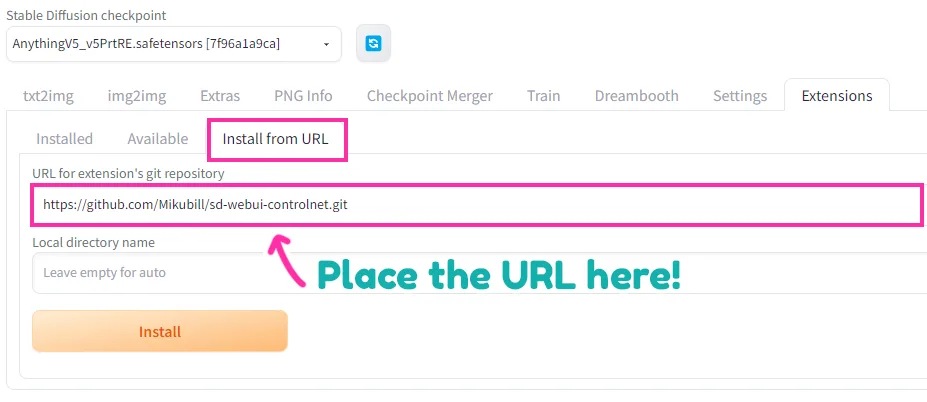
After that, click “Install” and wait for the installation. After the completed installation, you'll see “sd-webui-controlnet” in the installed tab.
Step #4: Download the ControlNet models
The next step is to download the ControlNet models.
1. Visit this link and download all the main models they provide.
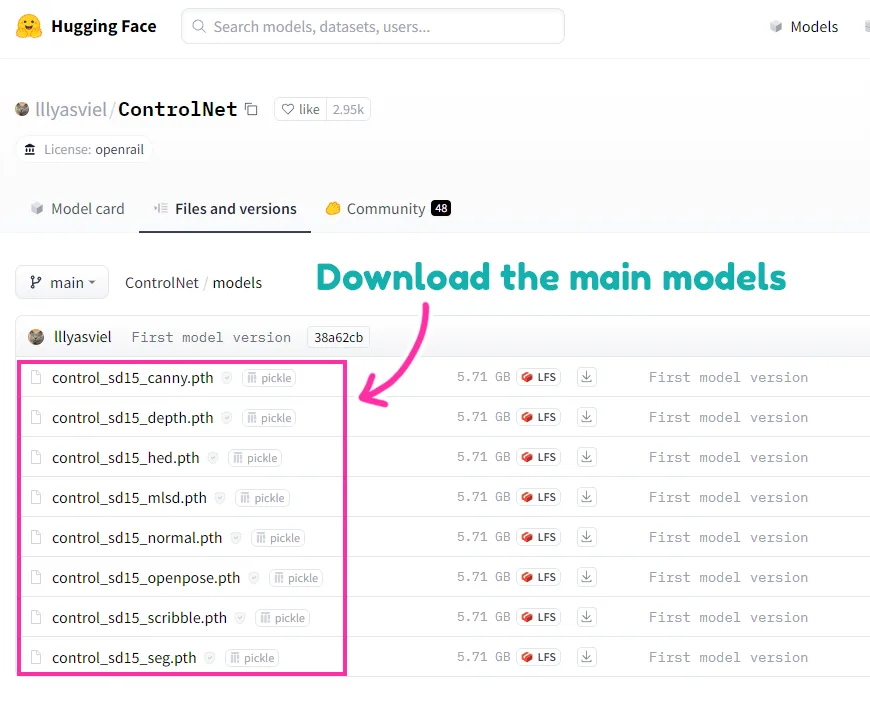
2. Put the downloaded ControlNet models in this folder: Stable Diffusion\stable-diffusion-webui\extensions\sd-webui-controlnet\models

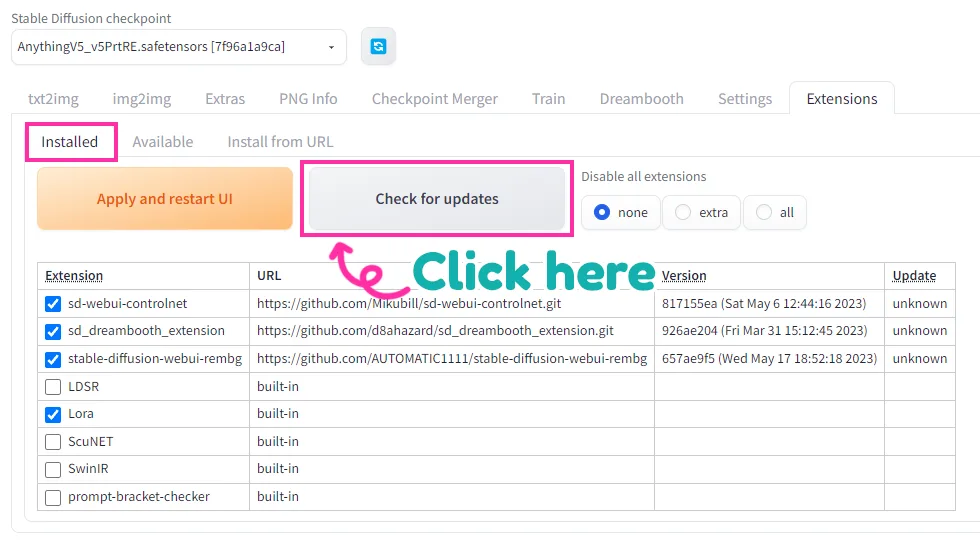
3. Before we move on to the next step, you may need to check the updates on the ControlNet and other extensions by visiting the “Installed” tab in the “Extensions” section and clicking the “Check for Updates” button.
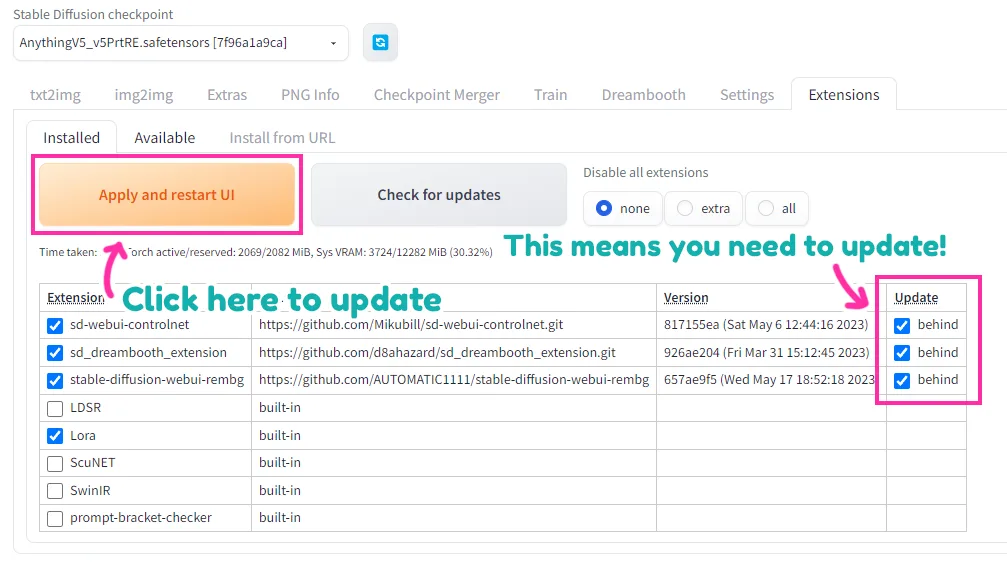
If some of your extensions are out-date, click “Apply and restart UI”.
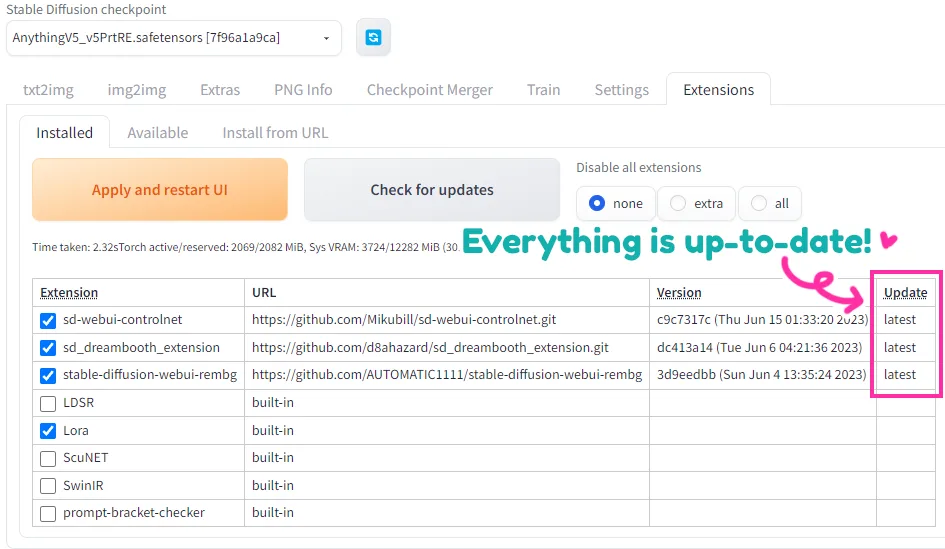
Wait until the update is complete, and you may check it again by clicking the Check for Updates button. This time, it'll show that your extensions are up-to-date.
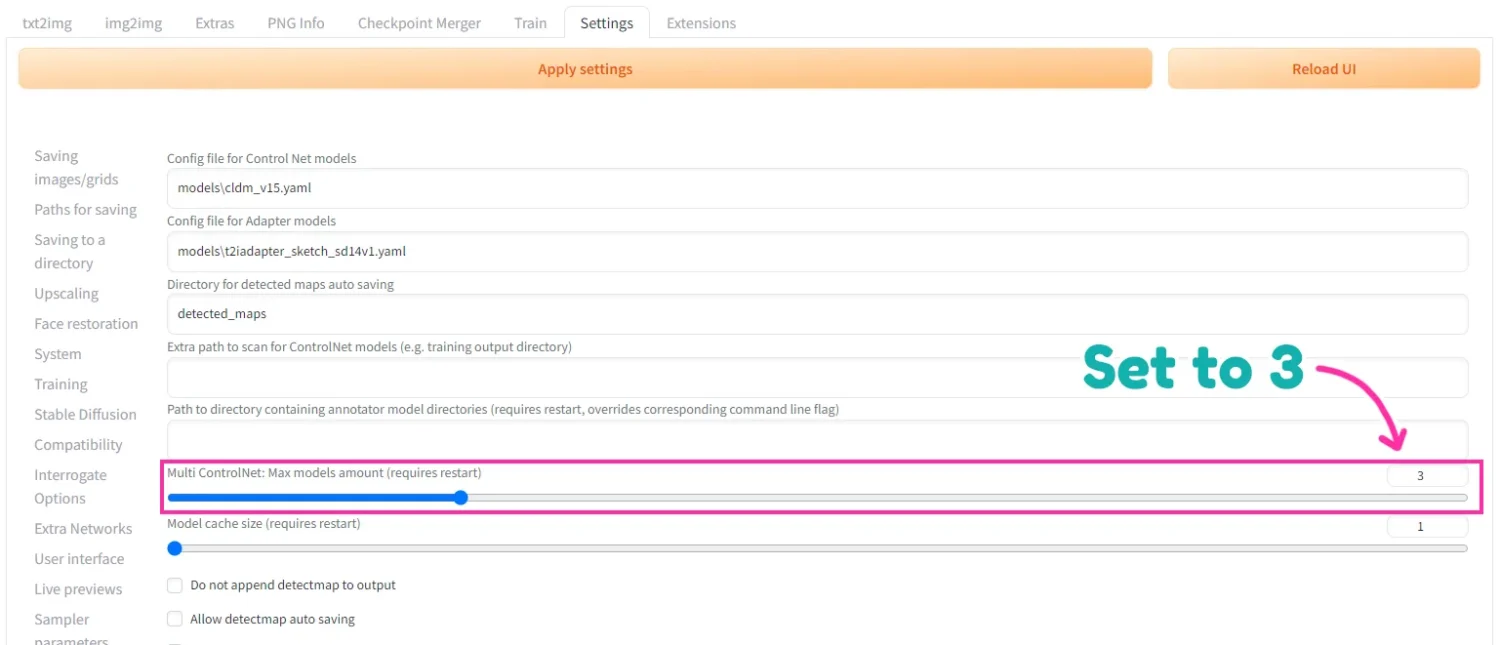
4. The last step is to go to the “Settings” tab and click on “ControlNet” in the side bar to adjust the “Multi ControlNet: Max models amount”. The parameter should be set at 2-3, depending on the number of ControlNet inputs. This option allows you to use multiple ControlNet inputs at once. For example, if you want to put two ControlNet inputs for two characters or objects, this parameter should be set to 2.
Oh and here is the sample of multiple ControlNet inputs that I mentioned about. You can use more than 2 inputs in a single generation.
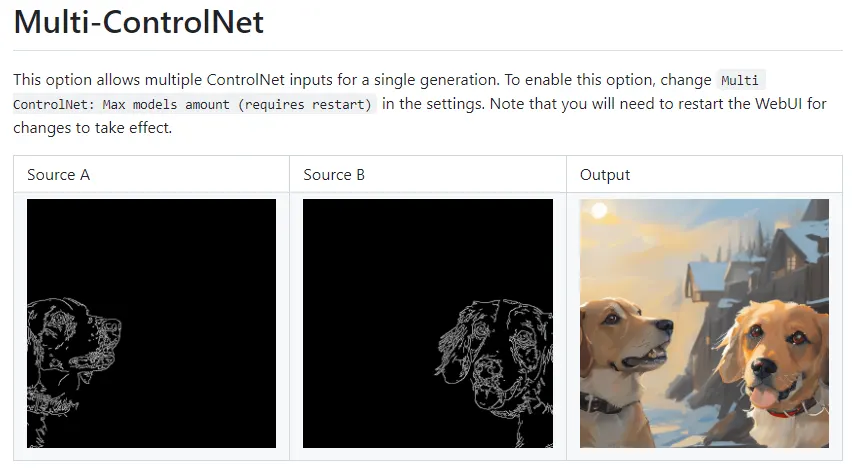
Original Image from: github.com/Mikubill/sd-webui-controlnet
Step #5: Generate Images
Before starting anything, I recommend closing your Stable Diffusion and rerunning it to prevent any errors.
Now, it's time to test the ControlNet we just installed! After you reopen the Stable Diffusion, you'll see the ControlNet section here.
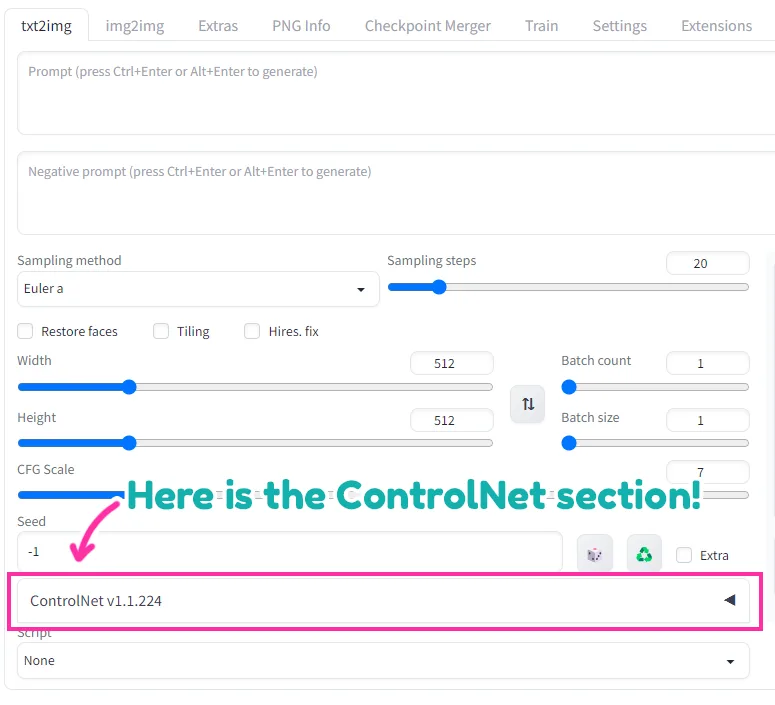
By clicking on the ControlNet tab, you can explore all of the functions within it.
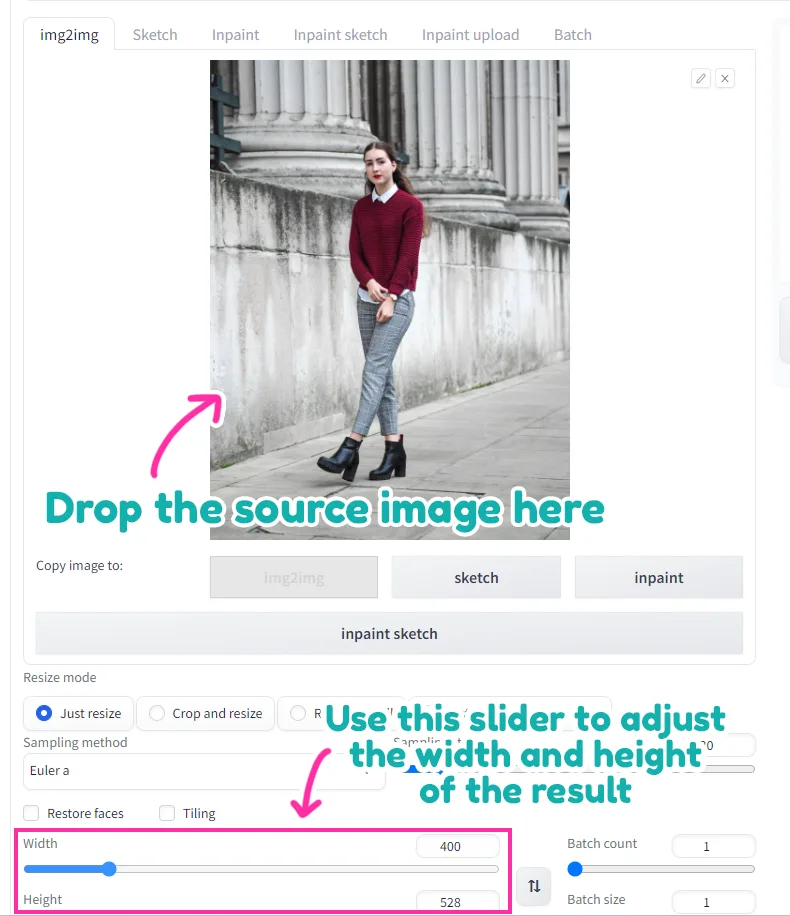
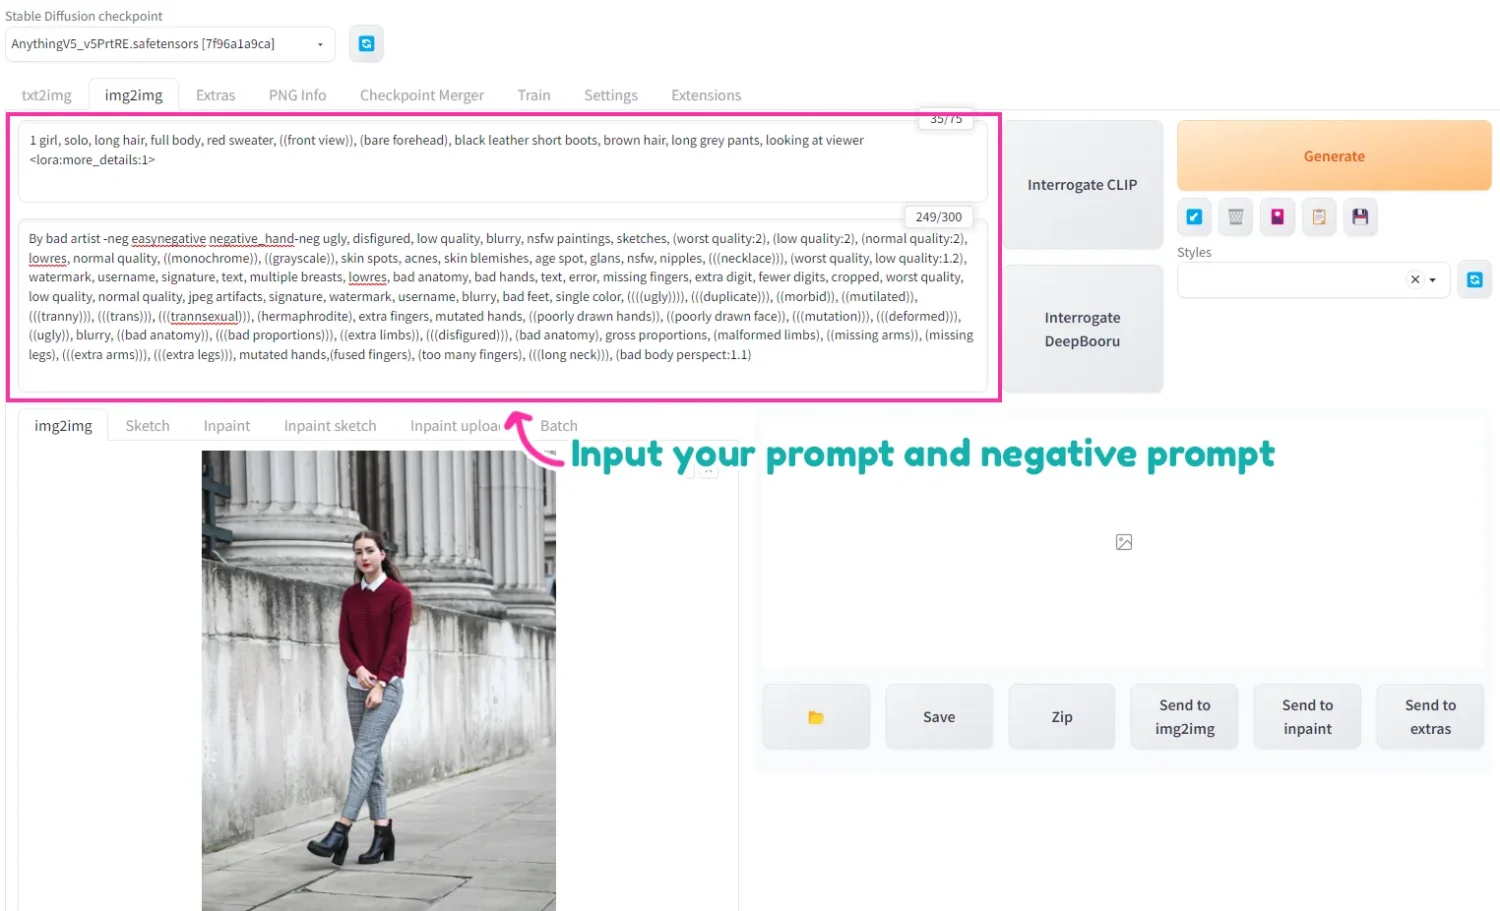
We'll test the image-to-image function. I'll go to the “img2img” tab and input the source image here. Adjust the width and height of the outcome so that they fit the aspect ratio of the source.
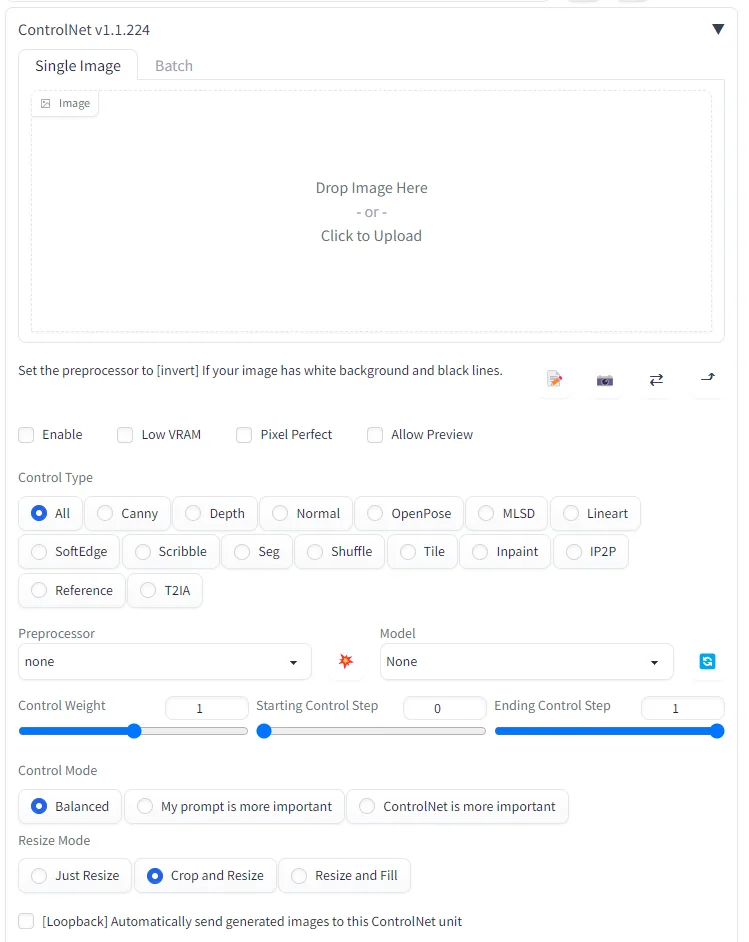
Then go to the ControlNet section and check “enable”. We'll use the OpenPose processor and OpenPose model.
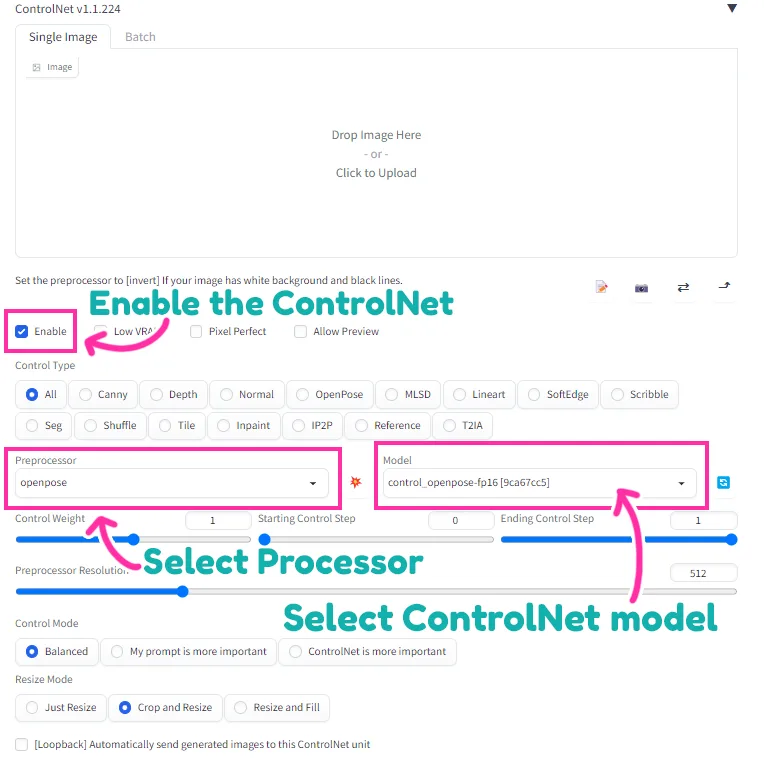
Input the prompt and the negative prompt and click generate.
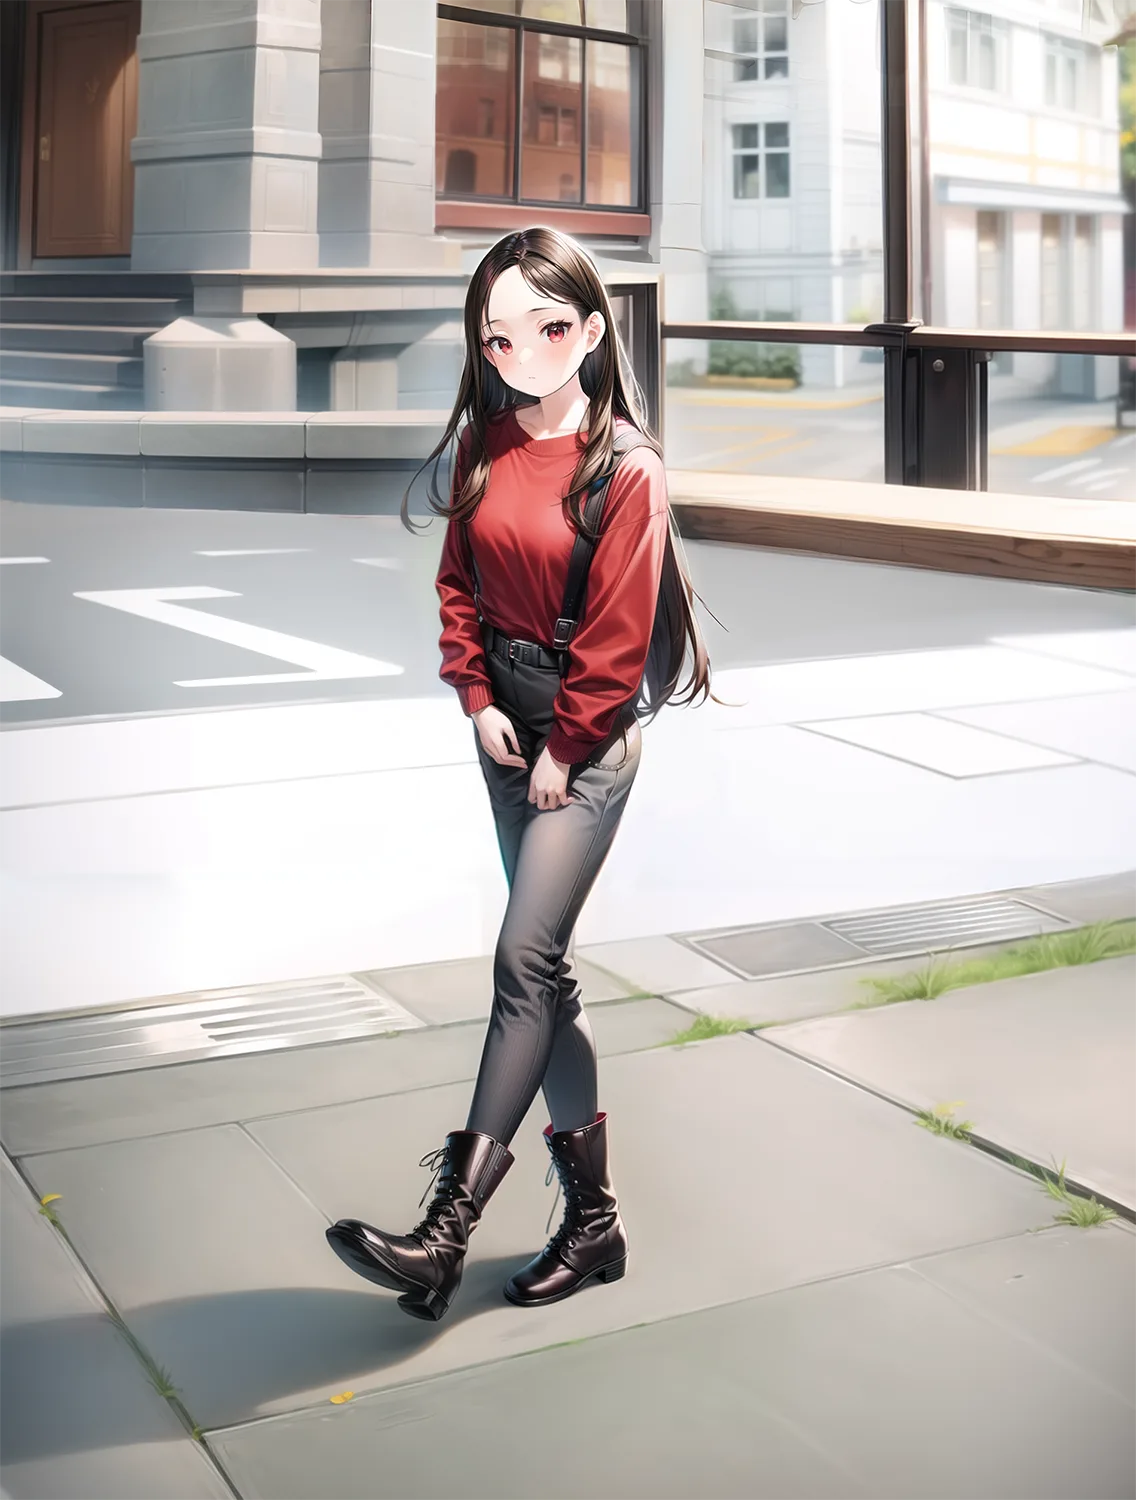
Prompt: 1 girl, solo, long hair, full body, red sweater, ((front view)), (bare forehead), black leather short boots, brown hair, long grey pants, looking at viewer <lora:more_details:1>
Neg Prompt: By bad artist -neg easynegative negative_hand-neg ugly, disfigured, low quality, blurry, nsfw paintings, sketches, (worst quality:2), (low quality:2), (normal quality:2), lowres, normal quality, ((monochrome)), ((grayscale)), skin spots, acnes, skin blemishes, age spot, glans, nsfw, nipples, (((necklace))), (worst quality, low quality:1.2), watermark, username, signature, text, multiple breasts, lowres, bad anatomy, bad hands, text, error, missing fingers, extra digit, fewer digits, cropped, worst quality, low quality, normal quality, jpeg artifacts, signature, watermark, username, blurry, bad feet, single color, ((((ugly)))), (((duplicate))), ((morbid)), ((mutilated)), (((tranny))), (((trans))), (((trannsexual))), (hermaphrodite), extra fingers, mutated hands, ((poorly drawn hands)), ((poorly drawn face)), (((mutation))), (((deformed))), ((ugly)), blurry, ((bad anatomy)), (((bad proportions))), ((extra limbs)), (((disfigured))), (bad anatomy), gross proportions, (malformed limbs), ((missing arms)), (missing legs), (((extra arms))), (((extra legs))), mutated hands,(fused fingers), (too many fingers), (((long neck))), (bad body perspect:1.1)
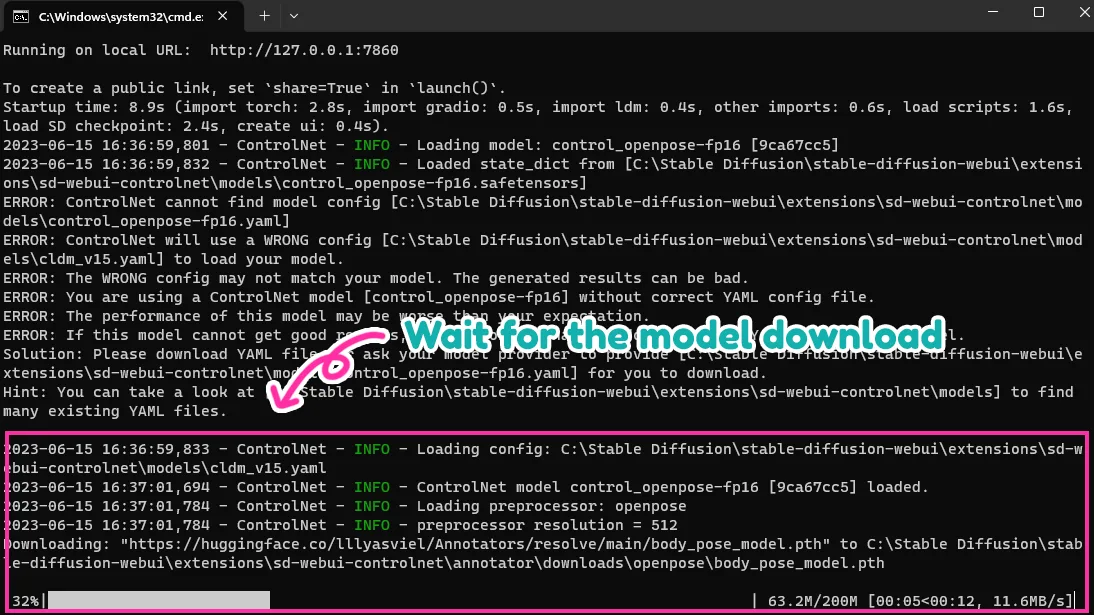
You'll need to wait for the model to download a bit.
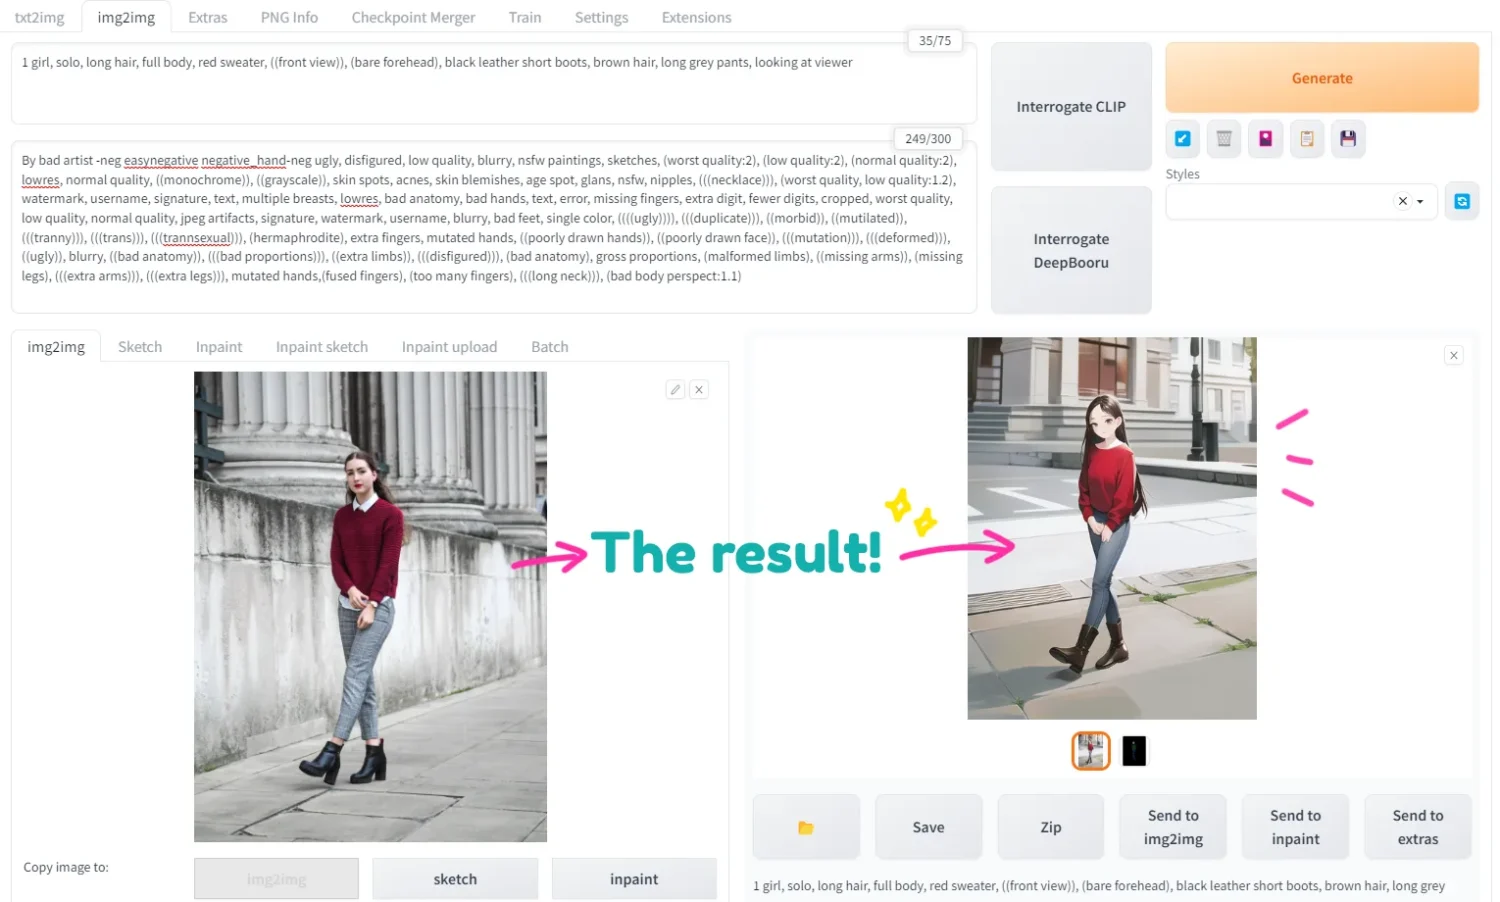
And then you'll get the result like this!
Then I use inpainting to polish all of the details, and below is the final image I got from ControlNet.
Conclusion
In conclusion, while ControlNet may appear daunting at first, don't let that discourage you. Once installed, it transforms into a user-friendly ally that greatly enhances pose drawing and shading. The advantages it offers are truly remarkable. Furthermore, there is a wealth of techniques to explore when harnessing ControlNet in Stable Diffusion, which we'll dive into in our future blog posts. Stay tuned for more valuable insights!
Finally, if you like art tips and content like this, feel free to subscribe to my weekly newsletter: !
I share my anime art tips and experiences in my digital art career in a weekly email. You'll get the insight and behind the scene of the art career! Really recommend if you're a beginner anime style artist.
Thank you so much for reading this post! I really appreciate your visiting and using your valuable time reading my content!
Much Love 💖

Want to know how to start your anime art journey?
Download my ANIME ART STARTER GUIDE and start your artistic path right away for FREE!