


Have you always wanted to do the base color process with Clip Studio Paint faster and better? Today we'll focus on the fill tool techniques for the easy way in the base coloring process. I'll give you a quick overview of how you can enhance your base drawing with this tool. I've also included the techniques I always use in my own process. Because I value your time, I chooses only information that is relevant, helpful, and practical. OK guys, let's get started!
What is Base Coloring in Digital Art Term?
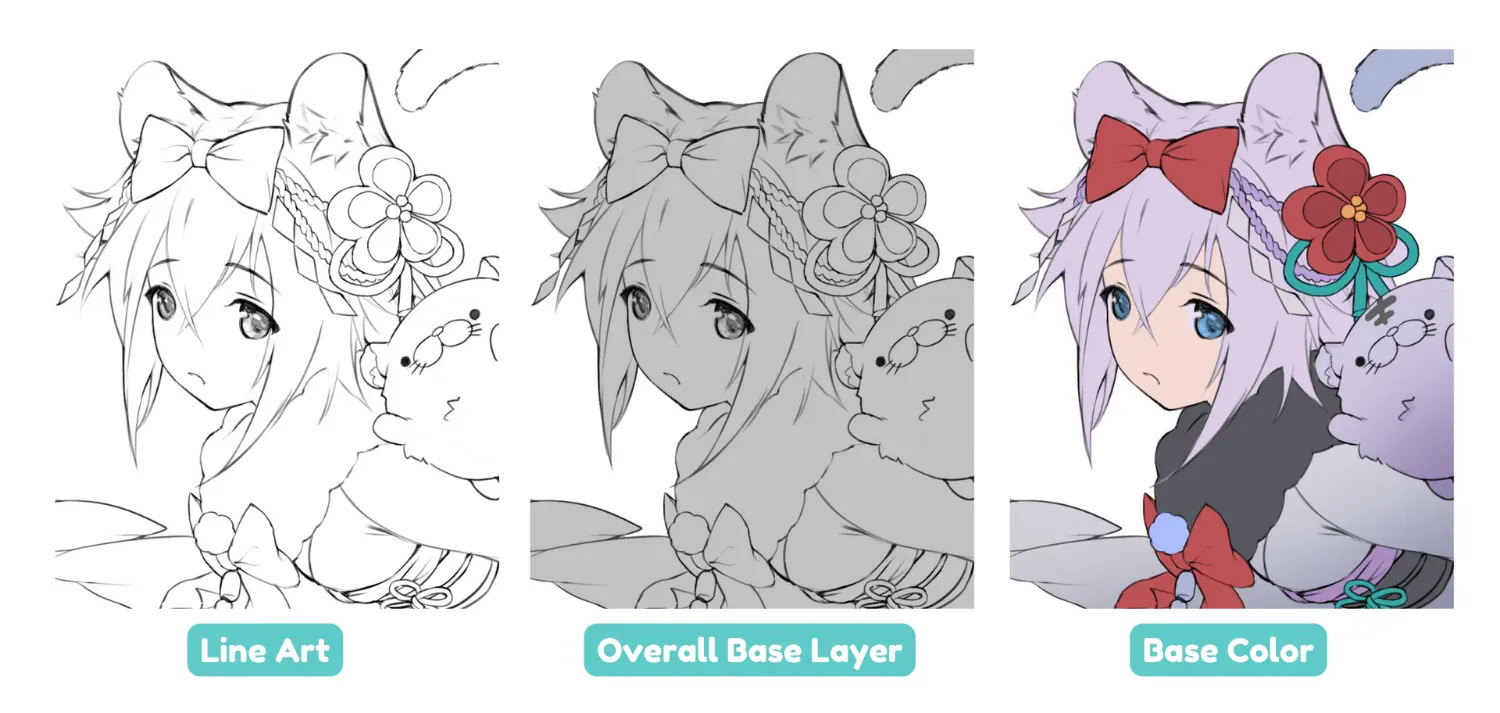 Base coloring for me is the first step of coloring my artwork. It involves choosing the colors that will be used in the artwork and blocking the color in each parts of your illustration. When I do the base coloring, I also separate the color into layers to make it easy to paint in the brushing up process.
What About the Line Art?
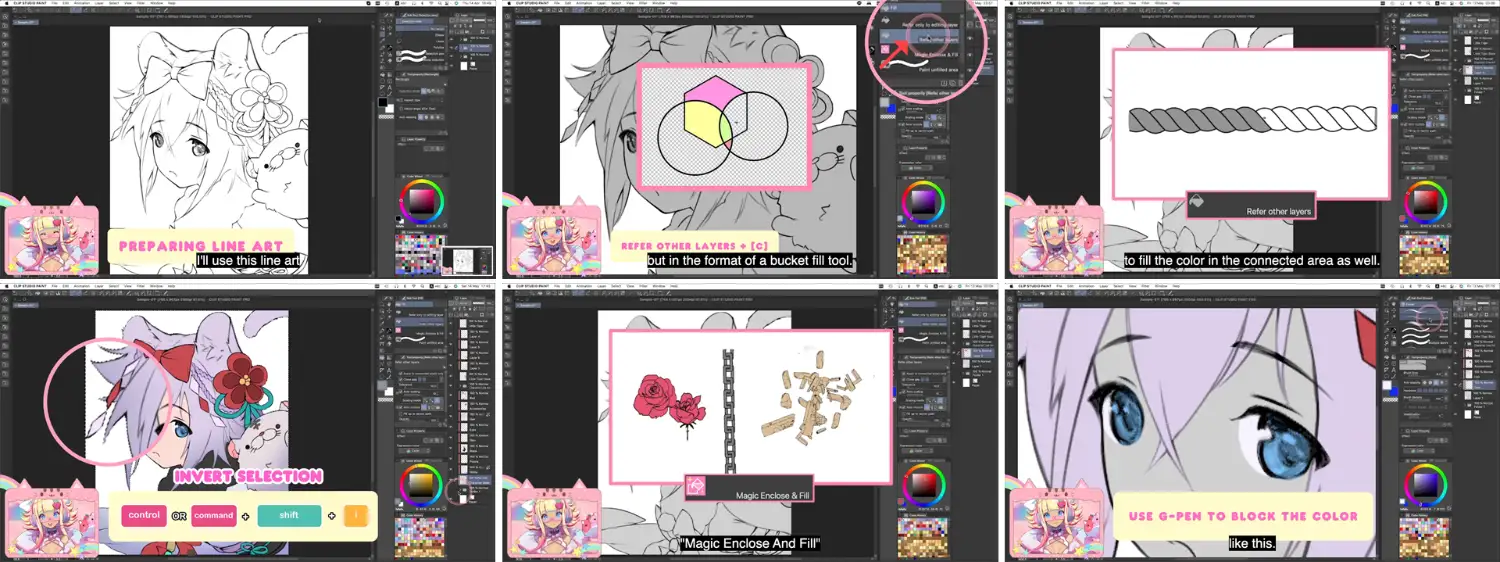
You need to finish your line art before starting the base color process. Don't forget that your line art should have a transparent background and try not to leave a large gap between the end of the line. If you have no idea which brush to use for your line art, you can grab my line art brushes here!. You can also read my tips for line art in this tutorial as well!
In case your line art have a white background because you did the line art on the paper and photo shoot them to color in your pc or may be you just accidentally merged the line art with the white background. No worries! Just go to Edit > Convert brightness to Opacity. This command will change the brightest area in your illustration to be transparent!
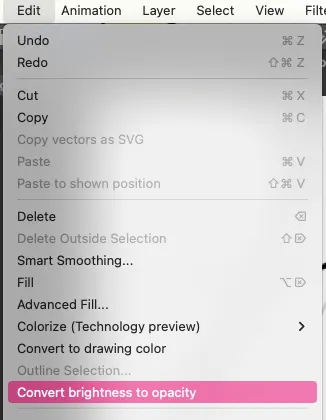
*Before using “Convert brightness to opacity”, make sure that your background is the pure white color (#FFFFFF) by increasing the brightness and contrast. If your background is not a pure white color, the transparent background we generate won't be at 100% transparency.
What is A Fill Tool In Clip Studio Paint and How It Helps You With Your Base Coloring Process?
I'd seen some do the base coloring by directly painting with a brush and erasing the overflow color with the eraser tool. For me it's a bit time-consuming method. If you use Clip Studio Paint, let's try the fill tool to speed up your process.
The fill tool is one of the most useful tools in CSP. It is a great way to quickly and easily fill in your base colors and speed up your coloring process. Simply choose the color you want to use from the palette, then click or drag on the area you want to fill. The fill tool will automatically apply the color to the selected area. Super easy! This is one of many reasons I switched from Photoshop to CSP since 2017. In my honest opinion, I feel a lot more comfortable with the base coloring process when I use CSP.
Fill Tool Types I Recommend
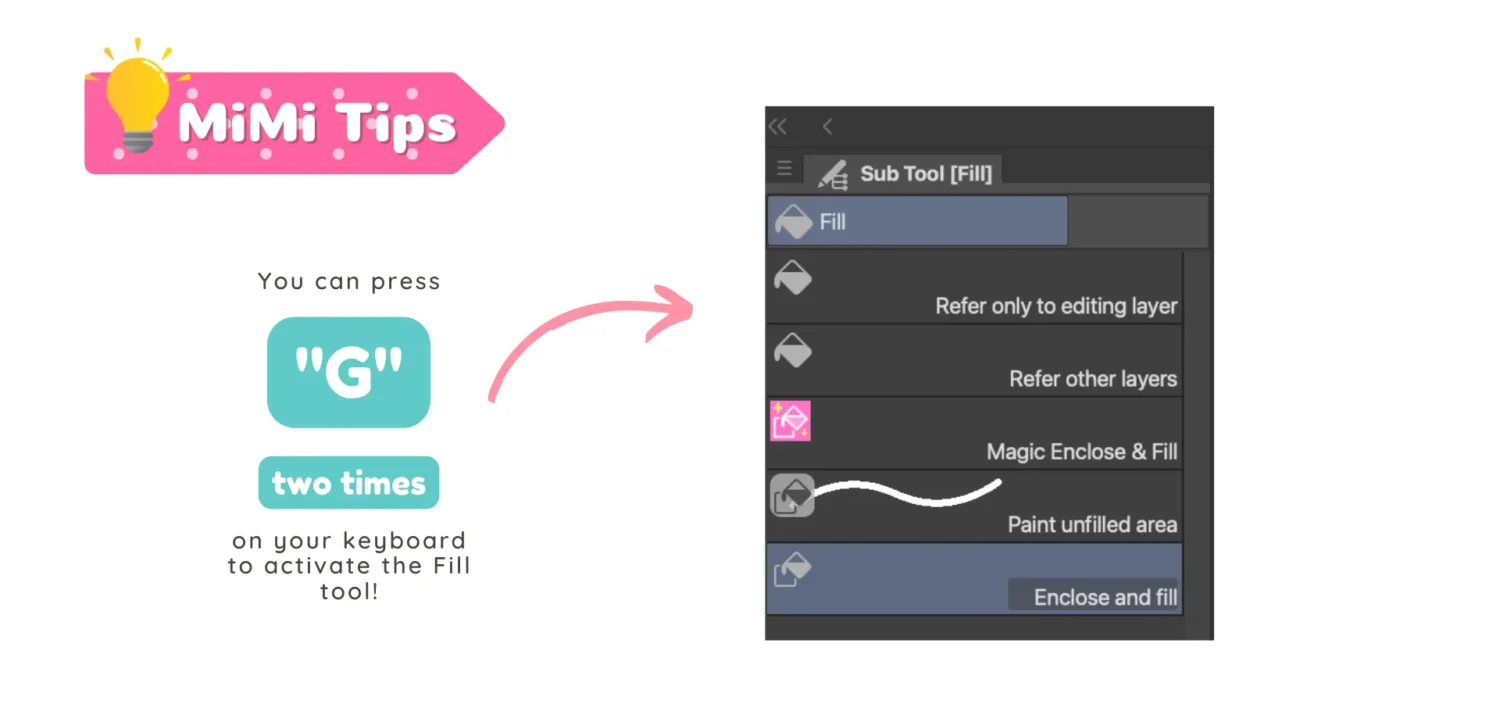
If you want to color your base drawing, the three fill tool types that I recommend are: “Refer only to editing layer” tool; “Refer other layers” tool; and the last one is the “Enclose and fill” tool. The first two types are the bucket tool which are great for filling in large areas quickly, while the enclose and fill tool is perfect for filling color in complex areas.
Refer Only to Editing Layer Fill Tool
Refer only to editing layer fill tool is a feature that allows you to fill color in areas only on the current layer you're working on. This tool won't detect objects, paint, lines, etc. on other layers.

When to use Refer Only to Editing Layer Fill Tool?
I use this tool only when I want to fill plain colors to the overall canvas. It's faster than using a brush.
Refer Other Layers Fill Tool

Refer Other Layers Fill Tool is a tool that lets you fill in the gaps between the lines or objects. This tool detects every object on the canvas. It's a simple tool which I always use to fill in the color.
When to Use Refer Other Layers Fill Tool?
This tools is super handy! I use it every time I do the base color. It works best when I fill the color in the large area!
 Enclose and Fill Tool
 Enclose and Fill Tool
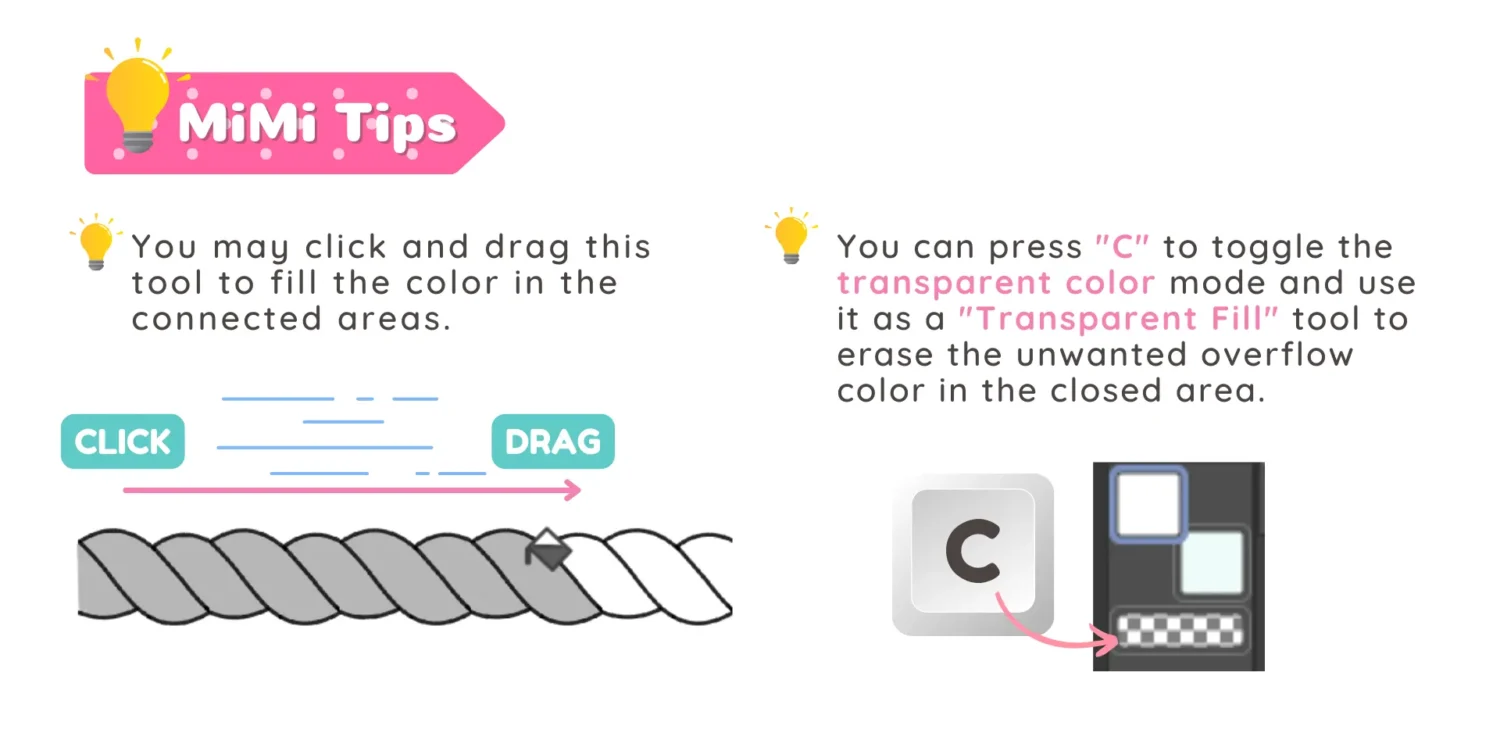
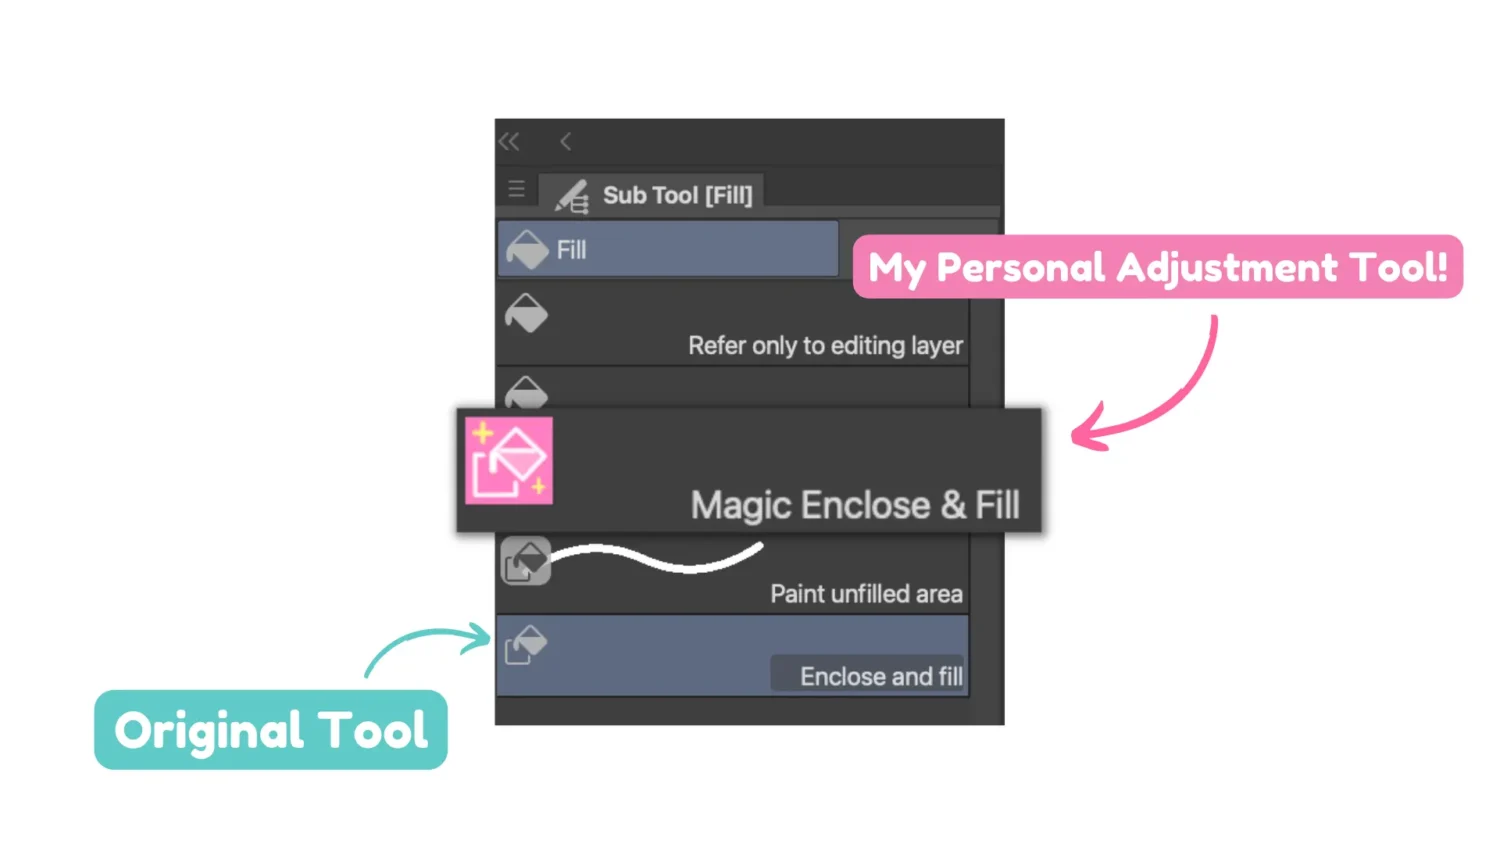
Enclose and fill is super useful when you want to fill the color in the complex parts of your illustration. Just select this tool and drag around your objects or parts to fill the color. I adjusted it to match my working style, and you can see its actual use in the animation above.
When to Use Enclose and Fill Tool?
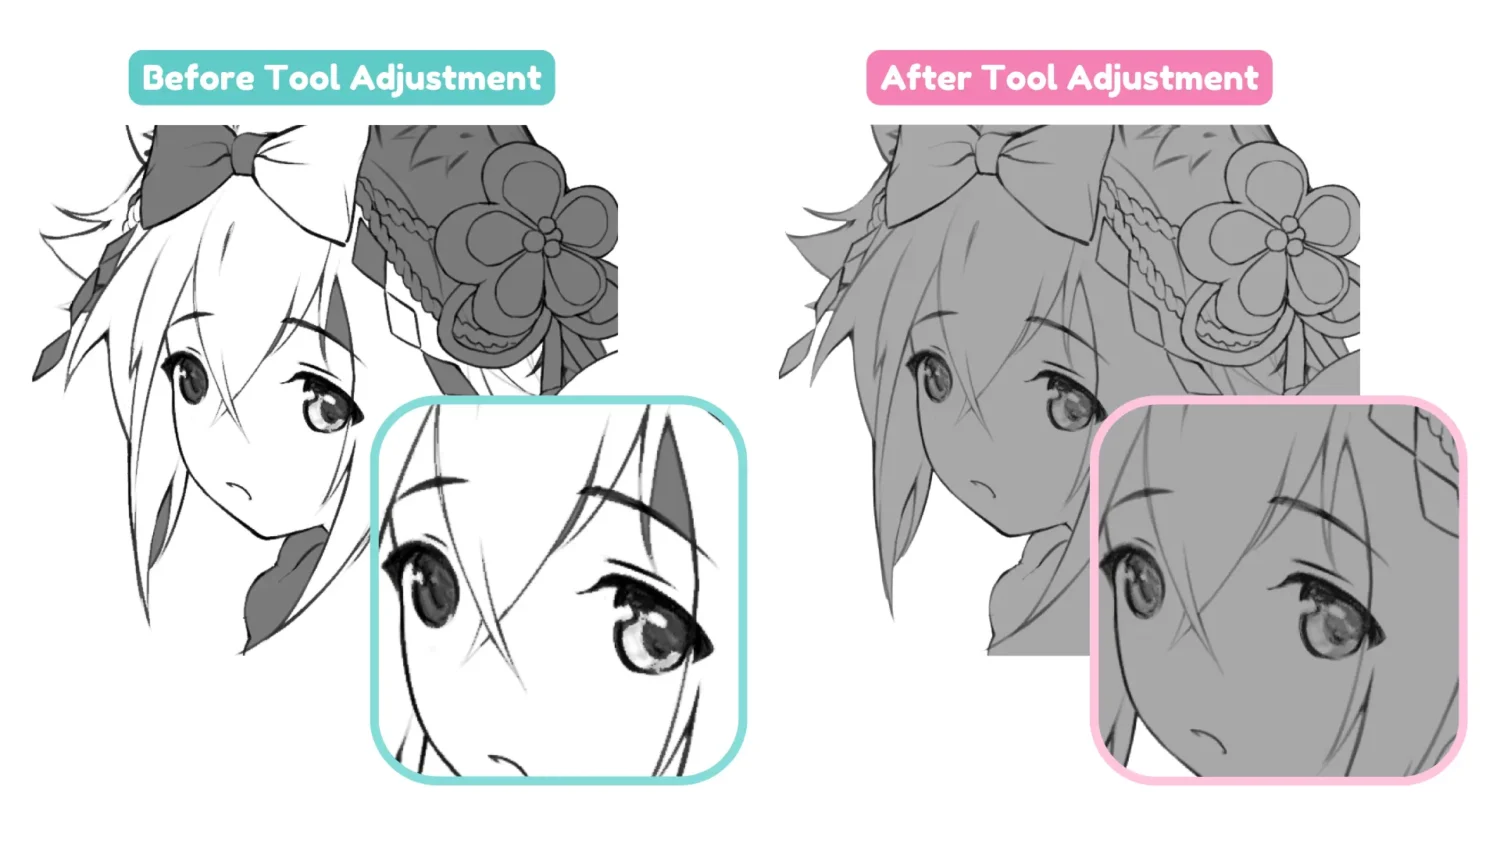
I love this tool! When I fill the color in the complex parts of my illustration, I always use this tool. The result is up to your tool settings. If you adjust it properly, it will work best even you have a bit sketchy line art!! I adjusted it to match my working style, experimenting this tool with my art, and I renamed it to “Magic Enclose and Fill” for my personal use. It's one of my frequently used fill tool so far! You can see the different before and after I adjusted the tool. Even it's the same tool but with better settings it'll give you a way better result!
Will the “close gap” helps when you have a line art with large gaps?
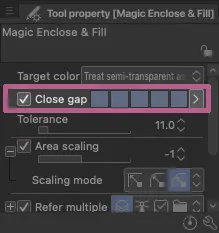
The close gap parameter in the CSP fill tool will let you fill the colors even when the line art has any small gaps. This is useful for filling color to cracks line art. So the answer is yes! You may increase the close gap parameter in the enclose and fill tool to work with the line art which has large gaps.
I also prefer picking a G-pen and directly paint on the gaps before using the fill tool as well. Moreover, keeping my line art neat and clean really helped me when I'm doing the base coloring process.
MiMi Tips for Base Coloring Process
Tips#1: Fill the Overall Base Layer First

Let's fill the overall character with base layer first. This process will help you see the silhouette of the character and objects clearly. It also helps you separate the character or objects from the background plus it'll let you see the depth in your illustration. I always use light grey color for the base layer.
Tips#2: Use Transparent Fill To Erase Unwanted Area
You can press “C” on your keyboard to change the “color” to “transparent”! Then you may use this function combine with the fill tool to easily erase the overflow color instead of using the normal eraser.
Tips#3: Organize Your Layer
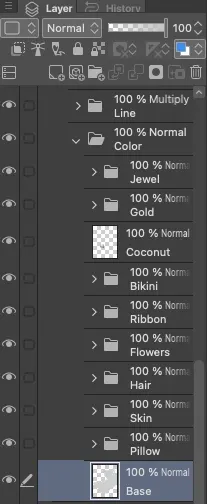
I always separate layers and make them into groups to keep my illustration well organized. The image below is my actual layer organization when I was working. You may group the layers by parts such as hair, skin, eyes, clothing, etc.
Tips#4: Memorize the Hotkey
The Hotkey is the heart of my working process. I'll recommend you my frequently used hotkey set for base coloring. Just memorize and practice using these hotkeys until your hands have muscle memory.
G : Swap between Gradient and Fill tool
C : Activate the transparent color mode (Don't forget to press “C” again to toggle it back to normal mode after using it)
P : Swap between Pen and Pencil tool
E : Eraser tool
Ctrl + D : Deselect the selection
Ctrl + Shift + I : Invert the selection
Tips#5: Duplicate and Adjust Your Tools
You may duplicate and adjust the tools to fit with your needs in any circumstance such as the tools to use with thin line art, tools for thick line art, and so on. This will come in handy when you have to switch your art style. Try experimenting with the tool settings will also helps you discover new things.
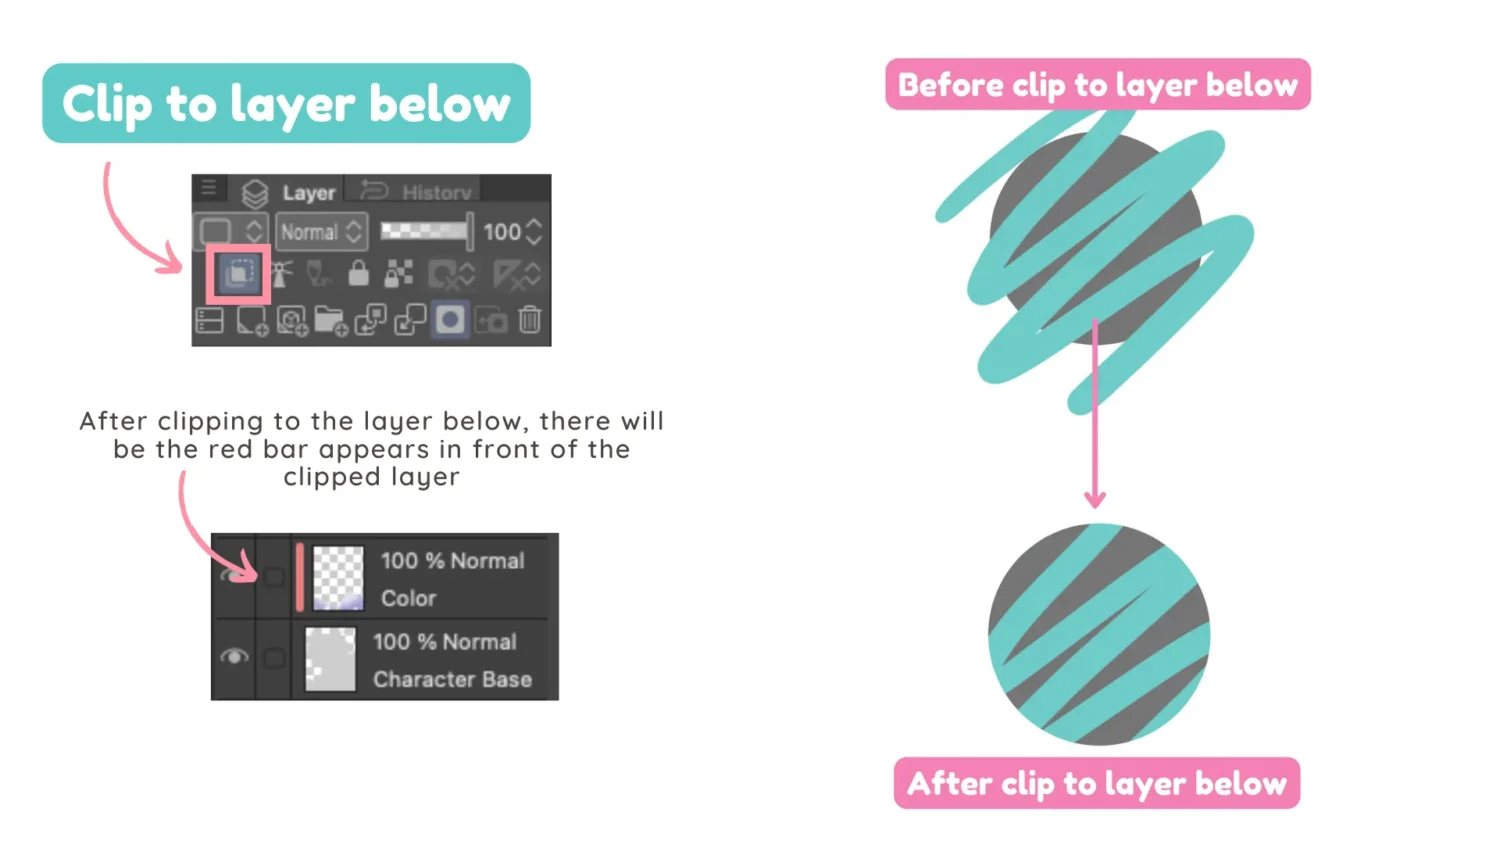
Tips#6: Use “Clip To Layer Below” to Prevent the Overflow Color in Your Upper Layer
When you add a new layer on top of your illustration and you want to paint only in the area of the layer below, just use the “Clip to layer below” function. It will lock the transparent based on the layer below!
That's all of my tips for you! In summary, the Clip Studio Paint fill tool is one of the most powerful and flexible tools and I hope this helps you get the most out of it! If you have any questions or comments, please let me know by tagging @lunarmimi in your Instagram stories! Happy drawing and see you in the next post.
Ah! Before you go, I have a special gift for you that can improve your art process!
Magic Assets Bundle
A collection of Magic Assets! The Magic Enclose and Fill Tool, Magic Line Art Brush Set, and Magic Paint Brush. They're the exact tool I use in Clip Studio Paint for creating my artwork. They'll help you with your line art, base coloring, and also painting process!
I also have a bonus tutorial for you! This set includes the Clip Studio Paint tutorial “Faster base coloring”! I'll walk you through my base coloring process that helps you x2 your base coloring speed!
It's originally $13 but now you can get it at $10 since we have a discount code for you. Just use the coupon code “MAGIC” and grab it before the sale ends!
These products helped me so much when I paint my art work so I hope they help you with your creation in Clip Studio Paint too!
Finally, if you like art tips and content like this, feel free to subscribe to my weekly newsletter
I share my anime art tips and experiences in my digital art career in a weekly email. You'll get the insight and behind the scene of the art career! Really recommend if you're a beginner anime style artist.
Thank you so much for reading this post! I really appreciate your visiting and using your valuable time reading my content!
Much Love 💖

Want to know how to start your anime art journey?
Download my ANIME ART STARTER GUIDE and start your artistic path right away for FREE!

